
Introduction
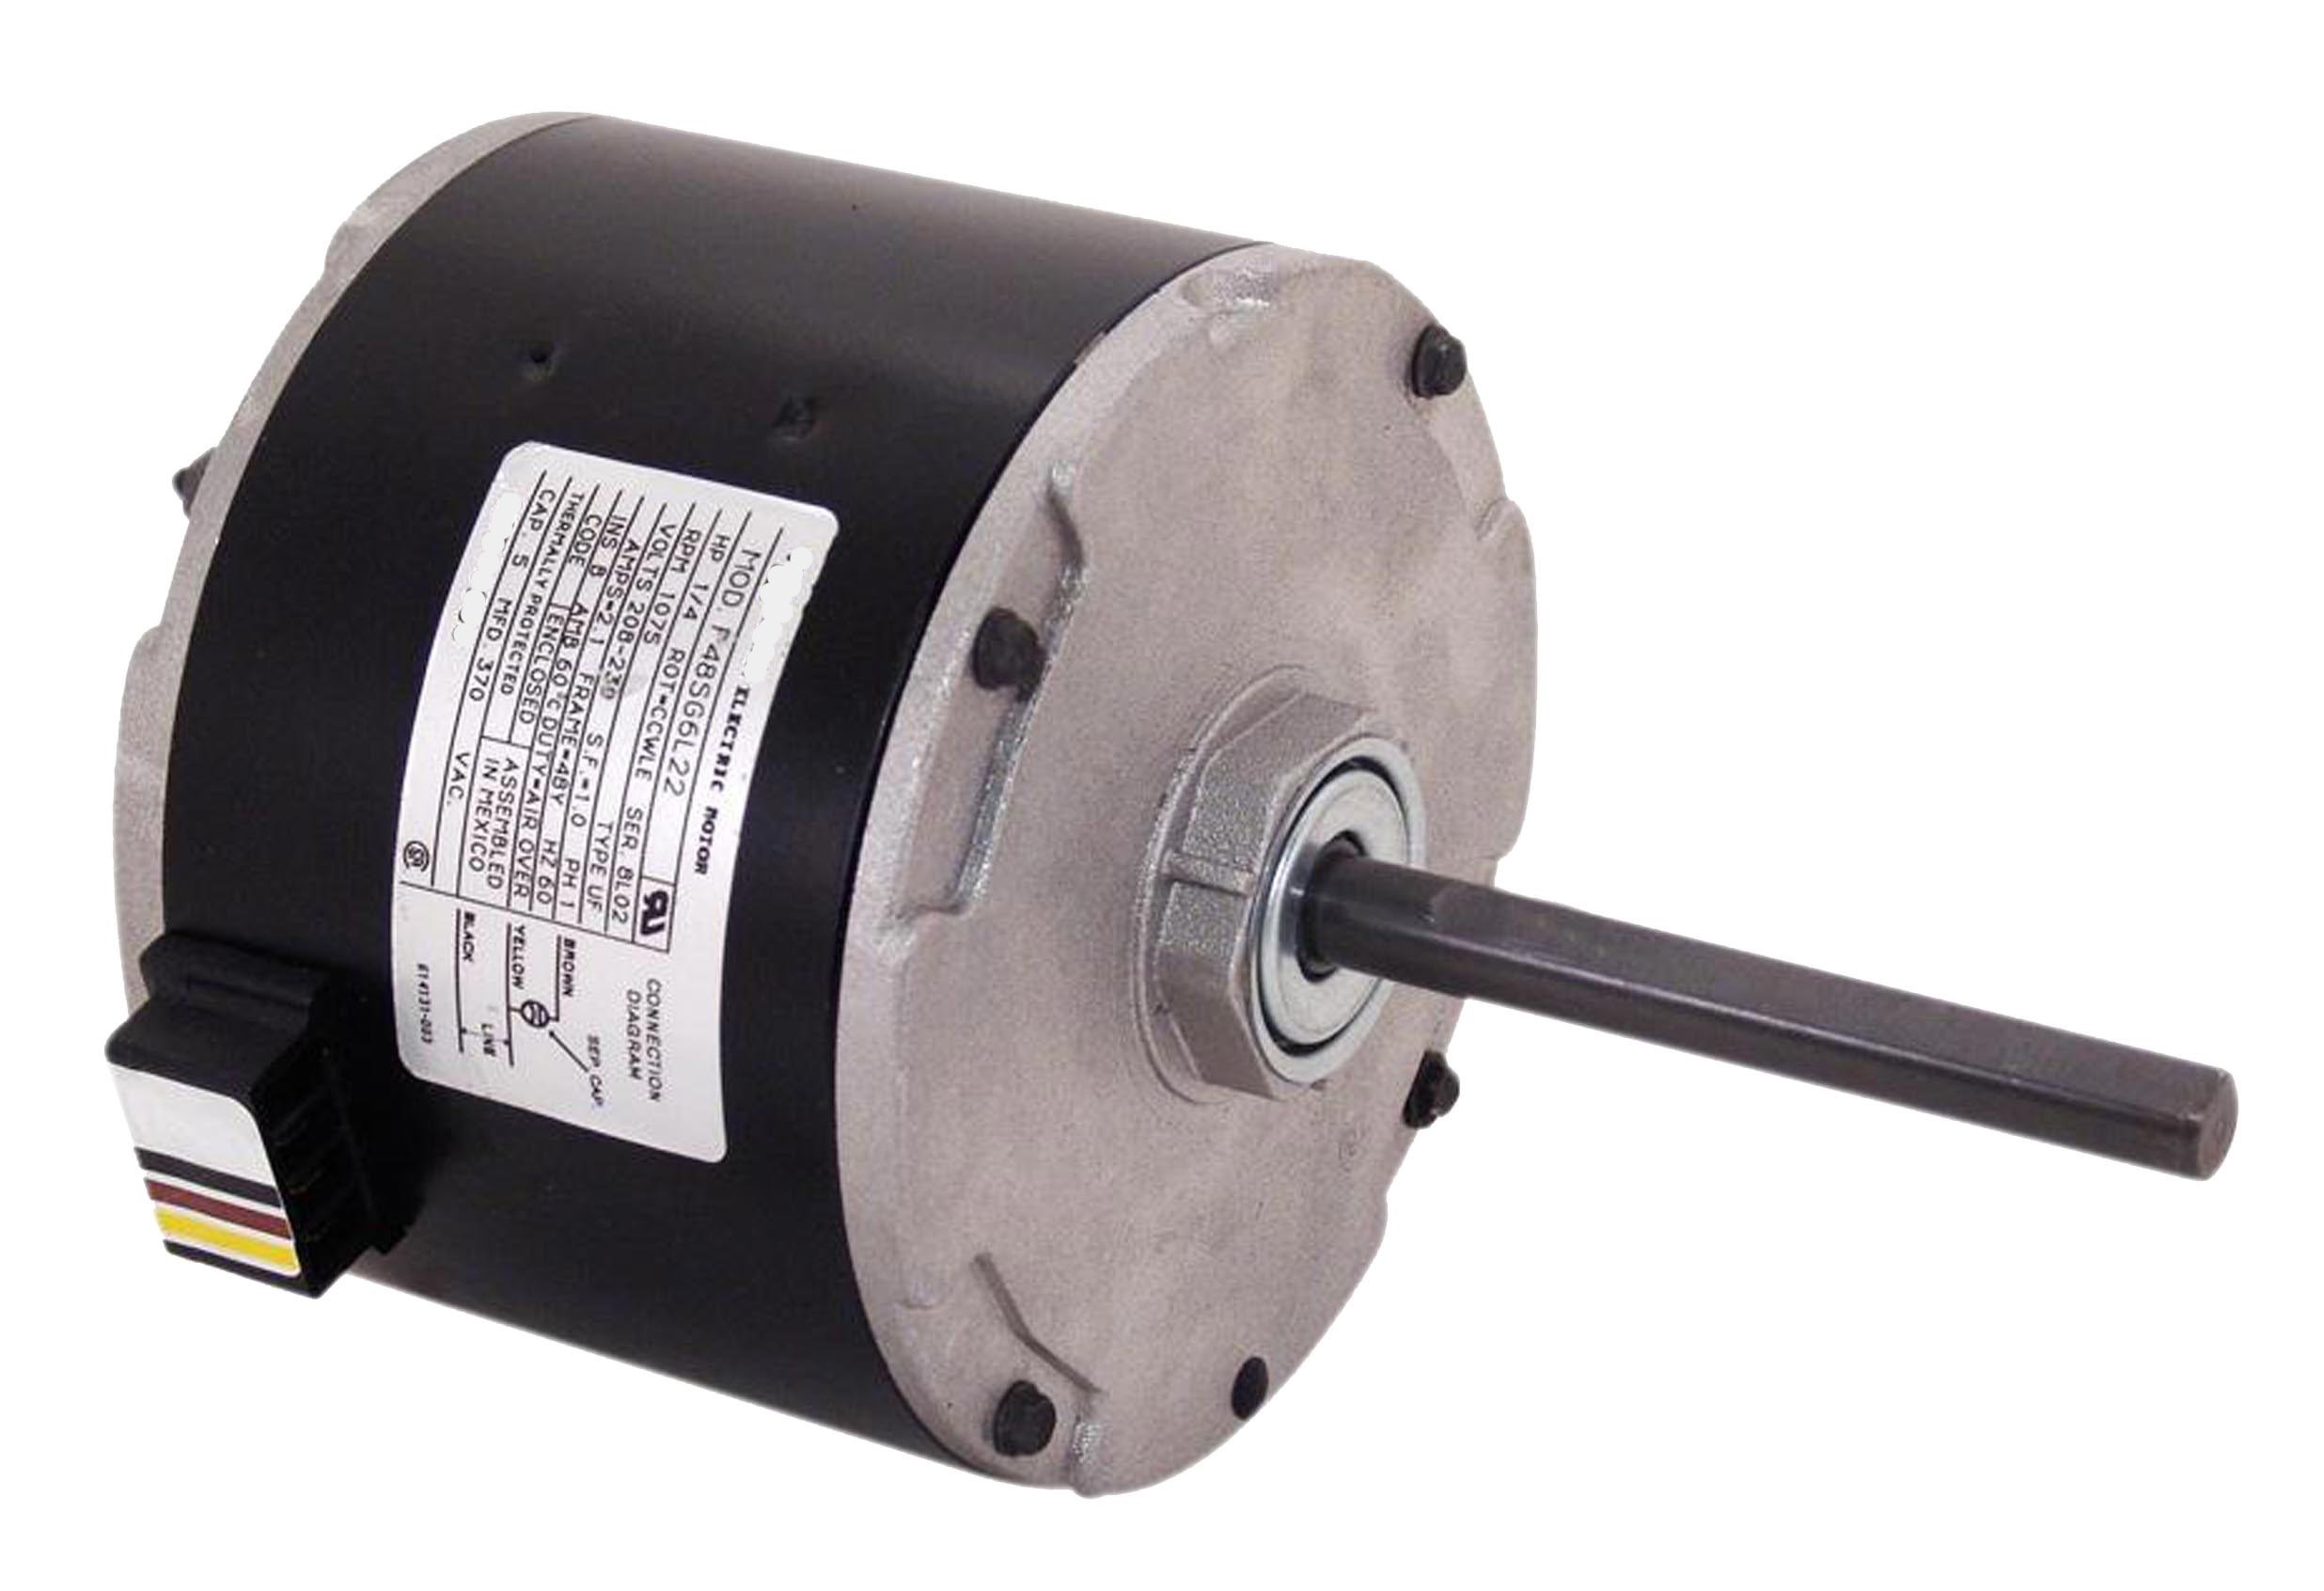
This manual provides essential information for the safe and effective installation, operation, and maintenance of the Century OYK1056V1 York OEM Direct Replacement Motor. The OYK1056V1 is a 1/2 horsepower, 1090 RPM, single-speed motor designed as a direct replacement for specific York OEM applications. It is engineered to meet the performance requirements of the original equipment.
Safety Information
Always observe the following safety precautions to prevent injury or damage to the equipment. Installation and servicing should only be performed by qualified personnel.
- Disconnect Power: Ensure all electrical power to the unit is disconnected at the main circuit breaker before attempting any installation, maintenance, or service. Failure to do so can result in severe electrical shock or death.
- Electrical Hazards: This motor operates on 208-230 volts. Improper wiring can cause electrical shock, fire, or damage to the motor and system. Follow all local and national electrical codes.
- Personal Protective Equipment (PPE): Wear appropriate safety gear, including safety glasses and gloves, during installation and servicing.
- Proper Grounding: Ensure the motor is properly grounded according to electrical codes to prevent electrical shock.
- Heavy Object: The motor weighs approximately 16 pounds. Use proper lifting techniques to avoid injury.
Setup and Installation
Careful installation is crucial for the proper function and longevity of the motor.
Pre-Installation Checks
- Verify that the new Century OYK1056V1 motor specifications (horsepower, RPM, voltage, rotation) match the requirements of the system and the motor being replaced.
- Inspect the motor for any shipping damage.
- Ensure you have all necessary tools and materials, including wiring connectors, mounting hardware, and a compatible 7.5 MFD/370V capacitor.
Installation Steps
- Disconnect Power: Turn off all electrical power to the HVAC unit at the main service panel. Confirm power is off using a voltage tester.
- Access Motor: Open the access panel to the blower compartment of the HVAC unit.
- Remove Old Motor: Disconnect all wiring from the old motor and capacitor. Carefully remove the mounting bolts or straps securing the old motor. Note the orientation and wiring connections for reference.
- Mount New Motor: Position the Century OYK1056V1 motor in the blower housing. Secure it using the appropriate mounting hardware. Ensure the motor is firmly seated and aligned.
- Connect Wiring: Refer to the wiring diagram provided with your HVAC unit or the motor for correct connections. Connect the motor's leads to the system's wiring. This motor features CWLE (Clockwise Lead End) rotation.
- Install Capacitor: Connect the new 7.5 MFD/370V capacitor to the motor wiring as per the wiring diagram. Ensure connections are secure and insulated.
- Secure Connections: Double-check all electrical connections for tightness and proper insulation. Ensure no wires are pinched or exposed.
- Restore Power and Test: Close the blower compartment access panel. Restore power to the HVAC unit. Initiate a test cycle to ensure the motor operates smoothly, quietly, and in the correct direction.
Operating Instructions
The Century OYK1056V1 motor is designed to integrate seamlessly into your existing HVAC system. Once correctly installed and integrated, the motor operates automatically as commanded by the system's thermostat or control unit. No direct user interaction with the motor itself is typically required for operation.
- Ensure the HVAC system's thermostat is set to the desired mode (e.g., Heat, Cool, Fan On).
- The motor will engage and disengage based on the system's demand for air circulation.
- Listen for unusual noises during operation, which may indicate an issue requiring attention.
Maintenance
Regular maintenance helps ensure the longevity and efficient operation of your Century OYK1056V1 motor.
- Annual Inspection: At least once a year, or more frequently in dusty environments, inspect the motor and blower assembly.
- Cleanliness: Keep the motor exterior free from dust, dirt, and debris. Accumulated grime can hinder heat dissipation and lead to overheating. Use a soft brush or vacuum cleaner for cleaning.
- Electrical Connections: Periodically check all electrical connections for tightness and signs of corrosion. Loose connections can cause intermittent operation or overheating.
- Airflow: Ensure that the air filters in your HVAC system are clean and that there are no obstructions to airflow around the motor. Restricted airflow can cause the motor to work harder and overheat.
- Lubrication: This motor is typically designed with sealed bearings that do not require user lubrication. Do not attempt to lubricate the motor unless specifically instructed by the manufacturer.
Troubleshooting
This section provides solutions to common issues you might encounter. For problems not listed here, or if solutions do not resolve the issue, contact a qualified HVAC technician.
| Problem | Possible Cause | Solution |
|---|---|---|
| Motor does not start | No power to the unit Faulty wiring connection Defective capacitor Motor overload protector tripped | Check circuit breaker and power supply. Verify all wiring connections are secure. Test or replace the capacitor. Allow motor to cool; check for obstructions or excessive load. |
| Motor runs, but no airflow | Blower wheel loose or damaged Motor shaft not connected to blower | Inspect blower wheel for damage and ensure it is securely fastened to the motor shaft. |
| Motor is noisy or vibrates excessively | Loose mounting bolts Unbalanced blower wheel Worn motor bearings | Tighten all motor mounting bolts. Inspect blower wheel for debris or damage; clean or replace if necessary. If bearings are worn, motor replacement may be required. |
| Motor overheats and shuts off | Restricted airflow Overload condition Incorrect voltage | Check and replace dirty air filters; ensure no obstructions in ductwork. Verify the motor is not undersized for the application. Confirm supply voltage is within the motor's specified range (208-230V). |
Specifications
Detailed technical specifications for the Century OYK1056V1 motor.
| Specification | Value |
|---|---|
| Model Name | OYK1056V1 |
| Horsepower (HP) | 1/2 HP (0.5 HP) |
| Revolutions Per Minute (RPM) | 1090 RPM |
| Speed | Single Speed |
| Voltage | 208-230 Volts |
| Amperage | 2.2-2.5 Amps |
| Rotation | CWLE (Clockwise Lead End) |
| Capacitor Requirement | 7.5 MFD / 370V (Leadless Design) |
| Shaft Diameter & Length | 1/2 inch x 4 inch |
| Motor Diameter | 5-5/8 inch |
| Item Weight | 16 Pounds |
| Cross Reference Models | 5kcp39lgn418s, 024-24110-001, w48a11t388 |
| UPC | 786674028747 |
Warranty and Support
The Century OYK1056V1 motor is backed by a manufacturer's warranty. For specific warranty terms, conditions, and duration, please refer to the documentation included with your purchase or contact Century customer support directly. Keep your proof of purchase for warranty claims.
For technical assistance, troubleshooting beyond this manual, or warranty service, please contact Century customer support through their official website or the contact information provided at the time of purchase.


