
1. Introduction
This manual provides essential information for setting up, operating, and maintaining your Vilros Arduino Uno Starter Kit. This kit is designed to introduce users to the fundamentals of electronics and Arduino programming through hands-on projects. Please read this manual thoroughly before beginning any projects.

Image: The cover of the Vilros Ultimate Starter Kit Guide, which is included in the kit.
2. Kit Contents
The Vilros Arduino Uno Starter Kit includes over 190 components to facilitate a wide range of electronic projects. Verify that all components listed below are present in your kit.
- 1 Arduino Uno R3 Board
- 1 Arduino & Breadboard Holder
- 1 Breadboard
- 1 Shift Register (74HC595N)
- 2 P2N2222A Transistors
- 2 1N4148 Diodes
- 1 DC Motor with wires
- 1 Small Servo (Tower Pro Micro Servo 9g)
- 1 5V Relay
- 1 TMP36 Temperature Sensor
- 1 6' USB Cable
- 65 Jumper Wires
- 1 Photocell (Light Dependent Resistor)
- 1 Tri-color LED
- 10 Red LEDs
- 10 Yellow LEDs
- 1 10K Trimpot (Potentiometer)
- 1 Piezo Buzzer
- 2 Big 12mm Buttons
- 45 330 Ohm Resistors
- 45 10K Ohm Resistors

Image: An overview of the Vilros Arduino Uno Starter Kit components.
3. Setup Guide
3.1. Arduino Uno R3 Board Overview
The Arduino Uno R3 is the microcontroller board at the heart of your kit. It features a USB connection for power and programming, digital and analog input/output pins, and a power jack.

Image: The Arduino Uno R3 board.
3.2. Software Installation
- Download Arduino IDE: Visit the official Arduino website (www.arduino.cc/en/software) and download the latest version of the Arduino IDE (Integrated Development Environment) for your operating system.
- Install Drivers: Follow the installation instructions provided by Arduino. On Windows, drivers for the Uno board are typically installed automatically. For other operating systems, specific driver installation steps may be required.
- Connect Arduino: Connect your Arduino Uno R3 board to your computer using the provided USB cable. The 'ON' LED on the board should illuminate.
3.3. First Program (Blink)
- Open Arduino IDE: Launch the Arduino IDE application.
- Select Board: Go to Tools > Board and select "Arduino Uno".
- Select Port: Go to Tools > Port and select the serial port corresponding to your Arduino Uno. This is usually labeled with "(Arduino Uno)" or similar.
- Load Example: Go to File > Examples > 01.Basics > Blink. This will open the classic LED blink sketch.
- Upload Sketch: Click the "Upload" button (right arrow icon) in the IDE. The TX/RX LEDs on the Arduino board will flash during upload. Once complete, the onboard LED (pin 13) should begin to blink.
4. Operating Your Kit
This section covers basic operation principles and introduces some key components.
4.1. Breadboard Usage
The breadboard allows you to build circuits without soldering. Rows of holes are connected internally, typically in columns for power rails and rows for component connections. Refer to the included manual for detailed breadboard diagrams for each project.

Image: A circuit diagram from the manual demonstrating breadboard connections.
4.2. Key Components
- DC Motor: A small electric motor that converts electrical energy into mechanical energy. It typically requires a transistor or motor driver to be controlled by Arduino.
- Servo Motor: A type of motor that allows for precise control of angular position. Useful for robotics and automated movements.
- Photocell (LDR): A light-dependent resistor whose resistance decreases with increasing light intensity. Used to detect light levels.
- Shift Register (74HC595N): An integrated circuit used to expand the number of output pins from your Arduino, often used for controlling multiple LEDs with fewer Arduino pins.
- Piezo Buzzer: An electronic component that produces sound when an electrical voltage is applied. Can be used for simple tones and alerts.

Image: DC Motor.
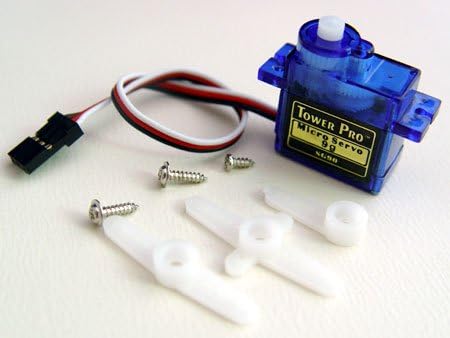
Image: Small Servo Motor.

Image: Photocell (LDR).
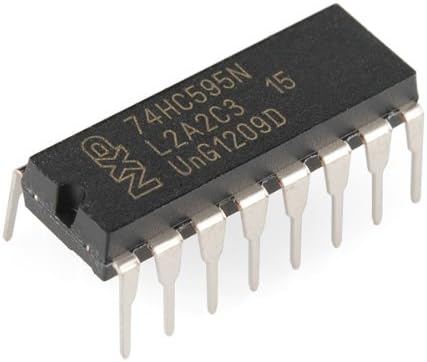
Image: Shift Register (74HC595N).

Image: Piezo Buzzer.
5. Maintenance
Proper care of your kit components will ensure longevity and reliable performance.
- Storage: Store all components in a dry, cool environment, away from direct sunlight and extreme temperatures. Use the original packaging or a dedicated storage box to prevent loss or damage to small parts.
- Handling: Handle electronic components, especially integrated circuits (ICs) and the Arduino board, by their edges to avoid static discharge. Avoid bending pins.
- Cleaning: If necessary, gently clean components with a soft, dry cloth. Avoid using liquids or abrasive cleaners.
- Power: Always disconnect power from the Arduino board before making changes to your circuit.
6. Troubleshooting
If you encounter issues, refer to the following common troubleshooting steps:
- Arduino Not Detected: Ensure the USB cable is securely connected to both the Arduino and your computer. Check that the correct port is selected in the Arduino IDE (Tools > Port). Reinstall Arduino IDE drivers if necessary.
- Sketch Upload Failed: Verify that the correct board (Tools > Board > Arduino Uno) and port are selected. Ensure no other programs are using the serial port. Disconnect and reconnect the USB cable.
- Component Not Working: Double-check all wiring connections on the breadboard and to the Arduino. Ensure components are inserted correctly (e.g., LEDs have correct polarity). Verify the code logic for controlling the component. Test with a simple example sketch if available.
- Power Issues: If the Arduino board does not power on, try a different USB port or cable. If using an external power supply, ensure it meets the Arduino's voltage requirements (7-12V DC).
- Code Errors: The Arduino IDE provides error messages in the console. Read these messages carefully as they often indicate the line number and type of error (e.g., missing semicolon, undeclared variable).
7. Specifications
| Brand | Vilros |
| Model Number | FBA_ARDUOR3_KIT_22 |
| Item Weight | 1.19 pounds |
| Product Dimensions | 9.84 x 6.61 x 2.36 inches |
| Processor Brand | Arduino |
| Memory Storage Capacity | 32 KB |
| Connectivity Technology | USB |
8. Warranty and Support
For any questions, technical assistance, or support regarding your Vilros Arduino Uno Starter Kit, please refer to the contact information provided with your purchase or visit the official Vilros website. While specific warranty details are not provided in this manual, general product support is available from the manufacturer.
Optional protection plans may be available for purchase separately to extend coverage beyond the standard manufacturer's terms. Please check with your retailer for details on available protection plans.