1. Introduction
Thank you for choosing the MTN Gearsmith Commercial Ozone Generator Air Purifier. This device is designed to effectively remove odors and refresh air in various environments. Please read this manual thoroughly before operation to ensure safe and efficient use of the product.

Image 1.1: Front view of the MTN Gearsmith Commercial Ozone Generator, showing the control dial and air intake.
2. Safety Information
WARNING: OZONE IS A POWERFUL OXIDIZER. THIS DEVICE IS INTENDED FOR USE IN UNOCCUPIED SPACES ONLY. EXPOSURE TO HIGH LEVELS OF OZONE CAN BE HARMFUL TO HUMANS AND ANIMALS.
- Always ensure the area is completely vacant of people, pets, and plants before operating the ozone generator.
- Allow sufficient time for ozone to dissipate before re-entering the treated area. Ventilation of the area after treatment is recommended.
- Do not operate the unit in wet or damp conditions.
- Keep out of reach of children.
- Do not block the air intake or exhaust vents during operation.
- Always unplug the unit before cleaning or performing maintenance.
3. Product Features
The MTN Gearsmith Commercial Ozone Generator is designed for robust performance and ease of use. Key features include:
- Heavy-Duty Construction: Durable design for commercial applications.
- Efficient Odor Removal: Utilizes ozone generation to neutralize strong odors.
- Integrated Timer: Allows for timed operation up to 60 minutes or continuous "HOLD" mode.
- Portable Design: Equipped with a handle for easy transport.
4. Setup
- Unpack the Unit: Carefully remove the ozone generator from its packaging. Inspect for any shipping damage.
- Placement: Place the unit in the center of the unoccupied area to be treated. Ensure it is on a stable, level surface. Do not place it directly against walls or furniture to allow for proper airflow.
- Verify Ozone Plates: Ensure the ozone plates are securely inserted into their slots at the rear of the unit. Refer to the maintenance section for details on plate insertion.
- Power Connection: Connect the power cord to the unit's power inlet at the rear, then plug it into a standard electrical outlet.
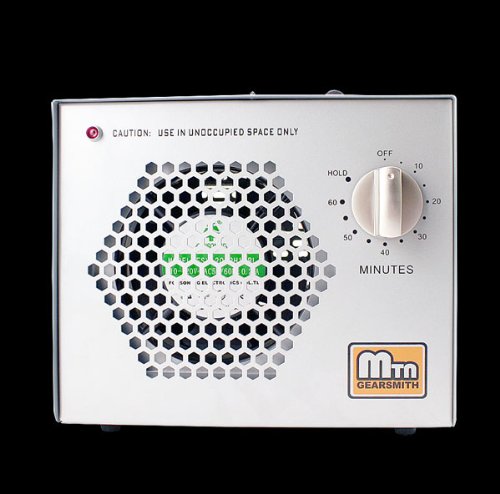
Image 4.1: Rear view of the ozone generator, highlighting the power connection and plate access.
5. Operating Instructions
Before operating, ensure the area is completely clear of people, pets, and plants.
- Set the Timer: Turn the control dial on the front of the unit to the desired treatment time (from 10 to 60 minutes). For continuous operation, turn the dial to "HOLD".
- Initiate Operation: The unit will begin generating ozone immediately after the timer is set. A red indicator light will illuminate.
- Vacate the Area: Immediately leave the treated area once the unit begins operation.
- Completion: The unit will automatically shut off when the timer reaches zero. If set to "HOLD", manually turn the dial to "OFF" to stop operation.
- Ventilation: After treatment, allow at least 30-60 minutes for the ozone to dissipate naturally. For best results, open windows and doors to ventilate the area before re-entry.

Image 5.1: Close-up of the control panel, illustrating the timer dial for setting operation duration.
6. Maintenance
Regular maintenance ensures optimal performance and longevity of your ozone generator. Always unplug the unit before performing any maintenance.
6.1. Cleaning Ozone Plates
The ozone plates should be cleaned periodically, depending on usage and environmental conditions. A visible residue on the plates indicates they need cleaning.
- Power Off and Unplug: Ensure the unit is turned off and unplugged from the power source.
- Remove Plates: Gently slide out the ozone plates from the slots at the rear of the unit.
- Clean Plates: Use a soft brush or a damp cloth with mild soap and water to clean any dust or residue from the ceramic plates. Ensure they are completely dry before re-inserting.
- Re-insert Plates: Carefully slide the clean, dry plates back into their respective slots. Ensure they are fully seated.

Image 6.1: Rear view showing ozone plates being removed for cleaning.
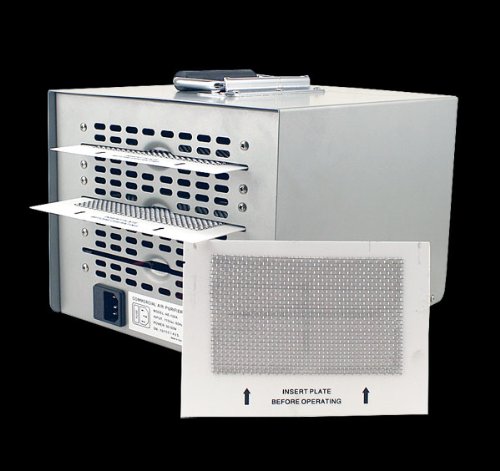
Image 6.2: A single ozone plate, illustrating its design for cleaning.
7. Troubleshooting
| Problem | Possible Cause | Solution |
|---|---|---|
| Unit does not turn on. | No power, loose connection, timer set to OFF. | Check power cord connection. Ensure outlet is functional. Turn timer dial to a time setting or "HOLD". |
| No ozone smell or weak output. | Dirty ozone plates, plates not fully inserted, unit malfunction. | Clean ozone plates as per Section 6.1. Ensure plates are fully inserted. If problem persists, contact customer support. |
| Unusual noise during operation. | Obstruction in fan, loose component. | Unplug the unit and inspect for any visible obstructions. Do not attempt to disassemble. Contact customer support. |
8. Specifications
- Model: PURIFIERHE110
- Brand: MTN Gearsmith
- Controller Type: Button Control (Dial)
- UPC: 670541399842
- Manufacturer: MTN Gearsmith
- Function: Commercial Ozone Generator / Air Purifier
- Timer: Up to 60 minutes or "HOLD" (continuous)
- (Additional specifications such as power consumption, ozone output, and dimensions are typically found on the product packaging or manufacturer's website.)
9. Warranty and Support
MTN Gearsmith products are manufactured to high-quality standards. For specific warranty information, please refer to the documentation included with your purchase or visit the official MTN Gearsmith website. For technical support or service inquiries, please contact MTN Gearsmith customer service through their official channels.
For more information, visit: MTN Gearsmith on Amazon