
Introduction
Thank you for purchasing the MTX THUNDER1000.1 Class D Mono Block Amplifier. This amplifier is designed to deliver powerful and clear audio performance for your vehicle's sound system. This manual provides essential information for proper installation, operation, and maintenance to ensure optimal performance and longevity of your amplifier.

Figure 1: Top view of the MTX THUNDER1000.1 Amplifier.
Safety Information
- Always disconnect the vehicle's battery negative terminal before beginning any installation.
- Ensure all wiring is properly routed and secured to prevent damage or short circuits.
- Use appropriate gauge wiring for power, ground, and speaker connections as specified in the installation section.
- Mount the amplifier securely in a location that allows for adequate ventilation and is protected from moisture and excessive heat.
- Do not operate the amplifier if it is damaged or malfunctioning. Refer to the troubleshooting section or contact support.
- This product contains chemicals known to the State of California to cause cancer and birth defects or other reproductive harm.
Product Features
- Compact Design: Small footprint chassis for installation in space-challenged vehicles.
- Heat Sink Protection: Extruded aluminum heat sink maximizes heat transfer away from the circuitry, protecting the amplifier from overheating.
- Selectable Bass Boost: Offers 0, 6, or 12dB bass boost centered at 50Hz for enhanced low-frequency output.
- Variable Butterworth Crossover: 12dB/Oct crossover allows precise frequency setting for speakers.
- Variable Subsonic Filter: Designed to block potentially damaging bass frequencies below the audible range.
Package Contents
The MTX THUNDER1000.1 amplifier package includes:
- THUNDER1000.1 Mono Block Amplifier
Note: Additional installation accessories such as wiring, fuses, and mounting hardware are typically sold separately.
Setup and Installation
Proper installation is crucial for the performance and safety of your amplifier. It is recommended that installation be performed by a qualified professional.
Mounting the Amplifier
- Choose a mounting location that is dry, well-ventilated, and secure. Avoid mounting in direct sunlight or areas prone to excessive vibration.
- Ensure there is sufficient space around the amplifier for air circulation, especially around the heat sink.
- Use appropriate screws to securely fasten the amplifier to a solid surface.
Wiring Connections
Refer to Figure 2 for the power, ground, remote, and speaker connections.
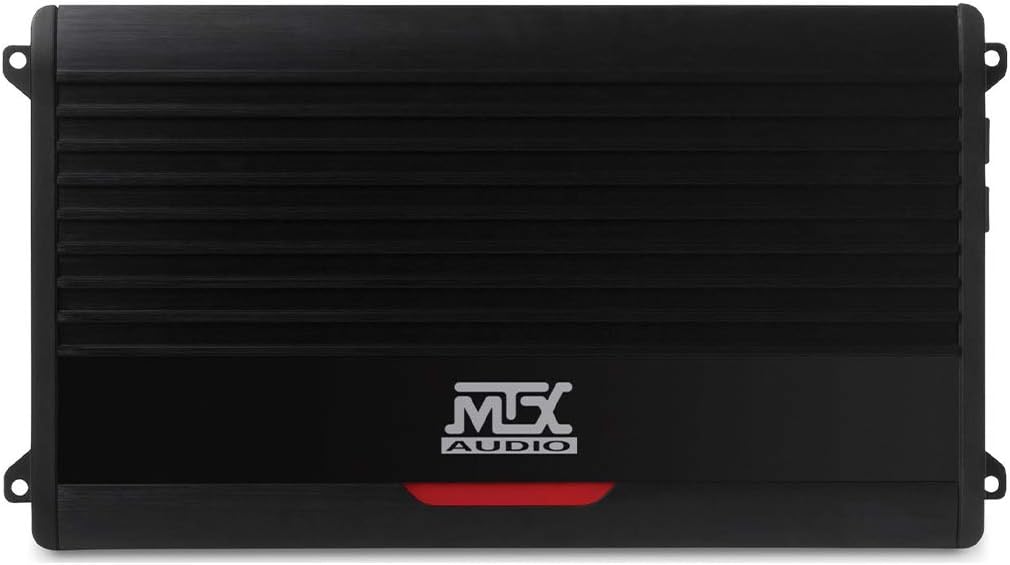
Figure 2: Power, Ground, Remote, and Speaker Output Terminals.
- Power Connection (+BATT): Connect a heavy-gauge power cable (e.g., 0/1 AWG) directly from the positive terminal of the vehicle's battery to the +BATT terminal on the amplifier. Install an appropriate fuse (not included) within 18 inches of the battery.
- Ground Connection (GND): Connect a heavy-gauge ground cable (e.g., 0/1 AWG) from the GND terminal on the amplifier to a clean, unpainted metal surface of the vehicle's chassis. Ensure a solid, low-resistance connection.
- Remote Turn-On (REM): Connect a remote turn-on wire from your head unit's remote output to the REM terminal on the amplifier. This wire signals the amplifier to turn on and off with your head unit.
- Speaker Output (SPEAKER): Connect your subwoofer(s) to the SPEAKER terminals. This amplifier is a mono-block design, meaning it has a single channel output. Ensure the total impedance of your connected subwoofers meets the amplifier's specifications (1 Ohm minimum). Observe correct polarity (+ to + and - to -).
Refer to Figure 3 for the input and control connections.

Figure 3: Input and Control Panel.
- RCA Input (INPUT R/L): Connect RCA cables from your head unit's subwoofer output to the INPUT R and L terminals on the amplifier.
Operating Instructions
Initial Power-Up
- After all connections are made and verified, reconnect the vehicle's battery negative terminal.
- Turn on your vehicle's ignition and head unit. The PWR indicator on the amplifier (see Figure 3) should illuminate, indicating the amplifier is receiving power and is operational. If the PROTECT indicator illuminates, refer to the troubleshooting section.
- Start with the amplifier's GAIN control set to minimum (fully counter-clockwise).
- Play a familiar audio track with a good bass response.
- Slowly increase the GAIN control until the desired volume and bass level are achieved without distortion. Avoid setting the gain too high, as this can lead to clipping and damage to your speakers or amplifier.
Controls and Adjustments
The MTX THUNDER1000.1 amplifier features several controls to fine-tune your audio output. Refer to Figure 3 for the location of these controls.
- BASS BOOST: This switch allows you to select a bass boost level of 0dB, 6dB, or 12dB, centered at 50Hz. Use this to enhance the low-frequency impact of your subwoofers. Start with 0dB and increase gradually if more bass is desired.
- GAIN: This control matches the input sensitivity of the amplifier to the output level of your head unit. Adjust this carefully to prevent distortion. It is not a volume control.
- LPF (Low Pass Filter): This variable control sets the upper frequency limit for the amplifier's output. For subwoofers, set the LPF to allow only low frequencies to pass through, typically between 40Hz and 220Hz. This prevents higher frequencies from reaching the subwoofer, improving sound quality and efficiency.
- SUBSONIC: This variable filter blocks extremely low, inaudible frequencies that can waste amplifier power and potentially damage subwoofers. Set this control to filter out frequencies below the subwoofer's resonant frequency or the port tuning frequency of your enclosure, typically between OFF and 50Hz.
- EBC (External Bass Control): This port is for connecting an optional external bass control knob (not included) for convenient adjustment of bass levels from the driver's seat.
Maintenance
- Cleaning: Periodically clean the amplifier's exterior with a soft, dry cloth. Do not use harsh chemicals or abrasive cleaners.
- Ventilation: Ensure that the amplifier's heat sink fins are free from dust and debris to maintain proper cooling.
- Connections: Occasionally check all power, ground, remote, and speaker connections to ensure they are secure and free from corrosion.
Troubleshooting
| Problem | Possible Cause | Solution |
|---|---|---|
| No Power (PWR LED Off) | Blown fuse, poor power/ground connection, no remote signal. | Check inline fuse near battery. Verify power, ground, and remote wire connections. Ensure head unit is on. |
| Protect LED On | Overheating, speaker short circuit, low impedance load, DC offset. | Allow amplifier to cool. Check speaker wiring for shorts. Verify speaker impedance is 1 Ohm or higher. Disconnect speakers and check if Protect LED turns off. |
| No Sound | RCA input not connected, gain too low, speaker wires disconnected. | Check RCA cable connections. Increase GAIN control. Verify speaker wire connections. |
| Distorted Sound | Gain set too high, poor ground connection, damaged speakers. | Reduce GAIN control. Ensure ground connection is solid. Inspect speakers for damage. |
Specifications
| Feature | Specification |
|---|---|
| Model Number | THUNDER1000.1 |
| Output Power | 1000 Watts RMS |
| Number of Channels | 1 (Mono) |
| Maximum Supply Voltage | 14.5 Volts (DC) |
| Mounting Type | Boat Mount (Versatile for vehicle applications) |
| Item Weight | 5.15 pounds |
| Wireless Remote | No (EBC port for optional wired remote) |
Warranty and Support
The MTX THUNDER1000.1 amplifier comes with a 2-year limited warranty. For warranty claims, technical support, or additional product information, please visit the official MTX store or contact their customer service.
MTX Store: Visit the MTX Store on Amazon


