
Introduction
This manual provides essential instructions for the safe and effective operation and maintenance of your AIRMAN ResQ Pro+ Tire Repair Kit. This kit is designed for emergency flat tire inflation and repair in various vehicles, including cars, SUVs, and minivans. Please read this manual thoroughly before first use and keep it for future reference.
Safety Information
- Always operate the device in a safe location, away from traffic and on a level surface.
- Ensure the vehicle engine is running when operating the compressor to prevent draining the vehicle's battery.
- Do not exceed the maximum recommended tire pressure for your vehicle. Refer to your vehicle's owner's manual or the tire placard.
- Avoid direct contact with the sealant. In case of contact, wash thoroughly with soap and water.
- Keep out of reach of children.
- The sealant is designed for temporary repair. Seek professional tire repair or replacement as soon as possible after use.
- Do not use the sealant if the tire has sidewall damage or a puncture larger than 6mm.
What's in the Box
Your AIRMAN ResQ Pro+ Tire Repair Kit includes the following components:
- ResQ Pro+ Compressor with integrated pressure gauge and LED light
- 450ml Active Sealant bottle
- Convenient carrying case
- Bonus adapters for inflating balls and other inflatables

Image: Contents of the Airman ResQ Pro+ Tire Repair Kit, showing the compressor, sealant bottle, and carrying case.
Setup
Before operating the ResQ Pro+ kit, ensure your vehicle is safely parked and the engine is running.
- Pull Over & Plug In: Stop in a safe location. With the vehicle engine running, plug the unit's 12V power cable into your vehicle's 12V outlet.
- Choose Your Function: Turn the knob on the unit to select your desired function.
- Orange setting: For tire repair (air and sealant).
- White setting: For air only inflation.
- Connect Hose to Tire Valve: Connect the labeled hose to the tire valve. The red hose is for repair, and the black hose is for air only. Ensure a secure connection.
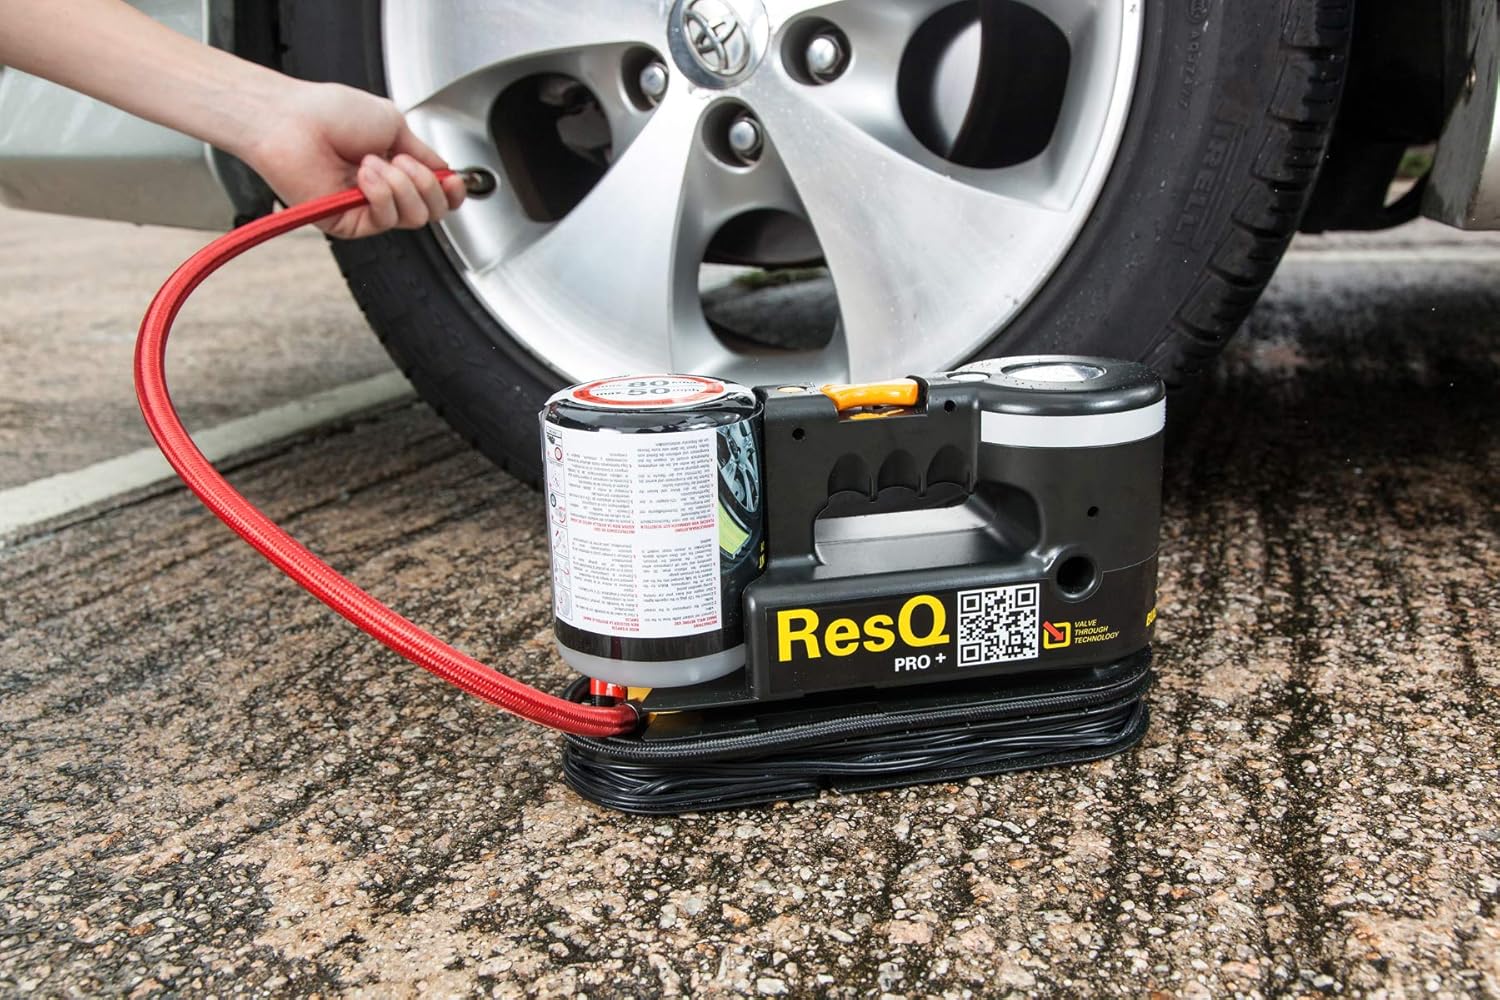
Image: A user connecting the red hose of the Airman ResQ Pro+ kit to a car tire valve for inflation or repair.
Operating Instructions
Tire Inflation (Air Only)
- Ensure the function knob is set to the White (Air Only) position.
- Connect the black air hose to the tire valve.
- Press the orange power button to start the compressor.
- Monitor the integrated pressure gauge. Inflate the tire to the recommended PSI as specified by your vehicle manufacturer.
- Once the desired pressure is reached, press the orange power button again to turn off the compressor.
- Disconnect the hose from the tire valve.
Tire Repair (Air and Sealant)
For optimal repair, it is recommended to completely deflate the tire using the deflate (-) button on your compressor before injecting sealant, if the tire is not already flat.
- Ensure the function knob is set to the Orange (Repair) position.
- Connect the red repair hose to the tire valve.
- Press the orange power button to start the compressor. The sealant will be pumped into the tire along with air.
- Inflate the tire to 36 PSI. Inflation typically takes 2 to 8 minutes, depending on tire size.
- Once 36 PSI is reached, press the orange power button to turn off the compressor.
- Disconnect the hose from the tire valve.
- Immediately drive the vehicle for approximately 5-10 minutes at a moderate speed (not exceeding 50 mph) to allow the sealant to distribute and seal the puncture effectively.
- After driving, recheck the tire pressure. If it has dropped, reinflate to the recommended pressure. If the tire continues to lose air, the damage may be too severe for this kit.

Image: A visual guide demonstrating the four steps for using the ResQ Pro+ kit: plug in, choose function, connect hose, and inflate.
Using the LED Light
The unit features a built-in LED light for use in dark environments. Locate the light switch on the unit to activate it when needed.

Image: Close-up view of the integrated LED light on the Airman ResQ Pro+ compressor, useful for nighttime operation.
Maintenance
- Sealant Shelf Life: The Active Sealant has a 6-year shelf life from its production date. To find the production date, locate the lot number on the sealant bottle. The first two numbers after "T" indicate the year of production, and the next two numbers indicate the week of production.
- Sealant Replacement: It is recommended to replace the sealant bottle after its expiration date or after each use for tire repair. Replacement sealant bottles are available from AIRMAN.
- Cleaning: After use, wipe down the unit with a damp cloth to remove any sealant residue. Ensure the unit is dry before storing.
- Storage: Store the kit in its carrying case in a cool, dry place, away from direct sunlight and extreme temperatures. The sealant can be used between -4°F and 140°F (-20°C and 60°C).

Image: A bottle of Airman 450ml Active Sealant, highlighting its water-based, TPMS-safe, and wide temperature range properties.
Troubleshooting
- Tire Not Completely Flat: If your tire is not completely flat, it is recommended to completely deflate it using the deflate (-) button on your compressor before initiating the repair process with sealant. This ensures proper sealant distribution.
- Sidewall Damage: Active Sealant is designed to work on tread and shoulder punctures only. It will not effectively repair sidewall damage. For sidewall damage, professional tire service is required.
- Compressor Not Turning On:
- Ensure the 12V power plug is securely inserted into the vehicle's outlet.
- Verify the vehicle engine is running.
- Check the vehicle's fuse for the 12V outlet.
- Tire Still Losing Air After Repair: If the tire continues to lose air after following the repair instructions, the puncture may be too large or located in an area not suitable for sealant repair. Seek immediate professional tire service.

Image: Frequently Asked Questions regarding the Airman ResQ Pro+ kit, covering topics like tire deflation, sidewall damage, and sealant shelf life.
Specifications
| Feature | Detail |
|---|---|
| Brand | AIRMAN |
| Manufacturer | Air Man |
| Model Number | 71-063-21 |
| Item Weight | 3.5 pounds |
| Product Dimensions | 11.25 x 7.1 x 4.25 inches |
| Voltage | 12 Volts |
| Sealant Volume | 450ml |
| Max Puncture Size | Up to 6mm (tread/shoulder only) |
| Sealant Temperature Range | -4°F to 140°F (-20°C to 60°C) |
Warranty
Warranty information for the AIRMAN ResQ Pro+ Tire Repair Kit is typically provided with the product packaging or can be found on the official AIRMAN website. Please refer to these resources for details regarding warranty coverage and terms.
Support
For further assistance, technical support, or to purchase replacement parts and sealant, please visit the official AIRMAN website: