Introduction
This manual provides essential information for the proper installation and maintenance of your MTC VM219 / 1247171 Battery Hold Down Screw Rod. This product is an OEM replacement part, specifically designed for various Volvo models, ensuring a secure fit and reliable performance. It is engineered from high-quality materials to provide longevity and secure retention of your vehicle's battery.
What's in the Box
- 1 x MTC VM219 / 1247171 Battery Hold Down Screw Rod
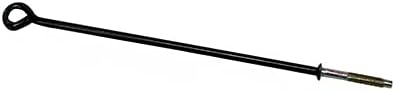
Image: The MTC VM219 / 1247171 Battery Hold Down Screw Rod, featuring a black coated rod with a looped end and a threaded, metallic lower section.
Setup and Installation
Proper installation of the battery hold down rod is crucial for vehicle safety and battery longevity. Ensure your vehicle is parked on a level surface and the engine is off before beginning installation.
- Safety First: Disconnect the negative (-) battery terminal first, then the positive (+) terminal. Remove the old battery if necessary.
- Position Battery: Place the new or existing battery securely in its designated tray within the engine bay. Ensure it is seated correctly and does not shift.
- Insert Hold Down Rod: Locate the battery tray's mounting points for the hold down rod. Insert the threaded end of the MTC VM219 / 1247171 rod through the appropriate hole in the battery tray or vehicle frame.
- Secure Battery: Position the looped end of the rod over the battery's hold-down clamp or frame, ensuring it firmly presses down on the battery.
- Tighten Fastener: Secure the rod with the appropriate nut (not included, typically reused from the original setup or purchased separately) onto the threaded end. Tighten the nut until the battery is held firmly in place and cannot move. Do not overtighten, as this can damage the battery casing or the hold-down rod.
- Reconnect Terminals: Reconnect the positive (+) battery terminal first, then the negative (-) terminal. Ensure all connections are tight and free of corrosion.
After installation, gently attempt to move the battery by hand to confirm it is securely fastened and does not exhibit any movement.
Maintenance
To ensure continued secure battery retention and product longevity, periodic maintenance is recommended:
- Regular Inspection: Periodically check the hold down rod for any signs of corrosion, bending, or damage.
- Tightness Check: Ensure the securing nut remains tight. Vibrations from driving can sometimes loosen fasteners over time. Retighten if necessary, but avoid overtightening.
- Cleanliness: Keep the rod and surrounding battery area clean and free of dirt, debris, and battery acid residue.
Troubleshooting
- Battery is Loose:
- Check if the securing nut is properly tightened.
- Ensure the rod is correctly seated in the battery tray and over the battery clamp.
- Verify that the battery itself is the correct size for the tray and that no foreign objects are preventing it from seating properly.
- Rod Does Not Fit:
- Confirm that the MTC VM219 / 1247171 is the correct part number for your specific Volvo model and year. Refer to your vehicle's service manual or a reputable parts catalog.
- Inspect the battery tray and surrounding area for any obstructions or damage that might prevent proper installation.
Specifications
| Manufacturer | MTC |
| Model | VM219 / 1247171 |
| OEM Part Number | 1247171.0 |
| Item Weight | 1 pounds |
| Package Dimensions | 9 x 9 x 9 inches |
| Exterior Finish | OEM Quality Fit and Finish |
Warranty and Support
For specific warranty information regarding your MTC VM219 / 1247171 Battery Hold Down Screw Rod, please refer to the retailer's purchase terms or contact MTC directly. For technical support or inquiries, please visit the official MTC website or contact their customer service department.


