Introduction
This manual provides essential instructions for the safe and effective use of your Pentax MX-1 Digital Camera. Please read this manual thoroughly before using the camera and keep it in a safe place for future reference.
Product Overview
The Pentax MX-1 is a high-end compact digital camera featuring a 12-megapixel back-illuminated CMOS sensor and a 4x optical zoom lens (28-112mm equivalent) with an f/1.8-2.5 aperture. It includes a 3-inch tilting LCD display and a dual shake reduction system for clear images and video.

Figure 1: Front view of the Pentax MX-1 Digital Camera.
Setup
1. Battery Installation and Charging
- Open the battery compartment cover located on the bottom of the camera.
- Insert the provided Lithium-Ion battery, ensuring the correct orientation as indicated inside the compartment.
- Close the battery compartment cover securely.
- Connect the camera to the AC adapter using the supplied USB cable. The charging indicator will illuminate.
- Charge the battery fully before first use. A full charge typically takes approximately 3 hours.
2. Memory Card Installation
- Locate the memory card slot, typically adjacent to the battery compartment or on the side of the camera.
- Insert an SD, SDHC, or SDXC memory card into the slot with the label facing the correct direction until it clicks into place.
- To remove the card, push it in gently until it springs out.

Figure 2: Side view of the camera showing the open port cover for USB/HDMI connections.
3. Initial Settings
- Turn on the camera by pressing the ON/OFF button.
- Follow the on-screen prompts to set the language, date, and time.
- Format the memory card before first use to ensure optimal performance. Navigate to the MENU, select SETUP, and then FORMAT CARD.
Operating the Camera
1. Basic Photography
- Power On: Press the ON/OFF button. The lens will extend.
- Select Mode: Rotate the mode dial on the top of the camera to select your desired shooting mode (e.g., Auto Pict, Program, Aperture Priority, Shutter Priority, Manual).
- Focus: Point the camera at your subject. Press the shutter button halfway down to focus. The focus frame will turn green when focus is achieved.
- Shoot: Press the shutter button fully down to take a picture.

Figure 3: Top view of the camera showing the mode dial, shutter button, and exposure compensation dial.
2. Using the Tilting LCD Monitor
The 3-inch LCD monitor can be tilted up or down to facilitate shooting from various angles, such as low-angle shots or overhead shots. Gently pull the top or bottom edge of the LCD screen to adjust its position.
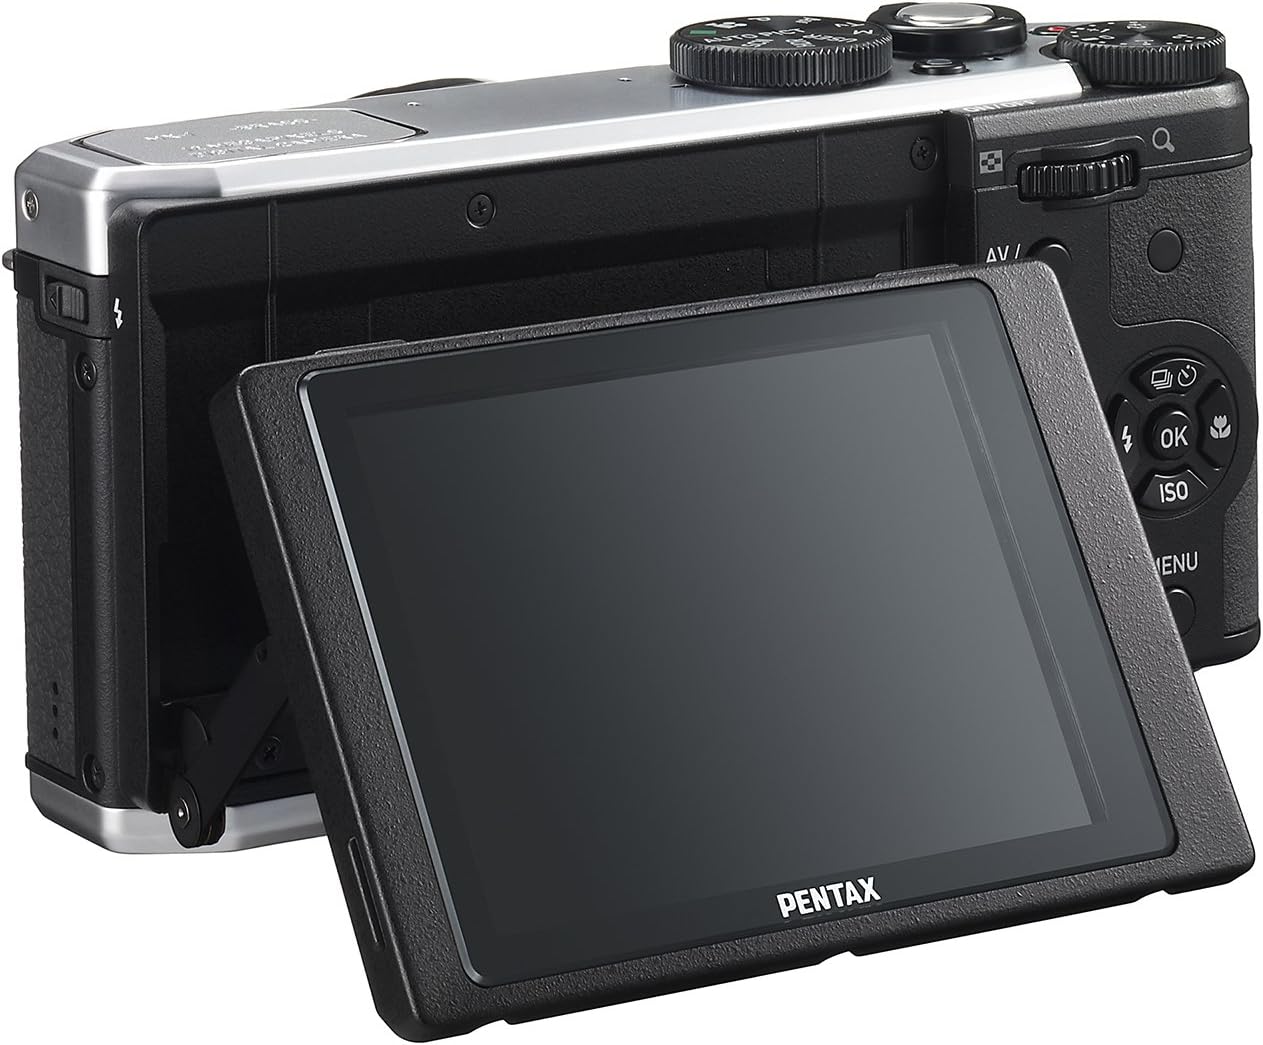
Figure 4: Rear view of the camera demonstrating the tilting LCD screen.
3. Flash Operation
To use the built-in flash, slide the flash release lever to pop up the flash unit. The flash modes (Auto, On, Off, Slow Sync, Rear Curtain Sync) can be selected via the camera's menu or a dedicated button, depending on the shooting mode.

Figure 5: Front view of the camera with the pop-up flash in the extended position.
4. Playback Mode
- Press the PLAY button to enter playback mode.
- Use the directional pad to scroll through your photos and videos.
- Press the OK button to view information about the selected image or to play a video.
- Press the MENU button to access playback options such as deleting, rotating, or resizing images.
Maintenance
1. Cleaning the Camera
- Camera Body: Use a soft, dry cloth to wipe the camera body. For stubborn dirt, slightly dampen the cloth with water or a mild cleaning solution. Avoid using organic solvents.
- Lens: Use a lens brush or a blower to remove dust. For smudges, use a lens cleaning cloth and lens cleaning fluid. Do not touch the lens surface with your fingers.
- LCD Monitor: Gently wipe the screen with a soft, lint-free cloth. Avoid pressing hard on the screen.
2. Storage
- When not in use for extended periods, remove the battery from the camera.
- Store the camera in a cool, dry, and well-ventilated place, away from direct sunlight, high temperatures, and humidity.
- Use a desiccant to prevent mold growth if storing in humid environments.
Troubleshooting
If you encounter issues with your Pentax MX-1, refer to the table below for common problems and their solutions.
| Problem | Possible Cause | Solution |
|---|---|---|
| Camera does not turn on. | Battery is depleted or incorrectly inserted. | Charge the battery or reinsert it correctly. |
| Cannot take pictures. | Memory card is full, locked, or not inserted. | Insert a memory card, unlock it, or delete unnecessary files. |
| Images are blurry. | Camera shake, incorrect focus, or dirty lens. | Hold the camera steady, ensure proper focus, or clean the lens. |
| Flash does not fire. | Flash is set to "Off" or not popped up. | Pop up the flash and set the flash mode to "Auto" or "On". |
| LCD screen is difficult to see in bright light. | High ambient light. | Adjust the tilting LCD for a better viewing angle or find shade. |
Specifications
| Feature | Detail |
|---|---|
| Model Name | Pentax MX-1 |
| Photo Sensor Resolution | 12 MP |
| Photo Sensor Size | 1/1.7-inch |
| Optical Zoom | 4x |
| Lens Focal Length | 28-112mm (35mm equivalent) |
| Aperture Range | f/1.8-2.5 |
| Image Stabilization | Sensor-shift |
| Screen Size | 3 Inches |
| Display Type | Tilting LCD |
| Supported File Format | JPEG 2.3, RAW |
| Video Resolution | FHD 1080p (H.264) |
| ISO Range (Expanded) | 100-12800 |
| Shutter Speed Range | 30 seconds to 1/8000 seconds |
| Memory Card Type | SD/SDHC/SDXC |
| Connectivity | HDMI (Mini HDMI type-D), USB |
| Battery Type | Lithium Ion |
| Item Weight | 13.76 ounces |
Warranty and Support
Warranty Information
The Pentax MX-1 Digital Camera comes with a 1-year warranty covering parts and labor from the date of purchase. This warranty covers manufacturing defects and malfunctions under normal use. It does not cover damage caused by misuse, accidents, unauthorized repairs, or normal wear and tear. Please retain your proof of purchase for warranty claims.
Customer Support
For technical assistance, service, or further inquiries, please visit the official Pentax support website or contact their customer service department. Refer to the product packaging or the official Pentax website for the most current contact information.
Visit the Pentax Store on Amazon for additional product information and accessories.


