1. Introduction
This manual provides detailed instructions for the proper use and maintenance of your Hytera TC-320U-1 UHF Analog 2-Watt Radio. The TC-320 is a cost-effective business two-way radio designed for reliable communication. It features a robust design, long battery life, and user-friendly operation.
2. What's in the Box
Carefully unpack your radio and check that all items listed below are present and in good condition. If any item is missing or damaged, please contact your dealer.
- Antenna (AN0460H11)
- Li-ion Battery (1700mAh) (BL1715)
- Switching Power Adapter (PS0602)
- Belt Clip (BC16)
- Nylon Strap (RO01)

Image 2.1: Contents of the Hytera TC-320U-1 package, including the radio, antenna, battery, power adapter, belt clip, and nylon strap.
3. Product Overview
The Hytera TC-320U-1 radio is designed for ease of use and durability. Key features include 16 channel capacity, wide communication range, double injection molding for anti-skid design, and a long-lasting battery with an indicator. The radio also supports switchable high/low power output.
3.1 Radio Controls and Components

Image 3.1: Front view of the Hytera TC-320U-1 radio, showing the speaker grille and microphone area.

Image 3.2: Side view of the Hytera TC-320U-1 radio, highlighting the orange Push-To-Talk (PTT) button.
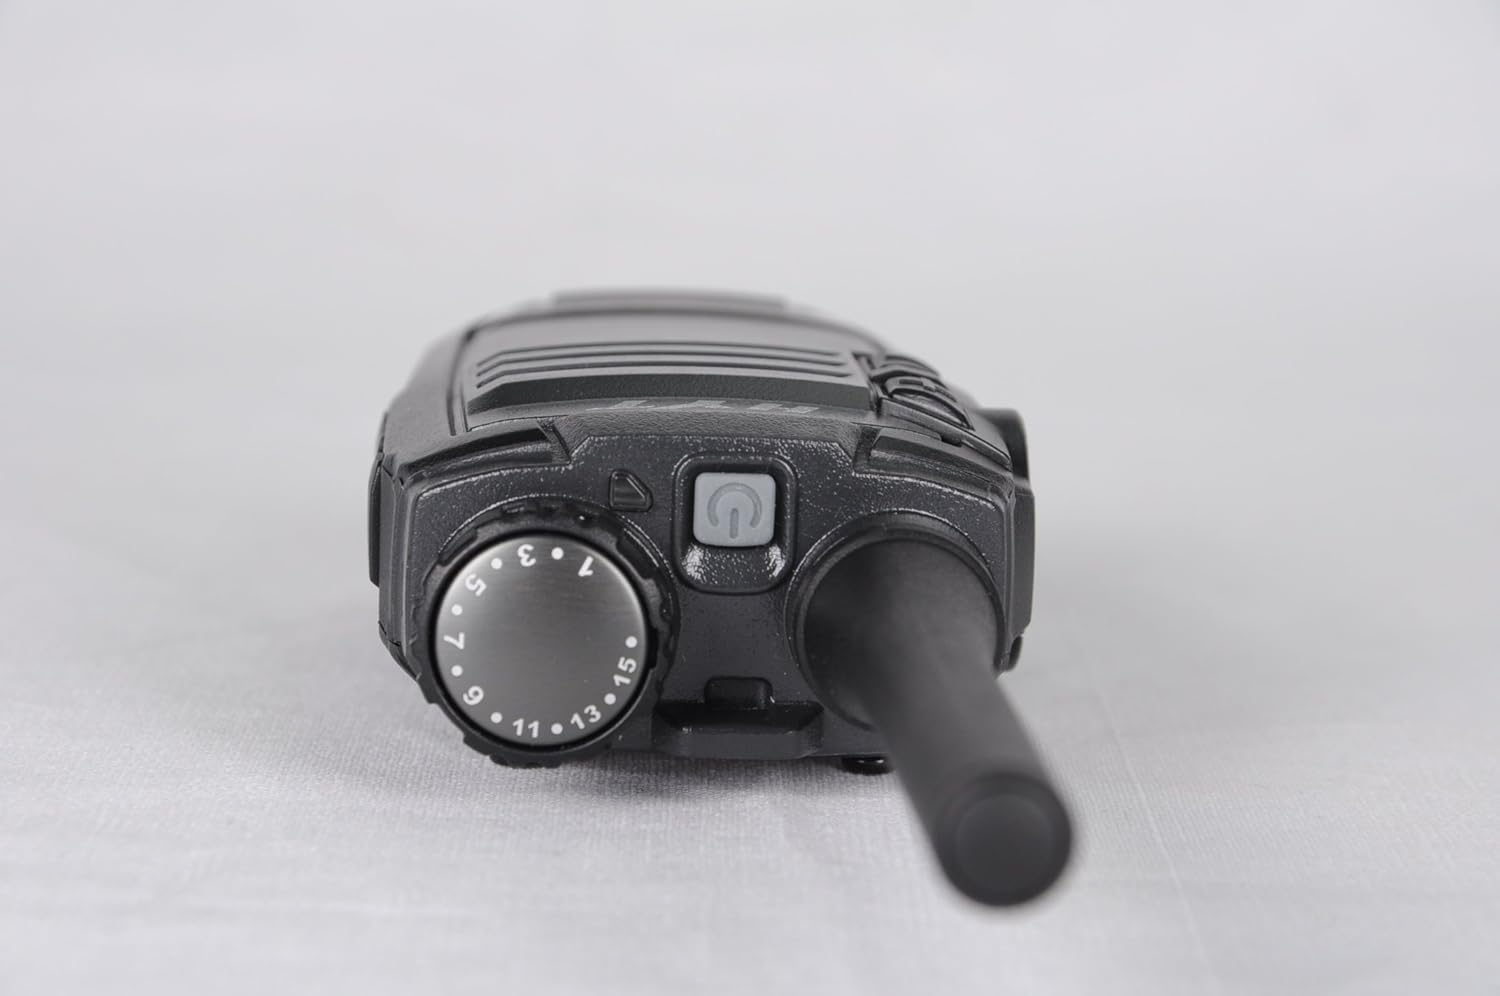
Image 3.3: Top view of the Hytera TC-320U-1 radio, showing the channel selector knob (numbered 1-16) and the power/volume knob.
4. Setup
4.1 Attaching the Antenna
- Align the threaded end of the antenna with the antenna connector on the top of the radio.
- Turn the antenna clockwise until it is securely fastened. Do not overtighten.
4.2 Installing the Battery
- Ensure the radio is powered off.
- Align the battery pack with the grooves on the back of the radio.
- Slide the battery pack upwards until it clicks into place.
- To remove, slide the battery latch (if present) and slide the battery downwards.
4.3 Charging the Battery
Before initial use, fully charge the battery. Use only the provided Hytera switching power adapter (PS0602) and charging accessories.
- Connect the power adapter to an AC outlet.
- Insert the charging cable into the radio's charging port or place the radio in its charging cradle.
- The charging indicator will typically show red during charging and green when fully charged.
4.4 Attaching the Belt Clip and Nylon Strap
- Align the belt clip with the screw holes on the back of the radio.
- Secure the belt clip with the provided screws.
- Thread the nylon strap through the designated loop on the radio for added security.
5. Operating Instructions
5.1 Powering On/Off and Volume Adjustment
Rotate the power/volume knob (located on the top of the radio, see Image 3.3) clockwise to power on the radio. Continue rotating clockwise to increase the volume. Rotate counter-clockwise to decrease volume and fully counter-clockwise to power off the radio.
5.2 Selecting a Channel
Rotate the channel selector knob (located on the top of the radio, see Image 3.3) to choose one of the 16 available channels. The selected channel number is indicated on the knob.
5.3 Transmitting and Receiving
- Receiving: When the radio receives a signal, the LED indicator will illuminate, and you will hear the audio through the speaker.
- Transmitting: To transmit, press and hold the Push-To-Talk (PTT) button on the side of the radio (see Image 3.2). Speak clearly into the microphone, holding the radio approximately 2.5 to 5 cm (1 to 2 inches) from your mouth. Release the PTT button to stop transmitting and return to receive mode.
5.4 High/Low Power Switch
The TC-320U-1 allows you to switch between high and low power output. Refer to your radio's specific controls for the location of this switch, typically a dedicated button or a programmable function. Using low power conserves battery life when communicating over short distances.
6. Maintenance
6.1 General Care
- Keep the radio dry. Avoid exposure to rain, moisture, or corrosive liquids.
- Do not expose the radio to extreme temperatures.
- Clean the radio's surface with a soft, damp cloth. Do not use harsh chemicals or abrasive cleaners.
- Ensure the antenna and battery contacts are clean and free of debris.
6.2 Battery Care
- Always use genuine Hytera batteries and chargers.
- Do not short-circuit the battery terminals.
- Do not dispose of batteries in fire.
- If the battery is not used for an extended period, store it in a cool, dry place after partially charging it.
7. Troubleshooting
If you encounter issues with your radio, refer to the following common problems and solutions:
| Problem | Possible Cause | Solution |
|---|---|---|
| Radio does not power on | Battery is depleted or not installed correctly | Charge the battery or re-install it securely. |
| Cannot transmit or receive | Incorrect channel selected; out of range; antenna loose | Verify channel selection; move closer to other radios; check antenna connection. |
| Low audio volume | Volume set too low; speaker obstructed | Increase volume; clear any obstructions from the speaker. |
| Short communication range | Low power mode selected; environmental obstructions | Switch to high power mode; move to an open area. |
8. Specifications
The following table outlines the technical specifications for the Hytera TC-320U-1 radio:
| Feature | Specification |
|---|---|
| Model Number | TC-320 |
| Frequency Range | UHF 400-470MHz |
| Number of Channels | 16 |
| Channel Spacing | 25/12.5kHz |
| Output Power | 2 Watts |
| Battery Type | 1 Lithium Ion (1700mAh) |
| Voltage | 3.8 Volts (DC) |
| Product Dimensions | 5.91 x 1.57 x 1.57 inches |
| Item Weight | 0.71 ounces (20 Grams) |
| Talking Range Maximum | 2 Miles (approximate, varies by terrain) |
| Water Resistance Level | Not Water Resistant |
9. Warranty Information
The Hytera TC-320U-1 radio comes with a 2-Year Manufacturer Warranty. Please retain your proof of purchase for warranty claims. For specific terms and conditions, refer to the warranty card included with your product or contact Hytera customer service.
10. Support
For further assistance, technical support, or service inquiries regarding your Hytera TC-320U-1 radio, please contact your authorized Hytera dealer or visit the official Hytera website for contact information and resources.


