1. Introduction
Thank you for choosing the Mondo DK01-WH Digital Alarm Clock and Timer. This device is designed for versatile timekeeping, offering both a digital clock display and a precise timer function. Its modern design, combined with practical features like magnetic attachment and freestanding capability, makes it suitable for various environments, including kitchens, offices, and bedrooms. Please read this manual carefully to ensure proper use and maintenance of your device.
2. Safety Information
- Keep the device away from water and excessive moisture.
- Do not expose the device to extreme temperatures or direct sunlight.
- Handle batteries according to local regulations. Do not mix old and new batteries, or different types of batteries.
- Keep batteries out of reach of children.
- Do not attempt to disassemble or repair the device yourself. Contact qualified personnel for service.
3. Package Contents
- 1 x Mondo DK01-WH Digital Alarm Clock and Timer
- 1 x AAA Battery
4. Product Overview
Familiarize yourself with the components of your Mondo DK01-WH device:

Figure 1: Front View of Mondo DK01-WH. This image shows the digital display indicating "10:38 AM" and the four control buttons: MODE, HOUR/MIN (with ALARM ON/CLEAR label), MIN/SEC (with L label), and SET START/STOP.
- Digital Display: Shows time (AM/PM indicator) or timer countdown/countup.
- MODE Button: Switches between clock and timer modes.
- HOUR/MIN Button: Adjusts hours/minutes in clock mode or timer setting. Long press for ALARM ON/CLEAR.
- MIN/SEC Button: Adjusts minutes/seconds in timer setting.
- SET START/STOP Button: Confirms settings, starts, or stops the timer.
- Battery Compartment: Located on the back (not visible in this image).
- Magnetic Back: Allows attachment to metallic surfaces (not visible in this image).
5. Setup
5.1 Battery Installation
- Locate the battery compartment cover on the back of the device.
- Slide or gently pry open the cover.
- Insert the provided 1x AAA battery, ensuring correct polarity (+/-).
- Replace the battery compartment cover securely.
5.2 Initial Time Setting
- Press the MODE button until the clock display is active.
- Press and hold the MODE button for a few seconds until the hour digits start flashing.
- Use the HOUR/MIN button to adjust the hour.
- Press the MODE button again to switch to minute adjustment.
- Use the MIN/SEC button to adjust the minutes.
- Press MODE once more to confirm and exit time setting.
6. Operating Instructions
6.1 Clock Mode
In clock mode, the device displays the current time. The AM/PM indicator will show for 12-hour format. To switch between 12-hour and 24-hour format, press the HOUR/MIN button while in clock mode (not setting time).
6.2 Timer Mode (Countdown)
The maximum adjustable time is 99 minutes and 59 seconds.
- Press the MODE button to switch to timer mode. The display will show "00:00".
- Use the HOUR/MIN button to set the desired minutes. Each press increases by one minute. Hold to fast-forward.
- Use the MIN/SEC button to set the desired seconds. Each press increases by one second. Hold to fast-forward.
- Press the SET START/STOP button to begin the countdown.
- To pause the countdown, press SET START/STOP again. Press it once more to resume.
- When the timer reaches "00:00", an alarm will sound.
- To stop the alarm, press any button.
- To clear the timer setting back to "00:00" before starting or after stopping, long press the HOUR/MIN button (ALARM ON/CLEAR).
6.3 Timer Mode (Countup)
This function is useful for measuring elapsed time.
- Ensure the timer is in "00:00" state (clear if necessary by long pressing HOUR/MIN).
- Press the SET START/STOP button to begin counting up from "00:00".
- To pause the countup, press SET START/STOP again. Press it once more to resume.
- To reset the countup timer to "00:00", pause it and then long press the HOUR/MIN button (ALARM ON/CLEAR).
6.4 Alarm Function
The device features an alarm that sounds when the countdown timer expires or when the countup timer reaches a set period. The "ALARM ON/CLEAR" label under the HOUR/MIN button indicates its dual function: a long press clears the timer, and it may also be used to activate or deactivate the alarm sound for the timer, depending on the specific mode or context. When the alarm sounds, press any button to silence it.
7. Mounting Options
The Mondo DK01-WH offers flexible placement options:
7.1 Freestanding Placement
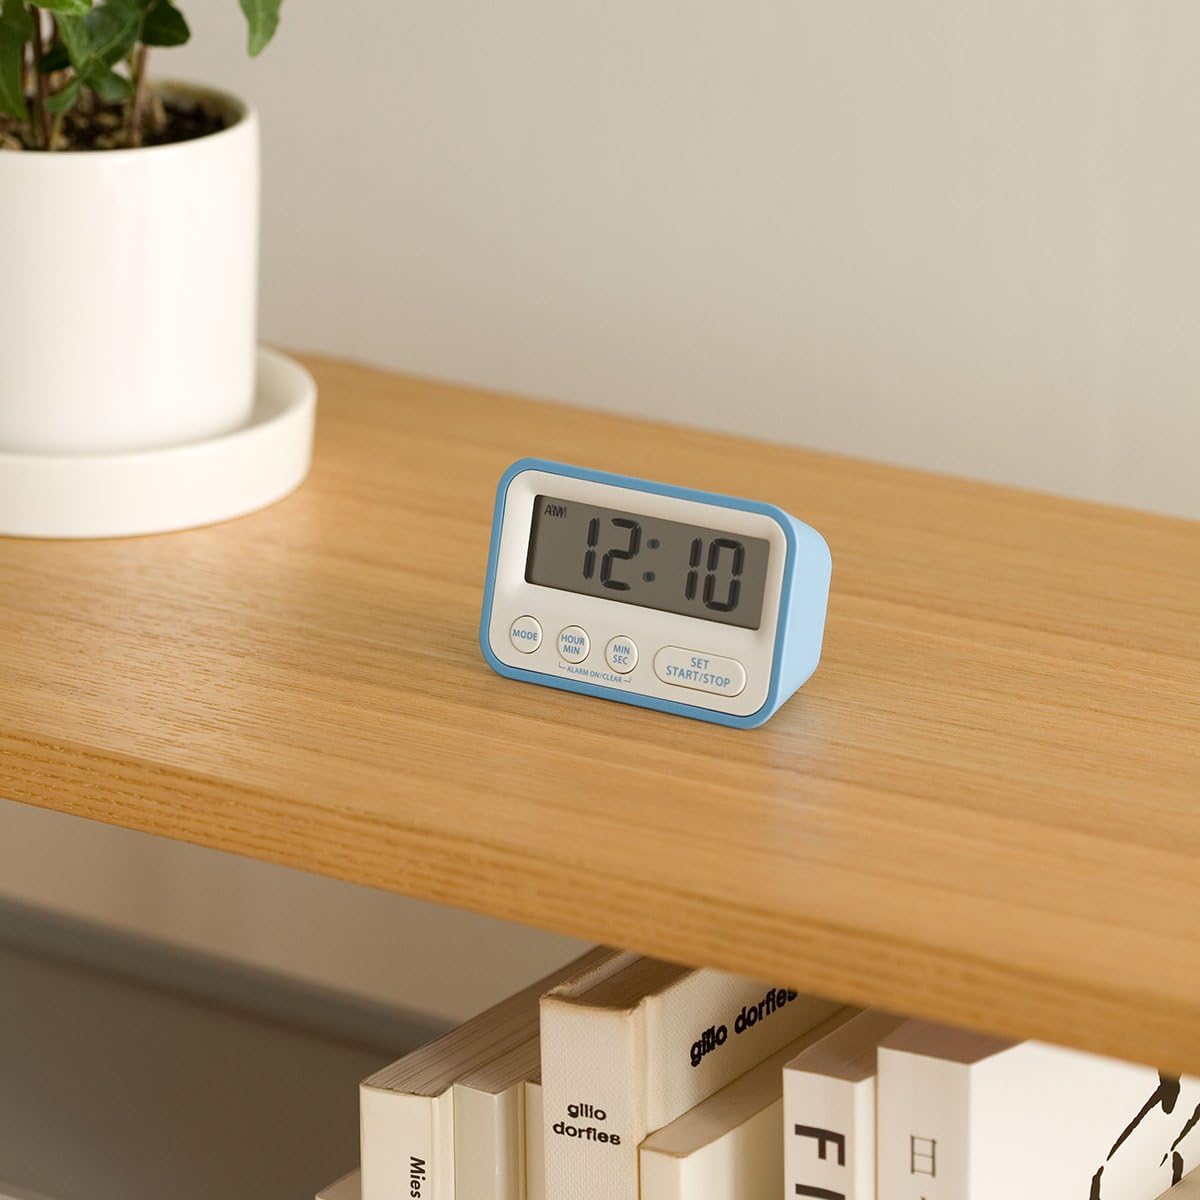
Figure 2: Freestanding Placement. The Mondo DK01-WH is shown resting on a wooden shelf, demonstrating its ability to stand independently.
The device is designed with a stable base, allowing it to stand upright on any flat surface such as a countertop, desk, or shelf.
7.2 Magnetic Attachment

Figure 3: Magnetic Attachment. The Mondo DK01-WH is depicted attached to the side of a refrigerator, showcasing its magnetic back for convenient placement on metallic surfaces.
The back of the device features integrated magnets, enabling it to adhere securely to any magnetic surface, such as a refrigerator door or a magnetic whiteboard.
8. Maintenance
8.1 Cleaning
Wipe the device with a soft, dry cloth. Do not use abrasive cleaners or solvents, as these may damage the surface or internal components.
8.2 Battery Replacement
When the display becomes dim or the device functions erratically, it is time to replace the battery. Follow the steps in Section 5.1 for battery installation, ensuring to use a fresh AAA battery.
9. Troubleshooting
| Problem | Possible Cause | Solution |
|---|---|---|
| Display is blank or dim. | Low or dead battery; incorrect battery installation. | Replace the AAA battery; ensure correct polarity. |
| Timer does not start or stop. | Incorrect mode; buttons not pressed firmly. | Ensure you are in timer mode; press SET START/STOP firmly. |
| Alarm does not sound. | Alarm function might be off; low battery. | Check if the alarm is enabled (refer to Section 6.4); replace battery. |
| Time setting is incorrect. | Time was not set correctly. | Follow the steps in Section 5.2 to reset the time. |
10. Specifications
- Model: DK01-WH
- Dimensions (L x W x H): 7.19 x 4.6 x 2.69 cm
- Weight: 90 g
- Material: Aluminum, Plastic
- Power Source: 1 x AAA Battery (included)
- Max Timer Setting: 99 minutes, 59 seconds
- Features: Digital clock, countdown/countup timer, alarm, magnetic back, freestanding.
11. Warranty and Support
For warranty information or technical support, please refer to the documentation provided at the time of purchase or contact your retailer. Keep your proof of purchase for any warranty claims.