1. Introduction
This manual provides essential information for the safe and efficient operation, maintenance, and troubleshooting of your Timbertech MNFS01 Wall Chaser. Please read these instructions carefully before using the tool and keep them for future reference. The Timbertech MNFS01 is a high-quality wall chaser designed for precise groove cutting in various masonry materials. It features a powerful 1700W motor, an integrated laser guide for accuracy, and adjustable settings for cutting depth and width.
2. Safety Instructions
Always follow basic safety precautions to reduce the risk of fire, electric shock, and personal injury. Failure to follow these instructions may result in serious injury or property damage.
- Read All Instructions: Familiarize yourself with the tool's controls and proper operation.
- Wear Personal Protective Equipment (PPE): Always wear safety glasses, hearing protection, a dust mask, and heavy-duty gloves when operating the wall chaser.
- Secure Workpiece: Ensure the material being cut is stable and securely clamped to prevent movement during operation.
- Maintain a Clean Work Area: Cluttered areas invite accidents. Keep your work area well-lit and free of debris.
- Avoid Hazardous Environments: Do not use power tools in damp or wet locations, or expose them to rain. Keep the work area well-ventilated.
- Prevent Accidental Starting: Ensure the switch is in the OFF position before plugging in the tool.
- Use the Right Tool: Do not force the tool; use the correct tool for your application.
- Disconnect Power: Always disconnect the tool from the power source before making any adjustments, changing accessories, or storing the tool.
- Check for Damaged Parts: Before use, inspect the tool for any damaged parts. Ensure all guards and safety features are in working order.
- Dust Extraction: Always connect the dust extraction adapter to a suitable vacuum cleaner to minimize dust exposure.
3. Package Contents
Your Timbertech MNFS01 Wall Chaser package includes the following items:
- 1 x Wall Chaser with Laser
- 1 x Carrying Case
- 2 x Diamond Cutting Discs (Ø 150mm)
- 1 x Groove Chisel
- 1 x Spanner Wrench
- 1 x Dust Extractor Adapter
- 1 x Instruction Manual

Figure 1: The Timbertech MNFS01 Wall Chaser shown with its main components and included accessories, such as diamond discs, wrenches, and the dust extraction adapter, all neatly arranged.
4. Technical Specifications
| Feature | Specification |
|---|---|
| Voltage | 230 V - 240 V ~50 Hz |
| Power Consumption | 1700 W |
| Protection Class | II |
| Speed | 4000 min-1 (RPM) |
| Cutting Disc Diameter | 150 mm |
| Bore Capacity | 22.2 mm |
| Groove Depth | Approx. 10 – 40 mm |
| Groove Width | Approx. 14, 19, and 26 mm |
| Laser Wavelength | 650 nm |
| Laser Output Power | 1 mW |
| Laser Divergence Angle | 1.5 mrad |
| Weight | 7.91 kg |
| Dimensions (Package) | 39.1 x 37.79 x 23.4 cm |
5. Setup and Assembly
5.1 Installing Diamond Discs
To install the diamond cutting discs:
- Ensure the tool is unplugged from the power source.
- Open the protective cover.
- Place the first diamond disc onto the spindle, ensuring the rotation arrow on the disc matches the arrow on the tool.
- Add the appropriate spacers to achieve the desired cutting width (14mm, 19mm, or 26mm).
- Place the second diamond disc, again matching the rotation arrow.
- Secure the discs and spacers with the flange and nut, tightening with the provided spanner wrench.
- Close the protective cover securely.
Video 1: Detailed instructions on how to correctly install the diamond cutting discs and spacers into the wall chaser for various groove widths.

Figure 2: Close-up view of the diamond cutting discs and the various spacers used to adjust the groove width, illustrating the different size options available.
5.2 Attaching Dust Extraction Adapter
For a cleaner work environment and to reduce dust exposure, attach the dust extraction adapter to a suitable vacuum cleaner.
- Locate the dust extraction port on the wall chaser.
- Securely attach the provided dust extractor adapter to this port.
- Connect a vacuum cleaner hose to the adapter.

Figure 3: The dust extraction adapter is shown connected to the wall chaser, ready to be attached to a vacuum cleaner for effective dust management during operation.
6. Operating Instructions
6.1 Adjusting Cutting Depth and Width
The wall chaser allows for precise adjustment of both cutting depth and width:
- Depth Adjustment: Use the depth adjustment screw to set the desired cutting depth between 10mm and 40mm. Refer to the markings on the tool for accurate setting.
- Width Adjustment: Adjust the groove width by adding or removing spacers between the diamond discs during installation. Available widths are 14mm, 19mm, and 26mm.

Figure 4: A detailed view of the wall chaser highlighting the depth adjustment mechanism, showing the screw and scale for precise control over cutting depth.
6.2 Using the Laser Guide
The integrated laser guide assists in achieving straight and accurate cuts:
- Locate the laser ON/OFF button on the tool.
- Press the button to activate the laser line, which will project onto your workpiece.
- Align the laser line with your marked cutting path for precise guidance.
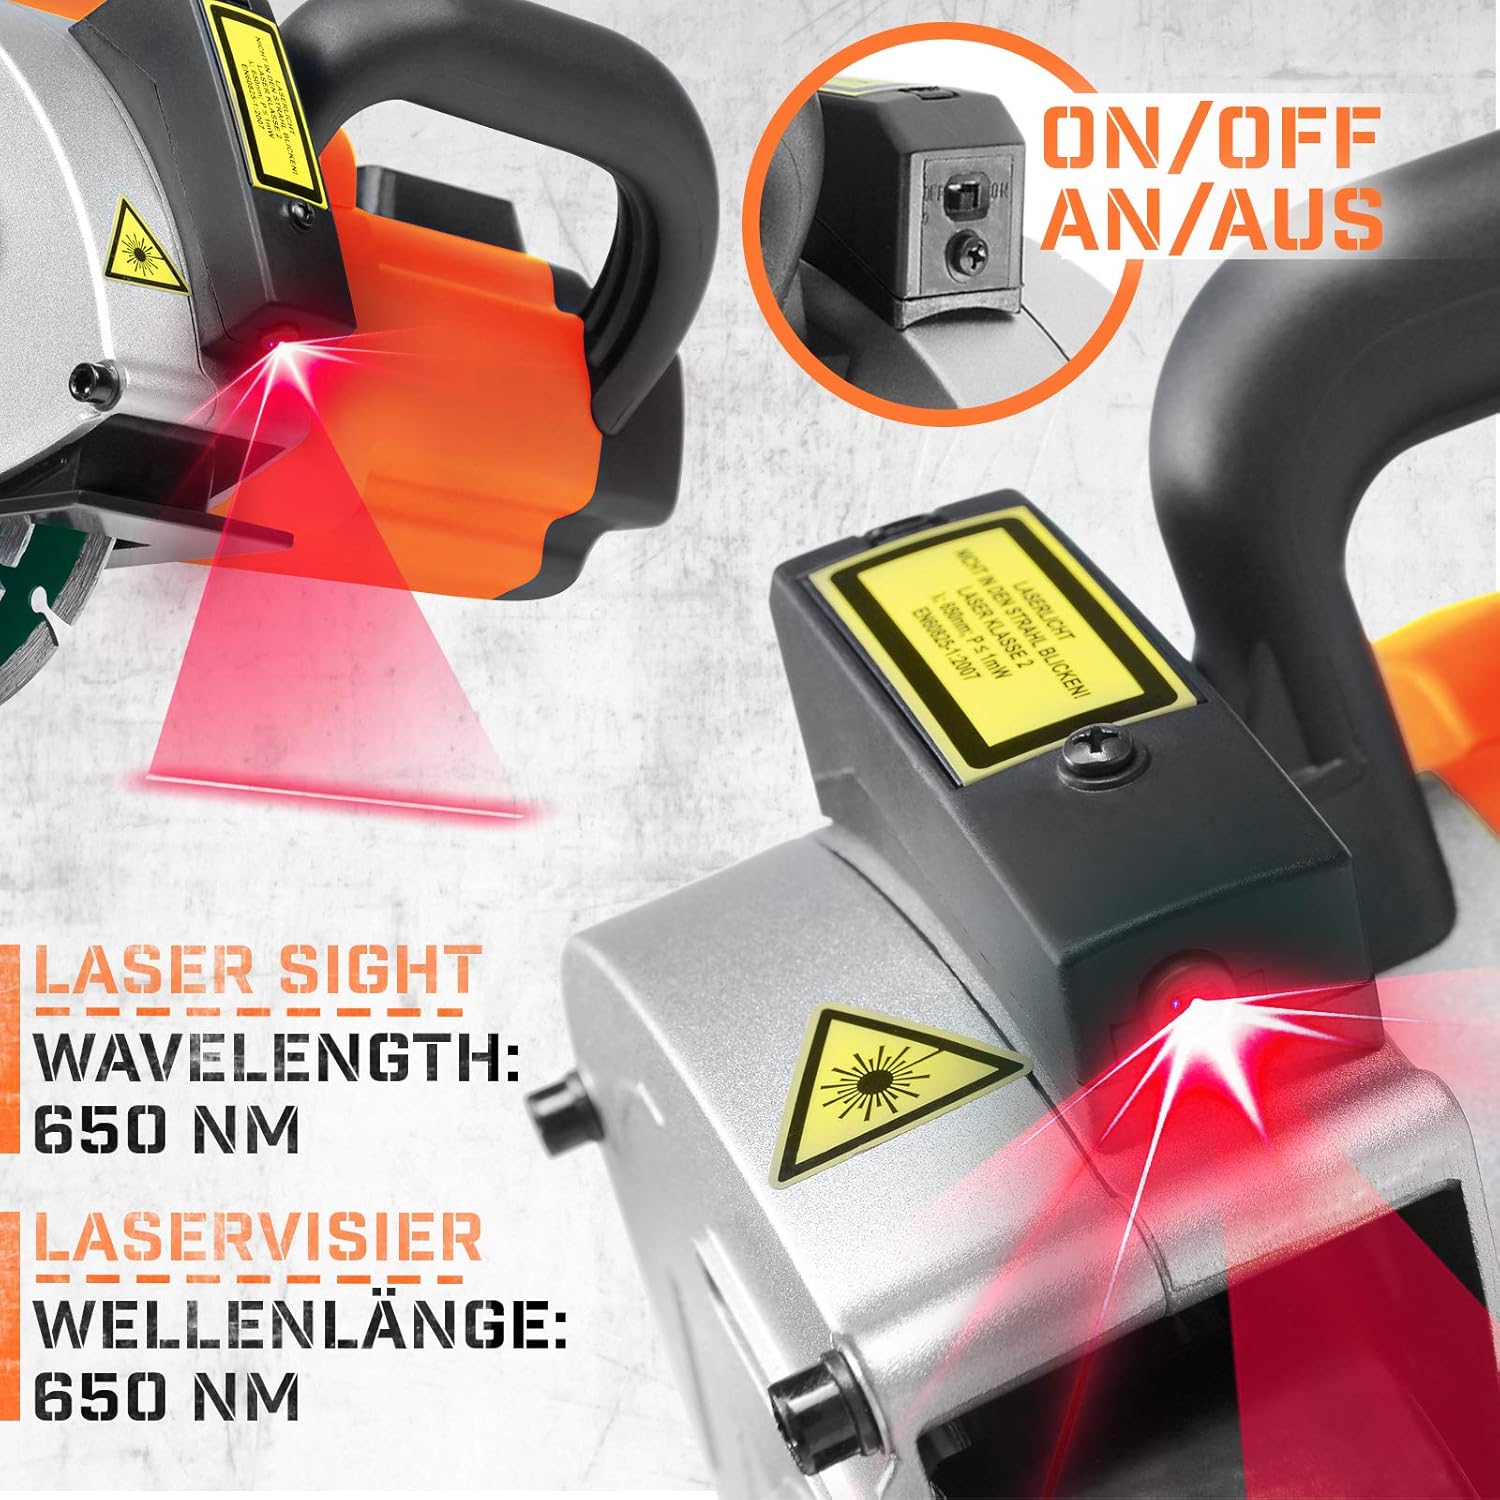
Figure 5: A close-up image of the wall chaser's laser sight, showing the laser beam projecting a guide line for accurate cutting.
6.3 General Operation Tips
- Soft Start Function: The tool is equipped with a soft start function to prevent sudden jolts upon startup, ensuring smoother operation and extending motor life.
- Overload Protection: An integrated overload protection system will automatically shut down the tool if it detects excessive load, preventing damage to the motor. Allow the tool to cool down before resuming operation.
- Working Direction: Always pull the wall chaser towards you or push it downwards along the marked line for optimal control and safety.
Video 2: Demonstration of the FERM WSM1008 Wall Slotter (similar to MNFS01) in operation, showing how to make precise cuts in a wall.
Video 3: An operational video showcasing the wall chaser in action, demonstrating its effectiveness in creating grooves for various applications.
7. Maintenance and Care
Regular maintenance ensures the longevity and optimal performance of your wall chaser.
- Cleaning: After each use, clean the tool thoroughly. Remove any dust and debris from the ventilation slots and the protective cover. Use a soft brush or compressed air.
- Blade Inspection: Regularly inspect the diamond cutting discs for wear or damage. Replace worn or chipped discs immediately to maintain cutting efficiency and safety.
- Cable Inspection: Check the power cable for any signs of damage, cuts, or fraying. Do not use the tool if the cable is damaged.
- Storage: Store the wall chaser in its carrying case in a dry, secure place, out of reach of children.
8. Troubleshooting Common Issues
If you encounter problems with your wall chaser, refer to the following troubleshooting guide:
- Tool Not Starting:
- Check if the power cable is securely plugged into a working outlet.
- Verify that the ON/OFF switch is fully engaged.
- Check for tripped circuit breakers or blown fuses.
- Reduced Cutting Performance:
- Inspect diamond discs for wear or damage. Replace if necessary.
- Ensure the cutting depth and width settings are appropriate for the material.
- Excessive Dust:
- Ensure the dust extraction adapter is properly connected to a functional vacuum cleaner.
- Check if the vacuum cleaner bag is full or the filter is clogged.
- Tool Shuts Off During Operation:
- This may indicate the overload protection has activated. Reduce pressure on the tool and allow it to cool down.
- Check for blockages around the cutting discs.
9. Warranty and Customer Support
For warranty information, service, or technical support, please refer to the contact details provided in your product packaging or visit the official Timbertech website. Keep your purchase receipt as proof of purchase for any warranty claims.