
Introduction
This manual provides essential information for the safe and effective operation, maintenance, and troubleshooting of your Valex Hammer 70100 SDS-MAX Demolition Hammer. Please read this manual thoroughly before using the tool and keep it for future reference.
Product Overview
The Valex Hammer 70100 is a versatile power tool designed for both demolition and hammer drilling tasks. Its robust construction and powerful motor make it suitable for demanding applications.

Figure 1: Valex Hammer 70100 SDS-MAX Demolition Hammer. This image shows the complete tool with its main body, handle, and chuck.
Key Features
- Two primary functions: Demolition and Hammer Drilling.
- Adjustable front handle for improved control and comfort.
- Equipped with an SDS-MAX chuck system for quick and secure bit changes.
- Robust magnesium housing for durability.
Setup
Unpacking and Inspection
Carefully remove the tool and all accessories from the packaging. Inspect for any signs of damage during transit. If any damage is found, do not use the tool and contact your supplier immediately.
Components Included
Your Valex Hammer 70100 typically includes the following items:
- Valex Hammer 70100 Demolition Hammer unit
- Adjustable Auxiliary Handle
- Grease for bits
- Dust Cap
- Depth Stop Rod
- Basic drill bits (may vary by package)
Attaching the Auxiliary Handle
The auxiliary handle can be rotated 360 degrees to provide optimal grip and control for various working positions. Loosen the handle clamp, position the handle as desired, and then tighten the clamp securely.
Bit Installation (SDS-MAX System)
The SDS-MAX chuck allows for quick and tool-free bit changes. To install a bit:
- Clean the shank of the bit and apply a small amount of the supplied grease.
- Pull back the chuck collar.
- Insert the bit into the chuck until it clicks into place.
- Release the chuck collar.
- Pull on the bit to ensure it is securely locked. The bit should have a slight axial play, which is normal for SDS-MAX systems.
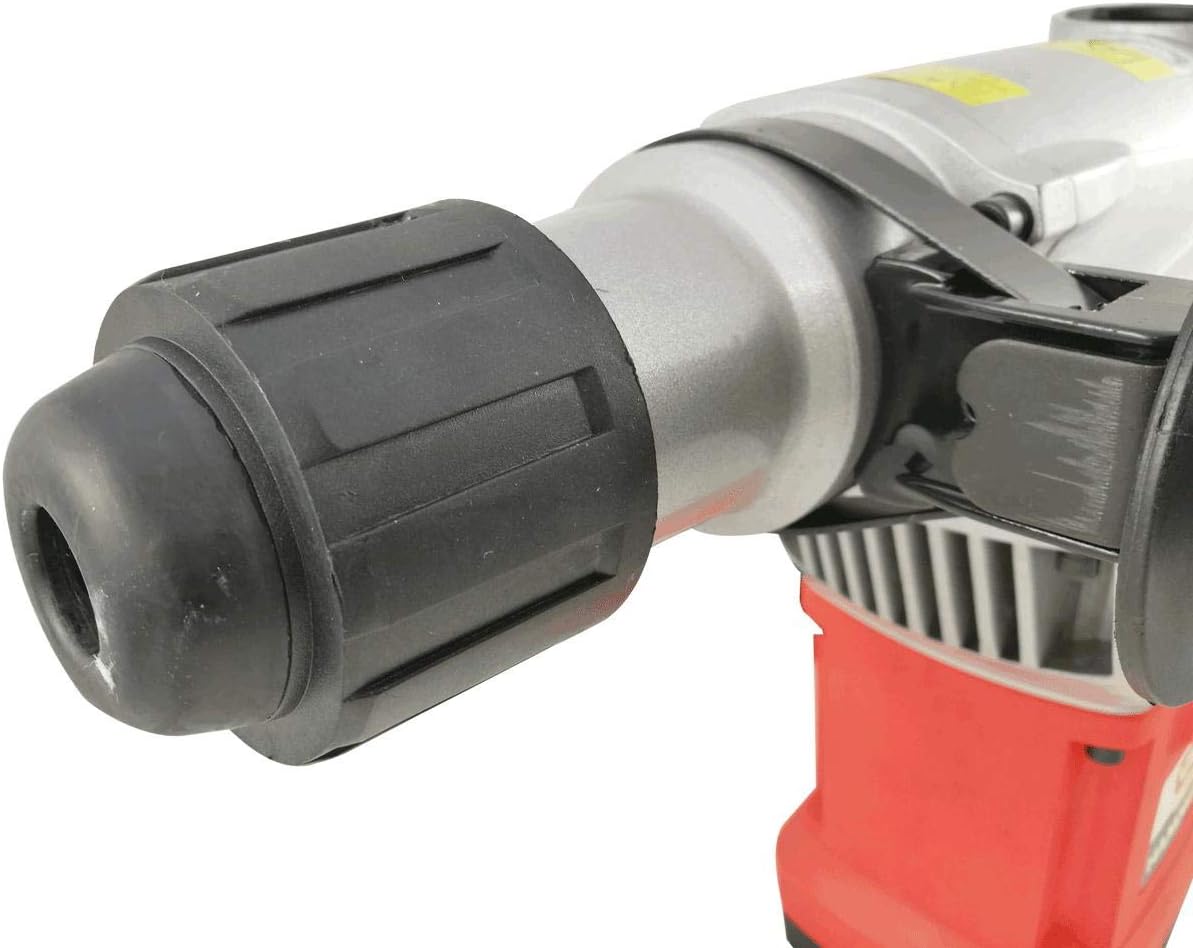
Figure 2: Close-up view of the SDS-MAX chuck system. This image highlights the mechanism for inserting and securing drill bits and chisels.
Power Connection
Ensure the power switch is in the "OFF" position before connecting the tool to a power outlet. Connect the power cord to a grounded 230 Volt AC power supply. Always use an appropriate extension cord if necessary, ensuring it is rated for the tool's power consumption.
Operating Instructions
Function Selection
The Valex Hammer 70100 offers two main operating modes: Demolition (chiseling) and Hammer Drilling. Use the function selector switch located on the side of the tool to choose the desired mode.

Figure 3: Detail of the function selector switch and the "MAGNESIUM" housing. This image shows the dial used to switch between demolition and hammer drilling modes.
- Hammer Drilling Mode: For drilling into concrete, masonry, and stone with percussion.
- Demolition Mode: For chiseling, breaking, and chipping concrete or masonry. This mode also features a varied locking function with 13 locking positions for chisel angle adjustment.
Starting and Stopping
To start the tool, press the trigger switch. To stop, release the trigger switch. Some models may have a lock-on button for continuous operation; if present, press the trigger and then the lock-on button. To release, press the trigger again.
Working with the Tool
Always hold the tool firmly with both hands using the main handle and the auxiliary handle. Apply steady, even pressure. Do not force the tool; allow the hammer mechanism to do the work. When drilling, ensure the depth stop rod is set correctly for the desired drilling depth.
Safety Precautions
Always wear appropriate personal protective equipment (PPE) including safety glasses, hearing protection, and gloves. Ensure your work area is well-lit and clear of obstructions. Disconnect the tool from the power supply before making any adjustments, changing accessories, or performing maintenance.
Maintenance
Cleaning
Regularly clean the ventilation slots to prevent overheating. Use a soft brush or compressed air to remove dust and debris. Do not use water or chemical cleaners.
Lubrication
Apply grease to the SDS-MAX bit shanks before each use to ensure smooth operation and prolong the life of the chuck and bits. Refer to the specific instructions for internal lubrication if required, typically performed by a qualified service technician.
Storage
Store the tool in a dry, secure place, out of reach of children. Protect it from direct sunlight and extreme temperatures.
Inspection
Periodically inspect the power cord for damage. Check the auxiliary handle and chuck for secure attachment. If any parts are worn or damaged, have them replaced by a qualified service center.
Troubleshooting
This section addresses common issues you might encounter with your Valex Hammer 70100. For problems not listed here, or if solutions do not resolve the issue, contact a qualified service technician.
| Problem | Possible Cause | Solution |
|---|---|---|
| Tool does not start. | No power supply; faulty power cord; trigger switch issue. | Check power outlet and connections. Inspect power cord for damage. If issues persist, seek professional service. |
| Reduced hammering action. | Worn carbon brushes; insufficient lubrication; damaged hammer mechanism. | Ensure bits are greased. For internal issues, professional service is required. |
| Bit not locking securely. | Dirty or damaged chuck; incorrect bit insertion. | Clean chuck and bit shank. Ensure bit is fully inserted and collar is released. |
Technical Specifications
| Specification | Value |
|---|---|
| Brand | Valex |
| Model Number | 271543047753 |
| Power Source | Corded Electric |
| Voltage | 230 Volts |
| Maximum Power | 1600 Watt |
| Drill Type | Rotary Hammer |
| Special Feature | 2-in-1 Demolition and Hammer Drilling |
| Item Weight | 4.54 kg (approx.) |
| Chuck Type | SDS-MAX |
Warranty Information
Specific warranty details for the Valex Hammer 70100 are not provided in the available product data. Please refer to the warranty card included with your purchase or contact the manufacturer/seller for detailed warranty terms and conditions.
For return policy information, please consult the retailer's terms of sale where the product was purchased. The general return policy for this product on Amazon.fr is 30 days for refund/replacement.
Customer Support
For technical assistance, spare parts, or service inquiries, please contact your authorized Valex service center or the retailer from whom you purchased the product. Specific contact information for customer support is not available in the provided product data.
When contacting support, please have your product model number (271543047753) and purchase details ready.