OneConcept MG3-V12-WH_SML
OneConcept V-12 Stereo System
User Manual
Model: MG3-V12-WH_SML
Introduction
This manual provides detailed instructions for the safe and efficient operation of your OneConcept V-12 Stereo System. Please read this manual thoroughly before using the device and retain it for future reference.

Image: Front view of the OneConcept V-12 Stereo System, showing the main unit with integrated CD player, control buttons, digital display, and two detachable speakers. The system is white and rests on a circular stand.
Safety Instructions
- Do not expose the unit to rain or moisture.
- Do not block any ventilation openings.
- Ensure proper power supply voltage as indicated on the unit.
- Keep the unit away from direct sunlight, heat sources, and strong magnetic fields.
- Do not attempt to disassemble or repair the unit yourself. Refer all servicing to qualified personnel.
Setup
Unpacking and Contents
Carefully remove all components from the packaging. Verify that all items are present:
- OneConcept V-12 Main Unit
- Two Detachable Speakers
- Power Adapter
- User Manual (this document)
Placement Options
The OneConcept V-12 offers versatile placement options:
- Desktop/Shelf Placement: Use the integrated stand for stable placement on any flat surface.
- Wall Mounting: The main unit and speakers can be detached from the stand and mounted on a wall using appropriate hardware (not included). Ensure the wall can support the weight of the unit.

Image: Side view of the OneConcept V-12 Stereo System, highlighting its compact design and the circular stand. This view demonstrates the unit's suitability for various placements.

Image: The OneConcept V-12 Stereo System with its two speakers detached from the central unit. This illustrates the modular design, allowing for flexible speaker placement or wall mounting.
Connecting Power and Speakers
- Connect the power adapter to the DC IN port on the back of the main unit.
- Plug the power adapter into a standard wall outlet.
- Connect the speaker cables from the detachable speakers to the corresponding speaker output jacks on the back of the main unit. Ensure correct polarity.

Image: Rear view of the OneConcept V-12 Stereo System, showing the speaker cable connections and the main power input. This view also highlights the ventilation grilles on the back of the unit and speakers.

Image: Top-down rear view of the OneConcept V-12 Stereo System, focusing on the manual switches for AM/FM radio selection and the main mode selector (AUX, Radio, CD, Alarm). Also visible is the tuning wheel.
Operating Instructions
Basic Controls
- POWER ON/OFF: Press the POWER button to turn the unit on or off.
- VOLUME: Use the VOL+ and VOL- buttons to adjust the volume level.
- MODE: Press the MODE button to cycle through available input sources: CD, USB, SD, FM Radio, AM Radio, AUX.
CD/MP3 Playback
- Press the OPEN/CLOSE button to open the CD tray.
- Place a CD or MP3 CD onto the spindle with the label side facing up.
- Press the OPEN/CLOSE button again to close the tray.
- Ensure the unit is in CD mode. Playback should begin automatically.
- Use the SKIP buttons (◀◀ / ▶▶) to navigate tracks.
- Press PLAY/PAUSE to pause or resume playback.
- Press STOP to stop playback.

Image: The OneConcept V-12 Stereo System with its front-loading CD tray open, revealing the disc compartment. The detached speakers are also visible, emphasizing the system's modularity.
USB/SD Playback
- Insert a USB flash drive into the USB port or an SD card into the SD card slot.
- Press the MODE button until "USB" or "SD" is displayed.
- The unit will automatically detect and begin playing compatible audio files (MP3).
- Use the REPEAT/PROG button for repeat modes and programming playback.
- Use the ALBUM button to navigate between folders (albums) on the storage device.
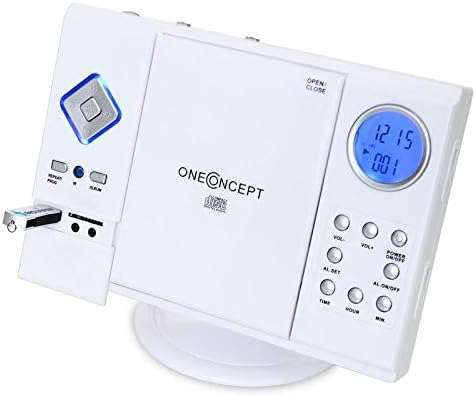
Image: Close-up of the left side of the OneConcept V-12 Stereo System, clearly showing a USB flash drive inserted into its dedicated port. This highlights the system's USB playback capability.

Image: Detailed view of the OneConcept V-12 Stereo System's left panel, featuring the USB port, SD card slot, and two 3.5mm audio jacks (likely headphone out and AUX in). This image emphasizes the various connectivity options.
Radio Operation (FM/AM)
- Switch the AM/FM selector on the back of the unit to the desired band.
- Press the MODE button until "Radio" is displayed.
- Use the TUNING wheel on the back of the unit to manually tune to a station.
- For better reception, extend the FM wire antenna fully.
AUX Input
Connect an external audio device (e.g., smartphone, MP3 player) to the AUX IN jack using a 3.5mm audio cable (not included). Press the MODE button until "AUX" is displayed. Audio from the connected device will play through the stereo system.
Alarm Function
The unit features an alarm function. Refer to the buttons on the right side of the main unit for setting the alarm:
- AL. SET: Press to enter alarm setting mode.
- TIME / HOUR / MIN: Use these buttons to set the alarm time.
- AL. ON/OFF: Press to activate or deactivate the alarm.
Maintenance
Cleaning
- Always unplug the unit from the power outlet before cleaning.
- Use a soft, dry cloth to wipe the exterior surfaces.
- Do not use abrasive cleaners, waxes, or solvents as they may damage the finish.
- For the CD lens, use a specialized CD lens cleaner disc.
Storage
If storing the unit for an extended period, disconnect it from power and store it in a cool, dry place, away from direct sunlight and extreme temperatures.
Troubleshooting
| Problem | Possible Cause | Solution |
|---|---|---|
| No Power | Power cord not securely connected. | Check power cord connection to unit and wall outlet. |
| No Sound | Volume too low; incorrect mode selected; speaker cables loose. | Increase volume; select correct input mode; check speaker connections. |
| CD/USB/SD not playing | Disc/device inserted incorrectly; incompatible file format; dirty disc. | Reinsert disc/device correctly; ensure MP3 format; clean disc; try another disc/device. |
| Poor Radio Reception | Antenna not extended; weak signal. | Fully extend FM wire antenna; reposition unit for better signal. |
Specifications
| Feature | Detail |
|---|---|
| Brand | OneConcept |
| Model Number | MG3-V12-WH_SML |
| Color | White |
| Connectivity Technology | USB |
| Special Features | CD changer, Alarm function |
| Compatible Devices | MP3 player, Smartphone |
| Speaker Type | Stereo |
| Surround Sound Channel Configuration | 2.0 |
| Supported Standards | MP3 |
| Item Dimensions (L x W x H) | 28 x 20 x 33 centimeters |
| Item Weight | 2.4 Kilograms |
| Power Source | Corded Electric |
Warranty and Support
This product is covered by a standard return policy. For specific warranty details and support, please refer to your point of purchase or the official OneConcept website. Keep your purchase receipt for warranty claims.
For technical assistance or inquiries, please contact OneConcept customer support, providing your product model number (MG3-V12-WH_SML) and a detailed description of the issue.
Ask a question about this manual
Ask about setup, troubleshooting, compatibility, parts, safety, or missing instructions. Manuals+ will review the question and use this page’s manual context to help answer it.