1. Introduction
This manual provides essential information for the safe and efficient operation of your Bio Green FY 45 Greenhouse Gas Heater. Please read these instructions thoroughly before installation and use. Proper installation, operation, and maintenance are crucial for your safety and the longevity of the product.
2. Safety Information
WARNING: Failure to follow these safety instructions could result in fire, explosion, property damage, personal injury, or death.
- Always ensure adequate ventilation when operating the heater in an enclosed space like a greenhouse.
- Do not store or use gasoline or other flammable vapors and liquids in the vicinity of this or any other appliance.
- Check all gas connections for leaks using a soapy water solution before initial use and after any gas cylinder change. Never use an open flame to check for leaks.
- Keep combustible materials at a safe distance from the heater. Refer to local regulations for specific clearances.
- Ensure the heater is installed on a stable, non-combustible surface or securely mounted to a wall.
- Never leave the operating heater unattended.
- Keep children and pets away from the heater.
- Only use the type of gas and pressure regulator specified for this appliance.
- If you smell gas, immediately shut off the gas supply, ventilate the area, and do not operate any electrical switches or appliances. Contact a qualified technician.
3. Package Contents
Please check that all components are present and undamaged:
- Bio Green FY 45 Greenhouse Gas Heater unit
- Instruction Manual
- Mounting hardware (if applicable for wall mounting)
Note: Gas hose and pressure regulator are typically sold separately and must be compatible with your gas supply and local regulations.
4. Specifications
| Feature | Specification |
|---|---|
| Brand | Bio Green |
| Model Number | FY 45 |
| Color | Brown |
| Material | Stainless Steel |
| Item Weight | 5 Kilograms |
| Form Factor | Pedestal |
| Indoor/Outdoor Use | Indoor (Greenhouse) |
| Power Source | Gas Powered |
| Heating Method | Radiant |
| Product Dimensions | 26D x 36W x 41H centimeters |
| Recommended Use | Greenhouse Heating |
| Mounting Type | Wall Mount |
| Room Type | Greenhouse |
| Power Output | 4500 W |
5. Setup
5.1 Placement
Place the heater on a firm, level, non-combustible surface. Ensure there is sufficient clearance from walls, plants, and any flammable materials. If wall-mounting, use appropriate hardware and ensure the wall can support the heater's weight and is non-combustible.
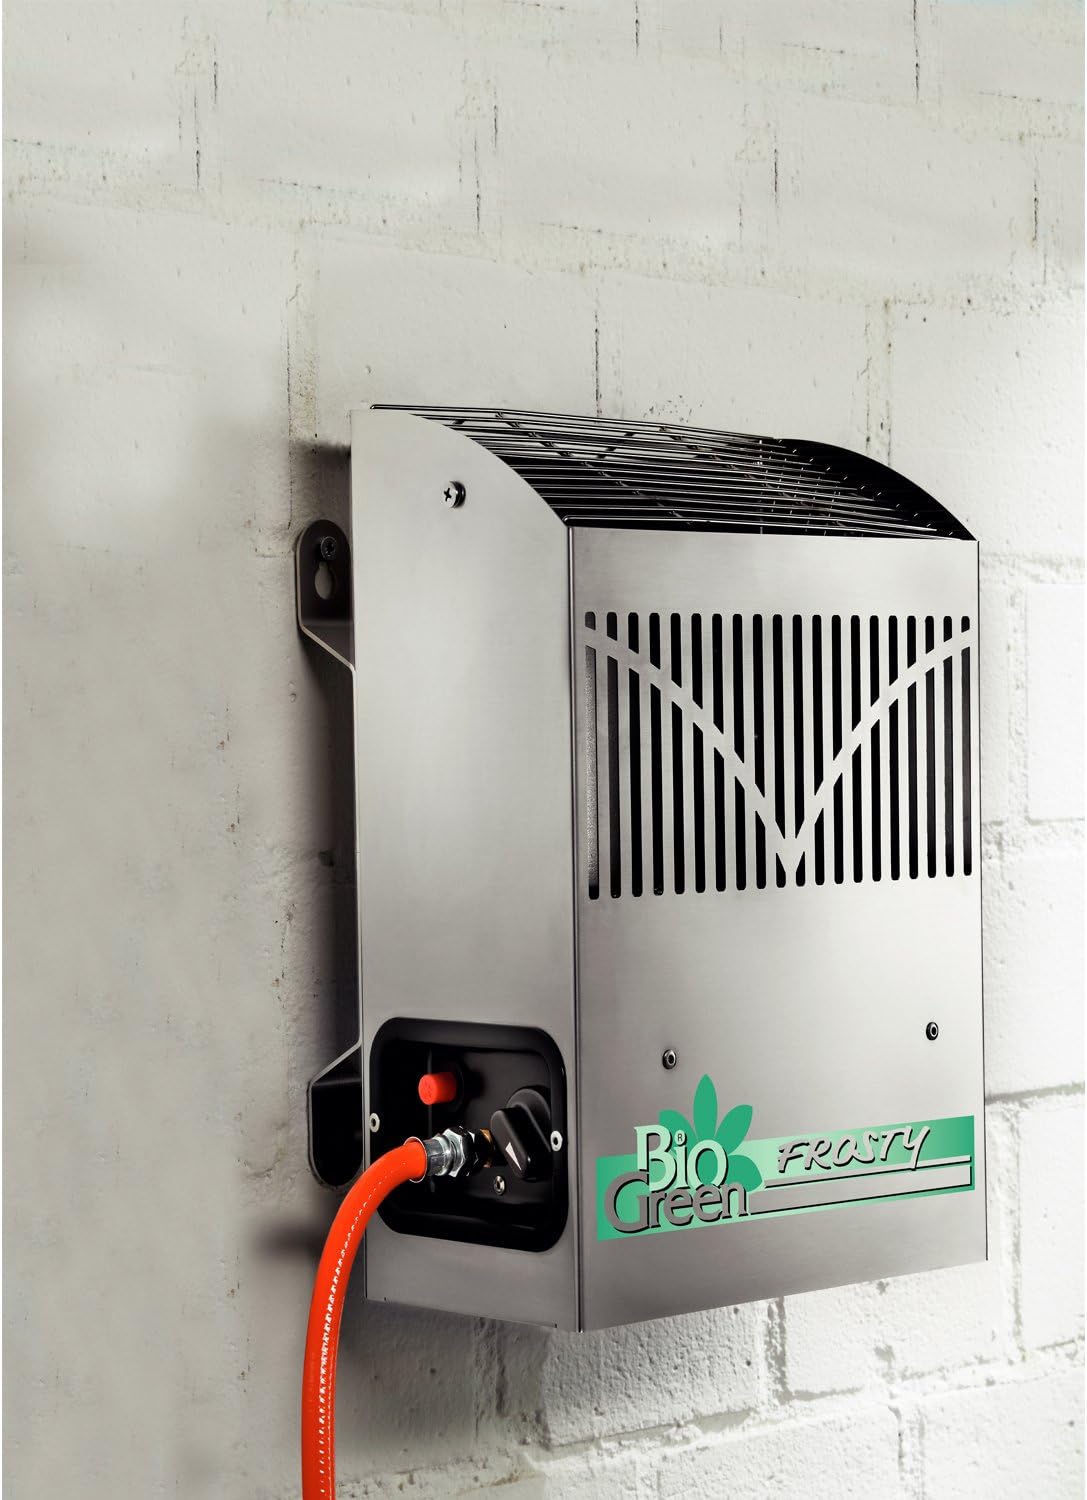
Image: The Bio Green FY 45 heater shown mounted on a wall, demonstrating a possible installation method.
5.2 Ventilation
Adequate ventilation is critical for gas heaters to prevent the accumulation of harmful gases. Ensure your greenhouse has proper ventilation openings or systems to allow for fresh air intake and exhaust of combustion byproducts.
5.3 Gas Connection
- Ensure the gas cylinder valve is closed before connecting.
- Connect a suitable gas hose and pressure regulator (not included) to your gas cylinder (e.g., propane or butane). Ensure the regulator is compatible with the gas type and pressure requirements of the FY 45 heater.
- Connect the other end of the gas hose to the inlet connection on the heater. Ensure all connections are tight and secure.
- Once connected, slowly open the gas cylinder valve.
- Apply a soapy water solution to all gas connections. If bubbles appear, there is a leak. Immediately close the gas valve and tighten the connection. Re-test until no bubbles are present.

Image: A detailed view of the gas inlet and control knob on the heater, with an orange gas hose connected.
6. Operating Instructions
6.1 Ignition
- Ensure the gas supply is open and the heater is properly ventilated.
- Turn the control knob to the pilot light setting (usually marked with a small flame symbol).
- Press and hold the control knob down while simultaneously pressing the igniter button (often red). You should hear a click and see a small pilot flame ignite.
- Continue to hold the control knob down for approximately 10-20 seconds after the pilot flame ignites to allow the thermocouple to heat up and hold the pilot flame.
- Release the control knob. If the pilot flame extinguishes, repeat steps 2-4.
- Once the pilot flame is stable, turn the control knob to the desired heat setting. The main burner will ignite.

Image: A close-up view of the radiant burner element, showing it in operation with a warm glow.
6.2 Temperature Control
The control knob allows you to adjust the heat output. Turn the knob to increase or decrease the flame size and thus the heat generated. Monitor the greenhouse temperature to achieve the desired environment for your plants.
6.3 Shutting Down
- Turn the control knob to the 'OFF' position. The main burner will extinguish.
- Close the valve on the gas cylinder.
- Allow the heater to cool down completely before handling or moving.
7. Maintenance
7.1 Regular Checks
- Periodically inspect the gas hose for cracks, cuts, or wear. Replace immediately if any damage is found.
- Check all gas connections for tightness.
- Ensure the air inlets and outlets are free from obstructions.
7.2 Cleaning
- Ensure the heater is completely cool and the gas supply is off before cleaning.
- Wipe the exterior of the heater with a damp cloth. Do not use abrasive cleaners or solvents.
- Gently clean any dust or debris from the burner area and ventilation grilles using a soft brush or vacuum cleaner.
7.3 Storage
When not in use for extended periods, disconnect the gas cylinder and store the heater in a dry, protected area, away from direct sunlight and extreme temperatures.
8. Troubleshooting
| Problem | Possible Cause | Solution |
|---|---|---|
| Heater does not ignite | No gas supply, faulty igniter, pilot light issue | Check gas cylinder, ensure valve is open. Check igniter spark. Hold pilot knob longer. |
| Pilot light goes out | Thermocouple not heated, draft, low gas pressure | Hold pilot knob longer. Check for drafts. Ensure adequate gas supply. |
| Low heat output | Low gas pressure, incorrect setting | Check gas cylinder level. Adjust control knob to higher setting. |
| Smell of gas | Gas leak | Immediately shut off gas supply. Ventilate area. Check all connections with soapy water. Do not operate. Contact qualified technician if leak persists. |
If you encounter problems not listed here or if solutions do not resolve the issue, please contact customer support.
9. Warranty and Support
For warranty information or technical support, please refer to the documentation provided at the time of purchase or visit the official Bio Green website. Keep your purchase receipt as proof of purchase.


