1. Introduction
Thank you for choosing the Glastender ST48-B Bottle Cooler. This manual provides essential information for the safe and efficient operation, installation, and maintenance of your new bottle cooler. Please read this manual thoroughly before operating the unit and retain it for future reference.
2. Safety Information
Always observe basic safety precautions when using this appliance to reduce the risk of fire, electric shock, or injury. This unit is designed for commercial use and should be operated by trained personnel only.
- Electrical Safety: Ensure the unit is connected to a properly grounded electrical outlet with the correct voltage and amperage as specified on the rating plate. Do not use extension cords.
- Ventilation: Maintain adequate clearance around the unit for proper airflow to the condenser. Blocking ventilation can lead to overheating and reduced efficiency.
- Heavy Object: This unit is heavy (approximately 271 pounds). Use appropriate lifting equipment and techniques when moving to prevent injury.
- Flammable Materials: Do not store explosive substances or flammable materials inside or near the cooler.
- Cleaning: Disconnect power before cleaning or performing any maintenance.
3. Setup and Installation
Proper installation is crucial for the performance and longevity of your bottle cooler.
3.1 Unpacking
Carefully remove all packaging materials, including any protective film or tape. Inspect the unit for any shipping damage. Report any damage to your carrier immediately.
3.2 Placement
Choose a location that is:
- Level and sturdy enough to support the unit's weight when fully loaded.
- Away from direct sunlight, heat sources (ovens, heaters), and excessive humidity.
- Well-ventilated. Allow at least 6 inches of clearance on all sides, especially where the condenser air intake and exhaust are located.
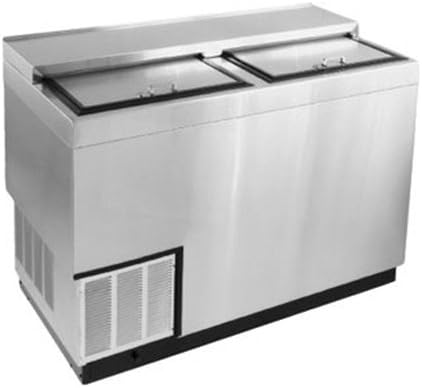
Image: The Glastender ST48-B Bottle Cooler, showcasing its stainless steel exterior, two top-access sliding lids, and the ventilation grille on the lower left side for the refrigeration system.
3.3 Electrical Connection
Before plugging in the unit, ensure the electrical supply matches the requirements listed on the unit's serial tag. The cooler must be connected to a dedicated, grounded circuit. Do not use adapters or multi-outlet power strips.
3.4 Initial Start-up
After placement and electrical connection, allow the unit to sit for at least 2 hours before plugging it in. This allows the refrigerant to settle. Once plugged in, the unit will begin to cool. Allow 24 hours for the unit to reach its stable operating temperature before loading product.
4. Operating Instructions
4.1 Temperature Control
The ST48-B is equipped with an adjustable thermostat. Locate the thermostat control (typically inside the unit or behind the front grille). Turn the dial or press the buttons to set the desired temperature. Refer to the specific thermostat model's instructions for detailed programming.
4.2 Loading Product
Load bottles or cans evenly to allow for proper air circulation. Do not block the internal air vents. Overloading the unit can impede cooling performance.
4.3 Lid Operation
The unit features sliding lids for easy access. Ensure lids are closed tightly when not in use to maintain internal temperature and energy efficiency.
5. Maintenance
Regular maintenance ensures optimal performance and extends the life of your cooler.
5.1 Cleaning the Interior
Clean the interior regularly with a mild soap and warm water solution. Rinse thoroughly and dry completely to prevent odors and mildew. Do not use abrasive cleaners or sharp objects.
5.2 Cleaning the Exterior
Wipe down the stainless steel exterior with a soft cloth and a non-abrasive cleaner designed for stainless steel. Avoid harsh chemicals.
5.3 Condenser Coil Cleaning
The condenser coils should be cleaned every 1-3 months, depending on the operating environment. Dust and debris on the coils reduce efficiency. Disconnect power, locate the condenser (usually behind the lower grille), and use a stiff brush or vacuum cleaner to remove accumulated dirt.
5.4 Gasket Inspection
Regularly inspect the lid gaskets for cracks, tears, or stiffness. Damaged gaskets compromise sealing and lead to energy loss. Replace worn gaskets promptly.
5.5 Drain Maintenance
Ensure the condensate drain is clear and free of obstructions. A clogged drain can lead to water accumulation inside the unit.
6. Troubleshooting
Before calling for service, check the following common issues:
| Problem | Possible Cause | Solution |
|---|---|---|
| Unit not cooling | Power supply issue; Thermostat set too high; Dirty condenser coils; Lids not closing properly. | Check power cord and circuit breaker; Adjust thermostat; Clean condenser coils; Inspect and adjust/replace lid gaskets. |
| Excessive noise | Loose components; Fan motor issue; Unit not level. | Check for loose parts; Contact service if fan is faulty; Level the unit. |
| Water on floor inside/outside | Clogged drain line; Excessive humidity; Damaged lid gaskets. | Clear drain line; Ensure lids are closed; Inspect and replace gaskets. |
If the problem persists after attempting these solutions, please contact a qualified service technician.
7. Specifications
- Model: ST48-B
- Dimensions (W x D x H): 48" x 24" x 34-1/2"
- Item Weight: 271 pounds
- Brand: Glastender
- ASIN: B009Z2FWD4
- First Available: October 30, 2012
8. Warranty and Support
For warranty information and technical support, please refer to the warranty card included with your purchase or visit the official Glastender website. Keep your purchase receipt and serial number handy when contacting support.
For parts and service, contact an authorized Glastender service provider.


