1. Introduction
This manual provides detailed instructions for the assembly, operation, and maintenance of your Walimex Pro 60x90 Softbox. Designed for professional photography, this softbox delivers soft and even lighting, making it suitable for various applications, including product and portrait photography. Please read this manual thoroughly before use to ensure proper setup and optimal performance.
2. Product Overview
The Walimex Pro 60x90 Softbox is engineered to provide controlled and diffused light. Key features include:
- Soft and Even Lighting: Ideal for product and people photography, ensuring consistent illumination.
- Adjustable Light Control: Includes a removable back diffuser for softer light and a grid for precise light direction.
- Shape Modifiers: Comes with round and square masks to alter the light shape and size.
- 360-Degree Rotation: The softbox can be rotated for flexible positioning.
- Durable Construction: Manufactured with high-quality, heat-resistant materials for extended lifespan.
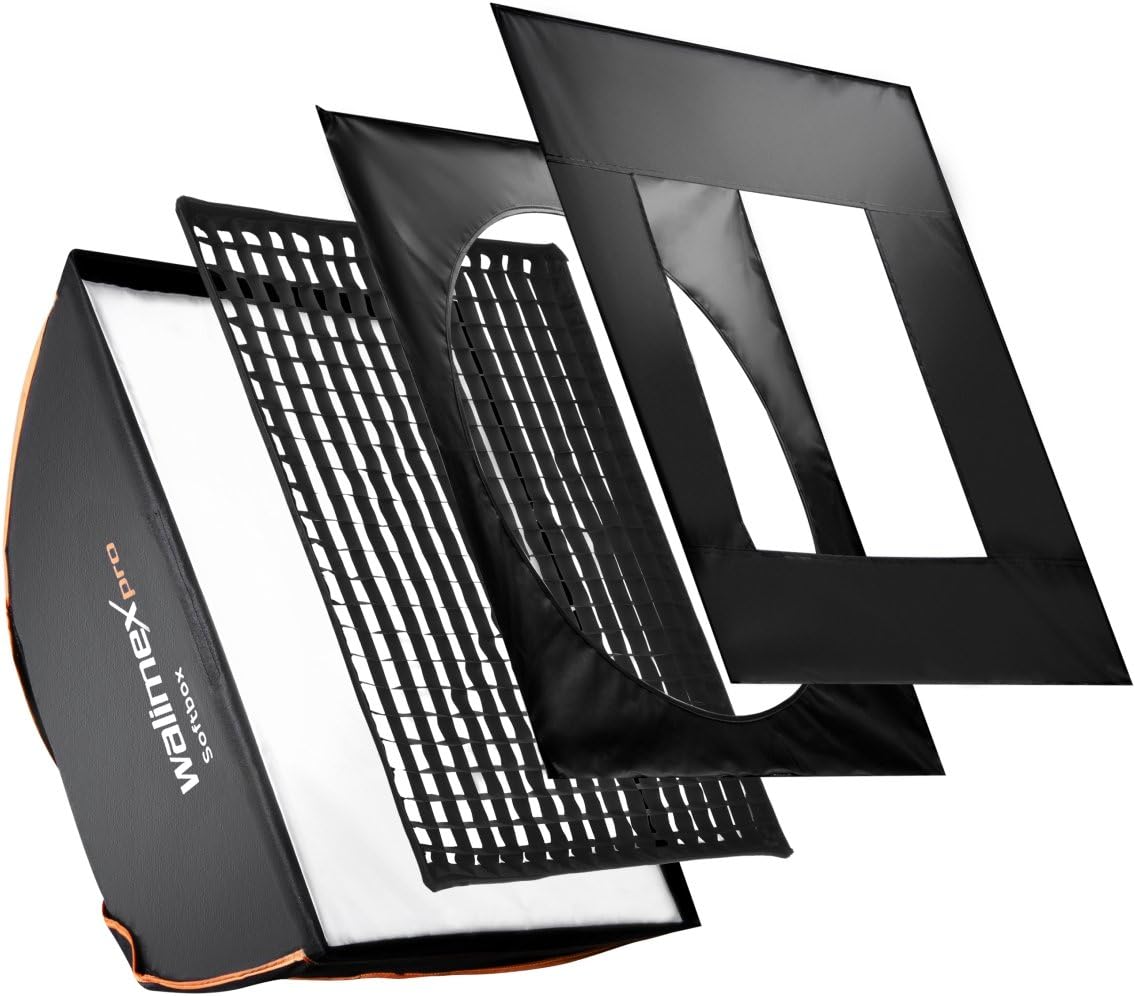
Figure 1: Exploded view of the Walimex Pro 60x90 Softbox components, showing the outer softbox, grid, and diffusers.
3. What's in the Box
Verify that all components are present before proceeding with assembly:
- Walimex Pro 60x90 Softbox
- Front Diffuser (Velcro attachment)
- Back Diffuser (Internal attachment)
- Grid (3cm depth, Velcro attachment)
- Round Mask
- Square Mask
4. Setup Instructions
- Attach Speedring: Insert the appropriate speedring adapter (not included, sold separately) into the rear opening of the softbox. Ensure it is securely fastened to your studio flash or continuous light source.
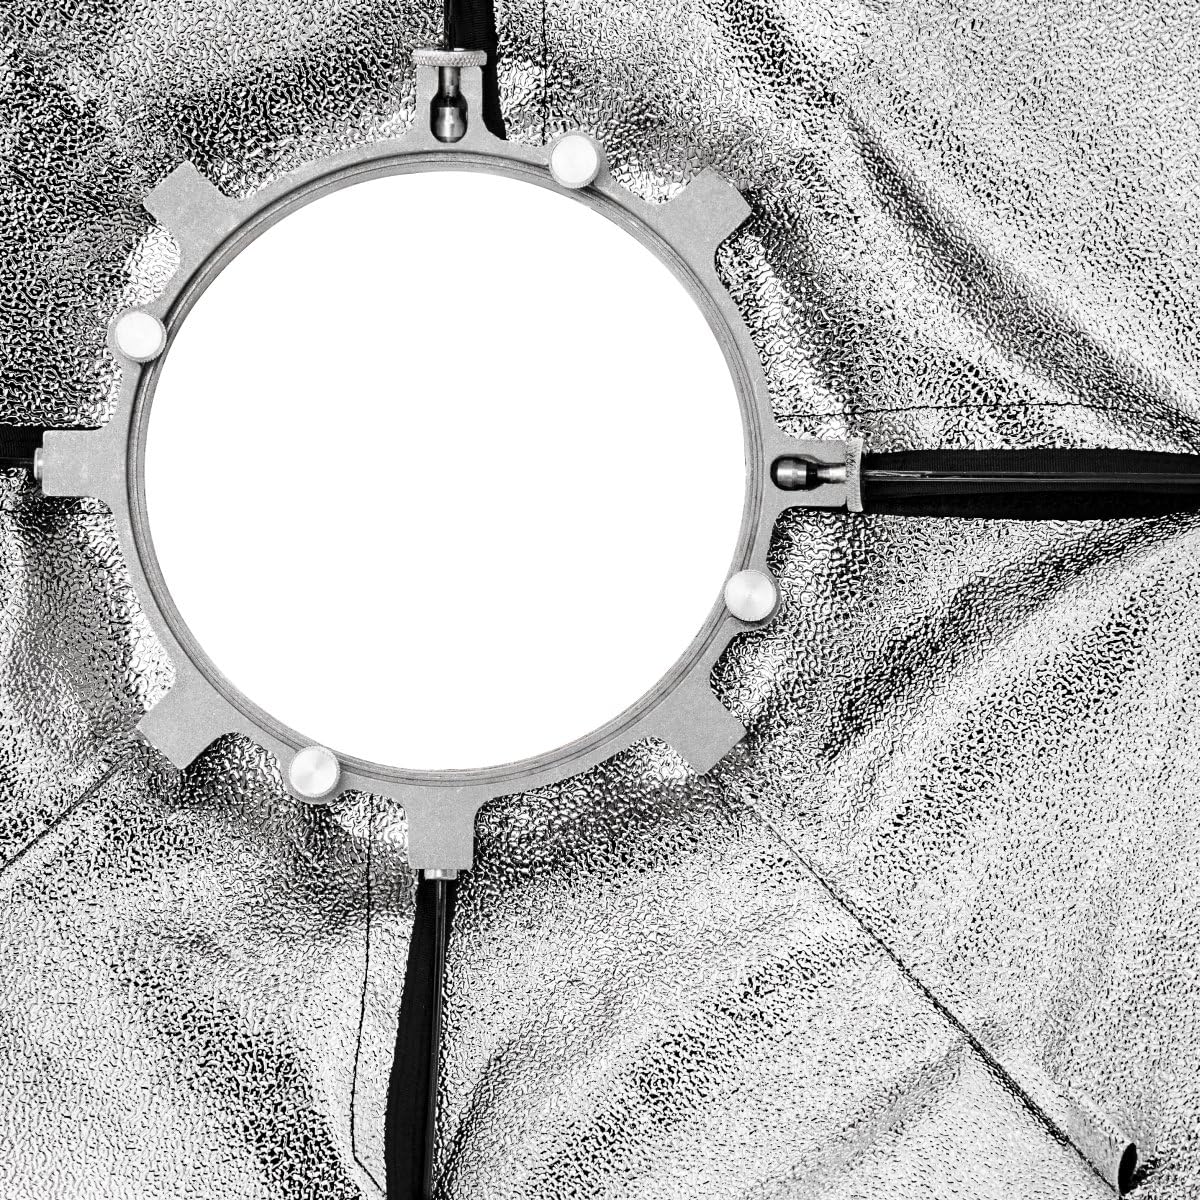
Figure 2: Interior view of the softbox, illustrating the mounting mechanism for the speedring adapter.
- Assemble Softbox: Carefully open the softbox. The internal rods should click into place, forming the rectangular shape.
- Mount to Light Stand: Attach the assembled softbox (with speedring and light source) to a sturdy light stand. Ensure all connections are tight and stable.
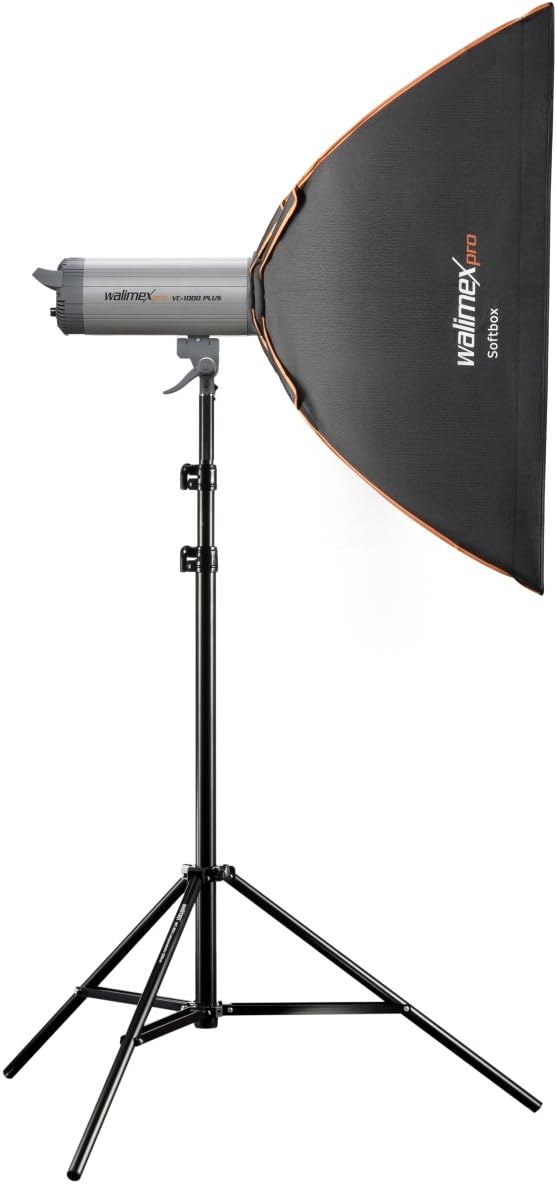
Figure 3: The Walimex Pro softbox correctly mounted on a light stand with a studio flash unit.
- Install Back Diffuser: If desired, attach the internal back diffuser. This diffuser hooks onto the internal loops of the softbox, further softening the light.
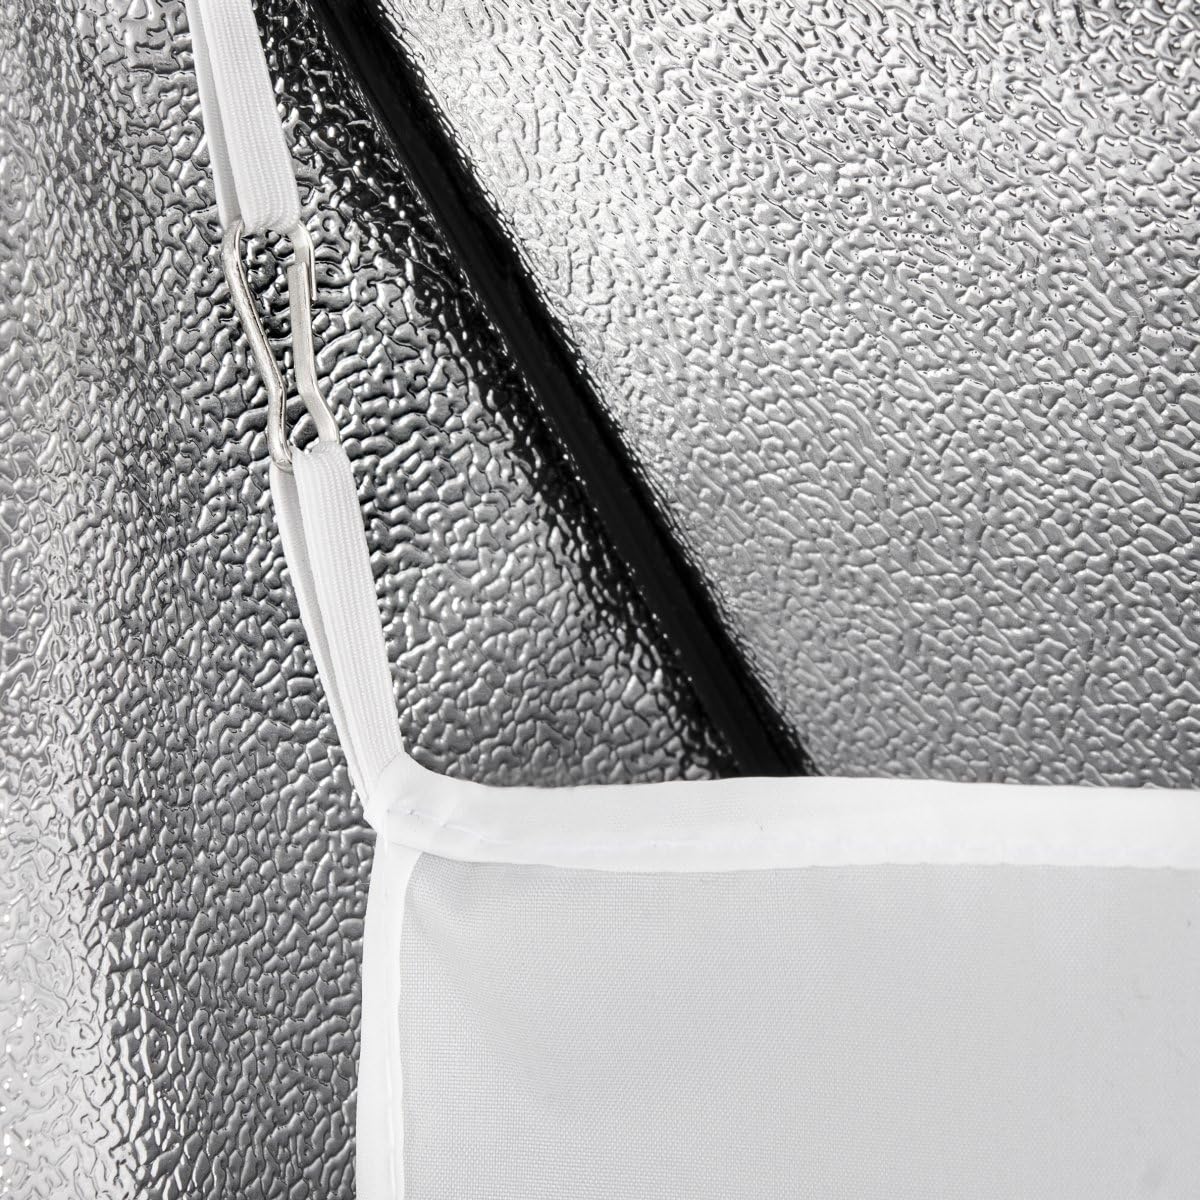
Figure 4: Close-up of the softbox interior, detailing the attachment points for the internal diffuser.
- Attach Front Diffuser: Secure the front diffuser to the outer edge of the softbox using the integrated Velcro strips. This creates clean light edges and provides the primary diffusion.
- Add Grid (Optional): For more directional light, attach the grid to the Velcro strips on the front of the softbox, over the front diffuser.
- Apply Masks (Optional): To modify the shape of the light, attach either the round or square mask to the front of the softbox, over the front diffuser and/or grid. The round mask is particularly useful for creating circular catchlights in eyes during portrait photography.
5. Operating Instructions
Once assembled, the Walimex Pro 60x90 Softbox is ready for use. Adjust its position and angle as needed for your photographic setup. The softbox can be rotated 360 degrees on its mount for precise light placement.
- Softness Control: Use both the back and front diffusers for the softest light. Remove the back diffuser for slightly more contrast.
- Directional Control: Attach the grid to narrow the light spread and prevent spill, directing light more precisely onto your subject.
- Shape Modification: Experiment with the round and square masks to create specific light shapes or reflections.
6. Maintenance
Proper maintenance ensures the longevity and performance of your softbox.
- Cleaning: Gently wipe the exterior fabric with a soft, damp cloth. For diffusers and grids, use a lint-free cloth. Avoid harsh chemicals or abrasive cleaners.
- Storage: When not in use, disassemble the softbox and store it in its carrying bag in a cool, dry place, away from direct sunlight and extreme temperatures.
- Inspection: Periodically check all seams, Velcro attachments, and mounting points for wear and tear.
7. Troubleshooting
| Problem | Possible Cause | Solution |
|---|---|---|
| Softbox does not hold shape. | Internal rods not fully extended or locked. | Ensure all internal rods are fully extended and securely locked into their respective sockets. |
| Light is too harsh or uneven. | Diffusers not installed or improperly positioned. | Verify that both the back and front diffusers are correctly installed. Adjust their position for optimal light spread. |
| Speedring adapter feels loose. | Adapter not fully seated or incompatible. | Ensure the speedring adapter is fully inserted and locked into the softbox mount. Confirm compatibility with your light source. If issues persist, consult the adapter's manual. |
| Grid or masks do not attach securely. | Velcro strips are dirty or worn. | Clean the Velcro strips on both the softbox and the accessories. Ensure proper alignment when attaching. |
8. Specifications
| Model Number | 18799 |
| Dimensions (L x W) | 60 x 90 cm (approx. 23.6 x 35.4 inches) |
| Product Dimensions (Packaged) | 0.39 x 0.39 x 0.39 inches (Note: This value from source appears to be a placeholder; actual dimensions are 60x90cm) |
| Item Weight | 2.82 pounds (approx. 1.28 kg) |
| Brand | Walimex Pro |
| Color | Orange Line (referring to trim) |
| Included Components | Softbox, Front Diffuser, Back Diffuser, Grid, Round Mask, Square Mask |
Note: Product specifications are subject to change without prior notice.
9. Warranty and Support
For warranty information and technical support, please refer to the documentation provided with your purchase or visit the official Walimex Pro website. Keep your proof of purchase for any warranty claims.