1. Introduction
This manual provides essential information for the installation, operation, maintenance, and troubleshooting of your Aerohive HiveAP 330 Access Point. The HiveAP 330 is an indoor dual-radio 802.11a/b/g/n wireless access point designed for high-performance wireless networking environments.
2. Product Overview
The Aerohive HiveAP 330 is a robust wireless access point featuring dual-band 3x3:3 MIMO technology, providing high-speed wireless connectivity. It includes two 10/100/1000 Ethernet ports for flexible network integration.
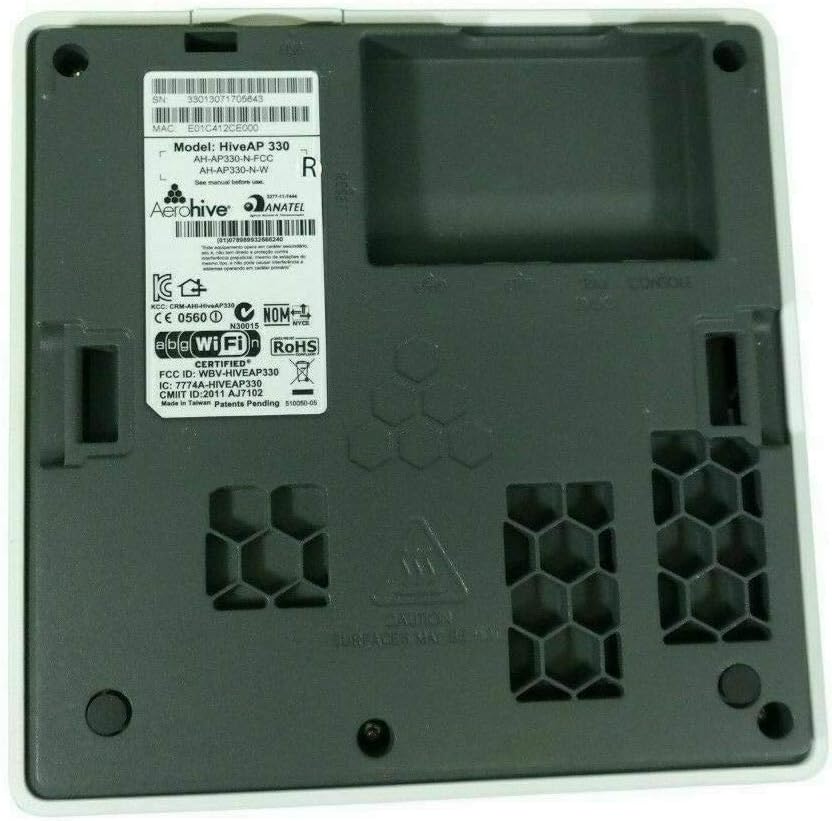
Figure 1: Front view of the Aerohive HiveAP 330 Access Point, showcasing its sleek design and ventilation. This view typically faces outwards when mounted.

Figure 2: Bottom view of the Aerohive HiveAP 330 Access Point, displaying product labels, MAC address, model number, and mounting points. This side contains critical identification and connection ports.
3. Setup
3.1 Unpacking
Carefully remove the HiveAP 330 from its packaging. Verify that all components are present. The HiveAP 330 typically does not include a power supply or external antennas, as it is designed for Power over Ethernet (PoE) and integrated antennas.
3.2 Mounting
The HiveAP 330 can be mounted on a ceiling or wall. Use the appropriate mounting bracket (sold separately) and hardware suitable for your installation surface. Ensure the mounting location provides optimal wireless coverage and is within reach of network cabling.
3.3 Connecting Power and Network
- Power: The HiveAP 330 is powered via Power over Ethernet (PoE) through one of its Ethernet ports. Connect an Ethernet cable from a PoE-enabled switch or a PoE injector to one of the Gigabit Ethernet ports on the access point. Ensure the PoE source meets the power requirements of the device.
- Network: Connect an Ethernet cable from your network infrastructure (e.g., switch or router) to one of the Gigabit Ethernet ports on the HiveAP 330.
3.4 Initial Configuration
Upon power-up, the HiveAP 330 will attempt to connect to the Aerohive HiveManager for centralized management and configuration. If HiveManager is not used, the device can be configured via a local web interface or console port. Refer to the Aerohive documentation for detailed configuration steps specific to your deployment method.
4. Operating
4.1 LED Indicators
The HiveAP 330 features LED indicators that provide status information:
- Power LED: Indicates power status. Solid green typically means the device is powered on and operating normally.
- Status LED: Indicates operational status and connectivity to HiveManager. Refer to Aerohive documentation for specific blink patterns and colors.
- Wireless LEDs: Indicate wireless activity on the 2.4 GHz and 5 GHz radios.
4.2 Basic Operation
Once configured, the HiveAP 330 will broadcast wireless networks (SSIDs) as defined in its configuration. Client devices can then connect to these SSIDs to access the network. The access point manages wireless client connections, security, and data forwarding.
5. Maintenance
5.1 Firmware Updates
Regularly update the device firmware to ensure optimal performance, security, and access to new features. Firmware updates are typically managed through Aerohive HiveManager or can be applied manually via the device's local interface.
5.2 Cleaning
Keep the access point clean and free from dust. Use a soft, dry cloth to wipe the exterior. Do not use liquid cleaners or aerosols directly on the device.
5.3 Environmental Considerations
Ensure the device operates within its specified temperature and humidity ranges. Avoid placing the access point near heat sources or in areas with excessive moisture or dust.
6. Troubleshooting
6.1 No Power
- Verify the Ethernet cable is securely connected to a PoE-enabled port or a PoE injector.
- Check the PoE source for proper operation.
- Ensure the power source meets the device's power requirements.
6.2 No Network Connectivity
- Confirm the Ethernet cable connecting the AP to the network is functional and properly seated.
- Check the status of the upstream network switch or router.
- Verify IP address configuration and network settings.
6.3 Poor Wireless Performance
- Check for sources of interference (e.g., other wireless devices, microwaves).
- Ensure the access point is mounted in an optimal location for coverage.
- Verify channel selection and power levels are optimized for your environment.
- Update firmware to the latest version.
6.4 Factory Reset
If issues persist, a factory reset may be necessary. Locate the reset button (often recessed) on the device. With the device powered on, press and hold the reset button for approximately 10-15 seconds until the LEDs indicate a reset sequence. This will revert all settings to their factory defaults.
7. Specifications
| Model | HiveAP 330 (AH-AP-330-N-FCC) |
| Wireless Standards | 802.11a/b/g/n |
| Radios | Dual Radio (2.4 GHz and 5 GHz) |
| MIMO Configuration | 3x3:3 |
| Ethernet Ports | (2) 10/100/1000 Gigabit Ethernet |
| Power Input | Power over Ethernet (PoE) |
| Antennas | Internal |
| Package Dimensions | 10 x 8 x 5 inches |
| Manufacturer | Aerohive |
| Date First Available | October 16, 2012 |
8. Warranty and Support
For warranty information and technical support, please refer to the official Aerohive Networks website or contact your authorized Aerohive reseller. Keep your purchase receipt and product serial number readily available when seeking support.
Aerohive Networks Website: www.aerohive.com