1. Introduction
Thank you for choosing the BAZZ 700 Series 4-inch Halogen Low-Voltage Recessed Light Fixture Kit. This manual provides important information regarding the safe installation, operation, and maintenance of your new lighting fixture. Please read these instructions thoroughly before installation and retain them for future reference.
2. Safety Information
WARNING: RISK OF ELECTRIC SHOCK. DISCONNECT POWER AT THE FUSE OR CIRCUIT BREAKER BEFORE INSTALLATION OR SERVICING.
- Always turn off the main power supply before beginning any electrical work.
- Consult a qualified electrician if you are unsure about wiring or installation procedures.
- Ensure all electrical connections are made in accordance with local electrical codes and ordinances.
- Do not install this fixture near combustible materials.
- This fixture is designed for insulated ceilings. Ensure minimum clearance above the ceiling space is 7.5 inches.
- Suitable for ceiling thickness from 0.5 to 2 inches.
- Use only the specified bulb type: (1) 35W MR16 GU5.3 12V Halogen.
3. Package Contents
Carefully unpack your fixture and inspect for any damage. Keep all packaging materials until you are sure the product is working correctly. The package should include:
- Recessed Light Fixture Housing
- Trim Kit (Satin finish)
- MR16 GU5.3 12V Halogen Bulb (35W)
- Installation Hardware
- Instruction Manual (this document)
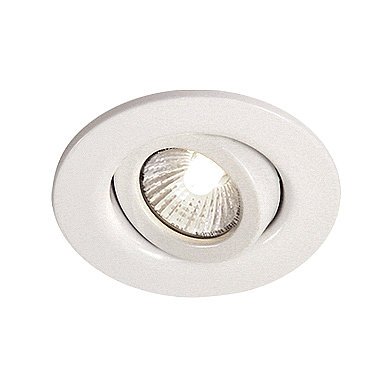
Image 1: BAZZ 700 Series 4-inch Halogen Low-Voltage Recessed Light Fixture Kit. This image shows the complete recessed light fixture, including the housing, trim, and the halogen bulb.
4. Setup and Installation
Tools Required: Screwdriver, Wire Strippers, Pliers, Measuring Tape, Drywall Saw (or Hole Saw), Safety Glasses, Gloves.
- Turn Off Power: Locate the circuit breaker or fuse box and turn off the power to the area where you will be installing the fixture. Verify power is off using a voltage tester.
- Determine Location: Choose a suitable location for your recessed light, ensuring there are no obstructions (joists, pipes, wires) in the ceiling space. Maintain the minimum clearance of 7.5 inches above the ceiling.
- Cut Ceiling Opening: Using a template (often provided with the fixture or found on the packaging) or by measuring the fixture's housing, mark and cut a 4-inch diameter hole in the ceiling. Ensure the hole is clean and smooth.
- Wiring Connections:
- Open the junction box cover on the fixture housing.
- Connect the incoming electrical wires to the fixture's wires:
- Connect the black (hot) wire from the supply to the black wire of the fixture.
- Connect the white (neutral) wire from the supply to the white wire of the fixture.
- Connect the green or bare copper (ground) wire from the supply to the green or bare copper wire of the fixture.
- Secure all connections with approved wire nuts (not included) and ensure they are tight.
- Carefully tuck all wires into the junction box and close the cover securely.
- Insert Fixture Housing: Push the fixture housing up into the ceiling opening. The spring clips on the sides of the housing will secure it firmly against the ceiling.
- Install Bulb: Insert the 35W MR16 GU5.3 12V Halogen bulb into the socket. Handle the bulb by its base to avoid touching the glass, as oils from your skin can reduce bulb life.
- Attach Trim: Align the trim kit with the housing and secure it according to the specific trim design (usually involves spring clips or torsion springs).
- Restore Power: Once installation is complete and all connections are secure, turn the power back on at the circuit breaker or fuse box.
5. Operating Instructions
The BAZZ 700 Series Recessed Light Fixture operates like any standard light fixture. Once properly installed and powered, it can be controlled by a wall switch connected to its circuit.
- Turning On/Off: Use the wall switch connected to the fixture to turn the light on or off.
- Dimming (Optional): If connected to a compatible low-voltage dimmer switch (sold separately), you can adjust the light intensity. Ensure the dimmer is rated for low-voltage halogen lighting.
6. Maintenance
Regular maintenance will ensure the longevity and optimal performance of your BAZZ recessed light fixture.
- Cleaning:
- Always turn off power before cleaning.
- Wipe the fixture and trim with a soft, dry or slightly damp cloth.
- Do not use abrasive cleaners, solvents, or polishes as they may damage the finish.
- Bulb Replacement:
- Turn off power to the fixture and allow the bulb to cool completely before attempting to replace it.
- Carefully remove the trim (if necessary) and then gently pull out the old MR16 bulb from its socket.
- Insert a new 35W MR16 GU5.3 12V Halogen bulb. Avoid touching the glass with bare hands.
- Reattach the trim and restore power.
7. Troubleshooting
| Problem | Possible Cause | Solution |
|---|---|---|
| Light does not turn on. |
|
|
| Light flickers. |
|
|
| Bulb burns out quickly. |
|
|
8. Specifications
- Model Number: 700-160
- Fixture Type: Low-Voltage Recessed Light
- Housing Type: Insulated Ceiling (IC) Rated
- Bulb Type: (1) MR16 GU5.3 12V Halogen
- Wattage: 35W (maximum)
- Input Voltage: 12V (requires transformer, typically integrated or external)
- Fixture Diameter: 4 inches
- Finish: Satin (Trim)
- Minimum Clearance Above Ceiling: 7.5 inches
- Ceiling Thickness Compatibility: 0.5 to 2 inches
- UPC: 773270716017
9. Warranty Information
BAZZ products are manufactured to high-quality standards. This product comes with a limited warranty against defects in materials and workmanship from the date of purchase. Please retain your proof of purchase for warranty claims. For specific warranty terms and conditions, please refer to the documentation included with your purchase or contact BAZZ customer support.
10. Customer Support
If you have any questions, require assistance with installation, or need to report a problem, please contact BAZZ customer support. For the most up-to-date contact information, please visit the official BAZZ website or refer to your product packaging.
Online Support: www.bazz.ca


