Introduction
This manual provides essential information for the safe and effective operation, maintenance, and troubleshooting of your RYOBI JS651L1 6.1 Amp Variable Speed Orbital Jigsaw. Please read and understand all instructions before using the tool.
The RYOBI JS651L1 is a versatile power tool designed for cutting various materials, including wood and metal, with precision and control. Its variable speed and orbital action features allow for optimized performance across different applications.
Safety Information
WARNING: Read all safety warnings, instructions, illustrations, and specifications provided with this power tool. Failure to follow all instructions listed below may result in electric shock, fire, and/or serious injury.
- Work Area Safety: Keep work area clean and well lit. Cluttered or dark areas invite accidents. Do not operate power tools in explosive atmospheres, such as in the presence of flammable liquids, gases, or dust.
- Electrical Safety: Power tool plugs must match the outlet. Never modify the plug in any way. Do not expose power tools to rain or wet conditions. Water entering a power tool will increase the risk of electric shock.
- Personal Safety: Always wear eye protection. Use hearing protection when operating power tools. Dress properly. Do not wear loose clothing or jewelry. Keep hair and clothing away from moving parts.
- Tool Use and Care: Do not force the power tool. Use the correct power tool for your application. Disconnect the plug from the power source before making any adjustments, changing accessories, or storing power tools.
- Specific Jigsaw Safety: Secure the workpiece. Never hold the workpiece in your hand or across your leg. Keep hands away from the cutting area. Do not reach underneath the workpiece.
Product Overview
Familiarize yourself with the components and controls of your RYOBI JS651L1 Jigsaw.

Figure 1: The RYOBI JS651L1 Jigsaw, shown new in its clear plastic packaging, accompanied by a black cutting guide and a bright green RYOBI branded carrying bag. This image displays the complete product package.

Figure 2: A detailed view of the jigsaw's side, highlighting the 'SpeedMatch' dial. This dial allows users to select between 'Precision' and 'Cut Speed' settings, with numerical indicators (0-3) for orbital action adjustment, optimizing cuts for different materials and desired finishes.

Figure 3: Underside view of the jigsaw, focusing on the blade clamp mechanism and the sturdy base plate. This perspective is crucial for understanding blade installation and ensuring proper contact with the workpiece.

Figure 4: A close-up of the black cutting guide accessory, featuring clear measurement markings in both inches and centimeters. This guide attaches to the jigsaw to assist in making straight and accurate cuts.
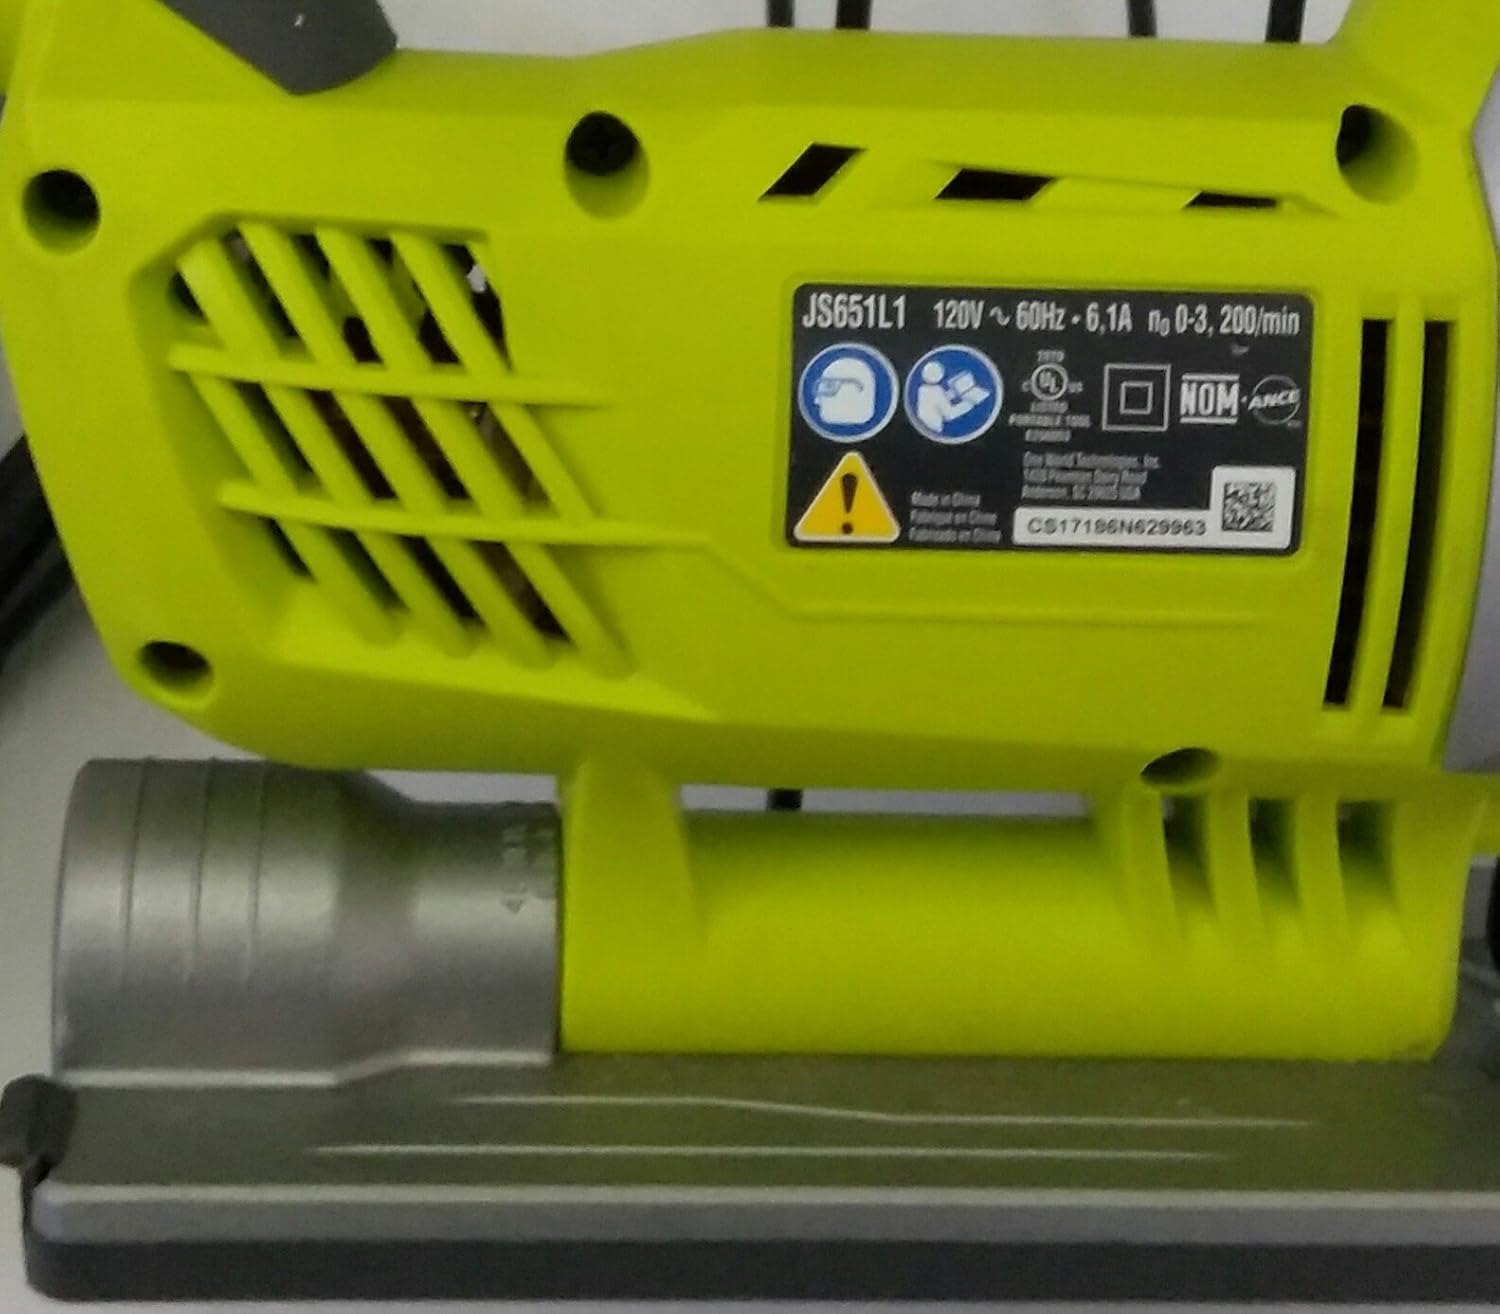
Figure 5: The product label located on the bottom of the jigsaw, clearly displaying the model number JS651L1, electrical ratings (120V ~ 60Hz, 6.1A), and various safety certifications.
Key Components:
- Blade Clamp: Secures the jigsaw blade.
- Base Plate: Provides stability and guides the saw along the workpiece.
- SpeedMatch Dial: Adjusts orbital action for different cutting applications (Precision to Cut Speed).
- Variable Speed Trigger: Controls the cutting speed.
- Power Cord: Connects the tool to an electrical outlet.
- Cutting Guide: (Accessory) Used for making straight cuts.
Setup
1. Blade Installation
- Ensure the tool is unplugged from the power source.
- Locate the blade clamp mechanism (refer to Figure 3).
- Open the blade clamp according to the tool's specific design (usually a lever or screw).
- Insert the shank of the jigsaw blade fully into the clamp, ensuring the teeth face forward.
- Securely close the blade clamp. Gently pull on the blade to confirm it is firmly seated.
2. Attaching the Cutting Guide
- Slide the cutting guide (refer to Figure 4) into the designated slots on the jigsaw's base plate.
- Adjust the guide to the desired cutting width.
- Tighten any locking screws or levers to secure the guide in place.
3. Power Connection
Connect the jigsaw's power cord to a standard 120V AC electrical outlet. Ensure the outlet is properly grounded.
Operating Instructions
1. Selecting Speed and Orbital Action
The SpeedMatch dial (Figure 2) allows you to adjust the orbital action, which affects how aggressively the blade cuts. Higher orbital settings (e.g., 3) provide faster, more aggressive cuts suitable for rough cutting in wood. Lower settings (e.g., 0 or 1) provide finer, slower cuts, ideal for precision work or cutting metal.
- Setting 0 (No Orbital Action): For fine, splinter-free cuts in wood, or for cutting metal and plastics.
- Settings 1-3 (Orbital Action): For faster cutting in wood. Increase the setting for more aggressive cuts.
The variable speed trigger allows you to control the blade speed. Start with a slower speed for initial cuts and increase as needed for optimal cutting performance.
2. Cutting Techniques
- Straight Cuts: Use the cutting guide (if attached) to maintain a straight line. Apply steady, even pressure.
- Curved Cuts: For intricate curves, use a narrow blade and a lower orbital setting. Guide the saw smoothly along the desired line.
- Plunge Cuts: (If applicable to your model and blade type) Consult specific instructions for plunge cutting. Generally, tilt the saw forward, start the blade, and slowly lower the base plate onto the workpiece.
- Material Compatibility: This jigsaw is suitable for cutting wood and metal. Ensure you use the appropriate blade for the material being cut.
Maintenance
1. Cleaning
- Always unplug the tool before cleaning.
- Use a soft brush or compressed air to clear dust and debris from ventilation openings (Figure 5 shows ventilation slots).
- Wipe the exterior with a damp cloth. Do not use harsh chemicals or abrasive cleaners.
2. Blade Replacement
Regularly inspect blades for dullness or damage. Replace dull blades promptly to ensure efficient and safe cutting. Follow the blade installation steps in the Setup section.
3. Cord Inspection
Periodically inspect the power cord for any signs of damage, cuts, or fraying. If damaged, have it repaired by a qualified service technician to prevent electrical hazards.
Troubleshooting
| Problem | Possible Cause | Solution |
|---|---|---|
| Jigsaw does not start | No power supply; Faulty power cord; Trigger lock engaged | Check power outlet and connections; Inspect power cord for damage; Ensure trigger lock is disengaged |
| Poor cut quality / Blade binding | Dull or incorrect blade; Incorrect speed/orbital setting; Forcing the tool | Replace blade or use appropriate blade for material; Adjust SpeedMatch dial and trigger speed; Allow the tool to cut at its own pace |
| Excessive vibration | Loose blade; Damaged blade; Worn internal components | Ensure blade is securely clamped; Replace damaged blade; If problem persists, seek professional service |
| Overheating | Blocked ventilation; Prolonged heavy use | Clear ventilation slots; Allow tool to cool down; Reduce load during operation |
Specifications
- Model: JS651L1
- Brand: RYOBI
- Power Source: Corded Electric
- Voltage: 120V
- Amperage: 6.1 Amp
- Item Weight: 5.5 Pounds
- Product Dimensions: 12.79"L x 3.78"W x 10"H
- Blade Material: High Speed Steel
- Surface Recommendation: Wood and Metal
- Special Feature: Brushless (as listed in product specifications)
- UPC: 033287150304
- Manufacturer: GB Industrial Direct
Warranty Information
This RYOBI JS651L1 Jigsaw comes with a Limited Warranty. For specific terms, conditions, and duration of the warranty, please refer to the warranty card included with your product or visit the official RYOBI website. Keep your proof of purchase for warranty claims.
Support
For technical assistance, replacement parts, or service inquiries, please contact RYOBI customer service. Contact information can typically be found on the RYOBI official website or in the documentation included with your product.
Online Resources: Visit the official RYOBI website for product registration, FAQs, and additional support materials.