
1. Introduction
This manual provides detailed instructions for the safe installation, operation, and maintenance of your TRANS GLOBE Lighting 6540 WB Indoor Perkins 18" Semiflush light fixture. Please read all instructions carefully before beginning installation and retain this manual for future reference. Proper installation and adherence to safety guidelines are crucial for optimal performance and user safety.
2. Safety Information
WARNING: Risk of electric shock. Disconnect power at the circuit breaker or fuse box before installation or servicing. Consult a qualified electrician if you are unsure about wiring procedures.
- Ensure all electrical connections comply with local codes and ordinances, as well as the National Electric Code (NEC).
- This fixture is intended for indoor use only. Do not expose to water or moisture.
- Use only the specified bulb type and wattage. Exceeding the maximum wattage may cause overheating and damage to the fixture.
- Handle glass components with care to prevent breakage.
- Do not install this fixture on a surface that can support less than 8 pounds.
3. Package Contents
Carefully unpack your new light fixture and lay out all parts on a clean, flat surface. Ensure all components listed below are present before discarding packaging materials.
- Fixture Body (with wiring)
- Mounting Bracket
- Mounting Screws
- Wire Nuts
- Glass Shade
- Finial/Decorative Cap
- Instruction Manual
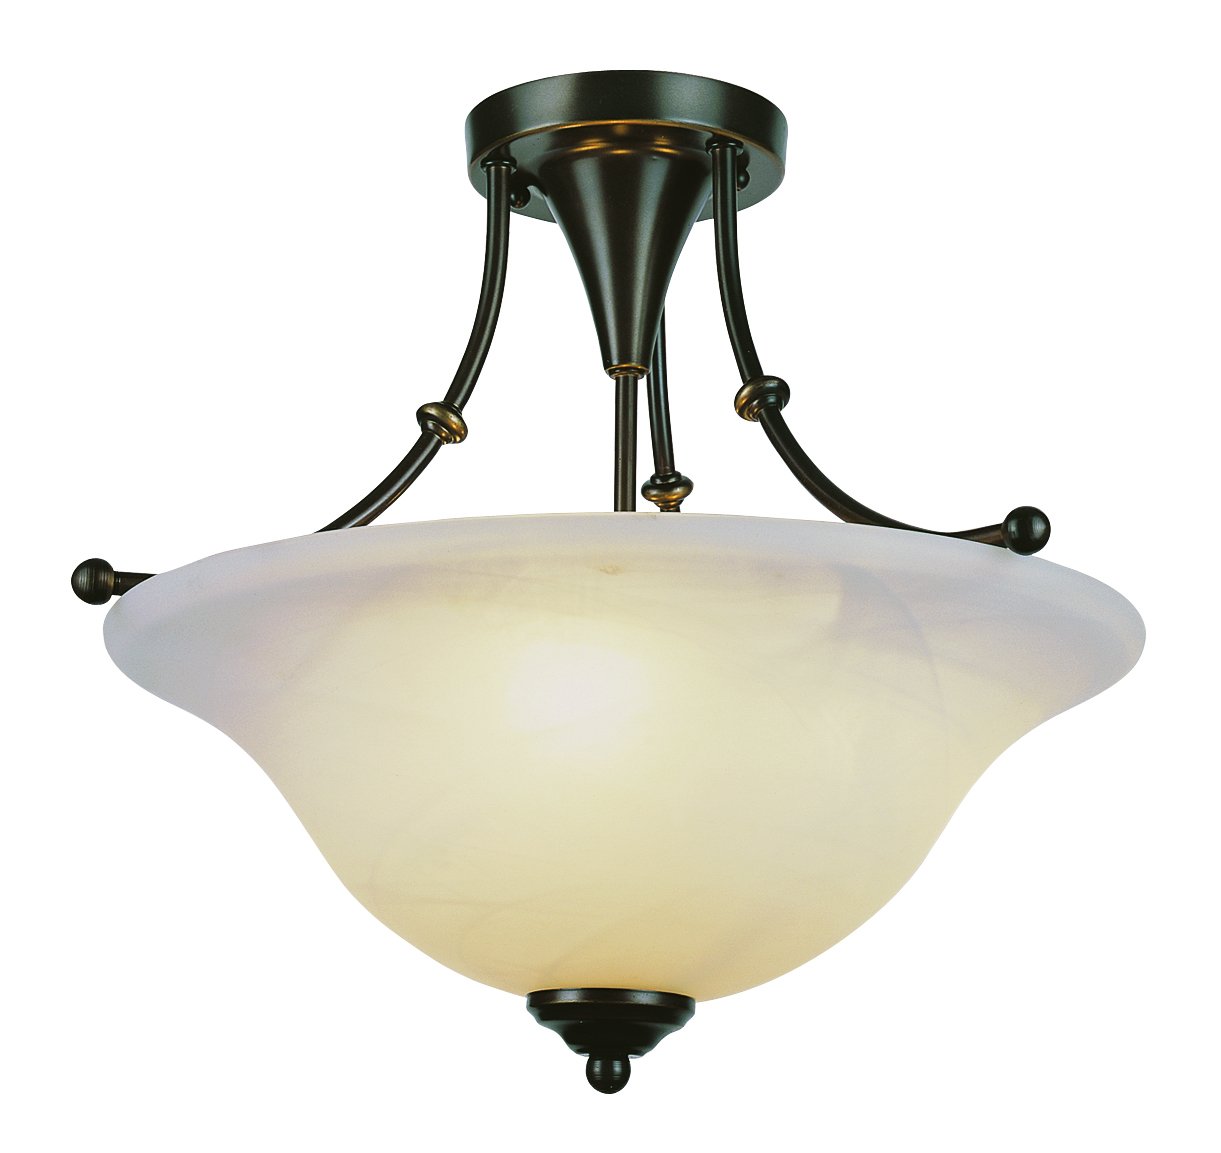
Figure 1: TRANS GLOBE Lighting 6540 WB Indoor Perkins 18" Semiflush Light Fixture. This image shows the complete assembled light fixture, featuring its weathered bronze finish and marbleized glass shade.
4. Setup and Installation
Before installation, ensure the power is turned off at the circuit breaker. This fixture is designed for flush mount installation on a ceiling.
4.1 Pre-Installation
- Turn off the main power supply at the circuit breaker or fuse box to avoid electrical shock.
- Remove the existing fixture from the ceiling junction box, if applicable.
- Ensure the junction box is securely mounted and capable of supporting the fixture's weight (approximately 8 pounds).
4.2 Mounting the Fixture
- Attach the mounting bracket to the ceiling junction box using the provided mounting screws. Ensure the bracket is firmly secured.
- Carefully pull the electrical wires from the junction box through the center hole of the mounting bracket.
4.3 Wiring Connections
- Connect the fixture's black wire to the house's black (hot) wire using a wire nut.
- Connect the fixture's white wire to the house's white (neutral) wire using a wire nut.
- Connect the fixture's ground wire (bare copper or green) to the house's ground wire and the mounting bracket's ground screw.
- Ensure all wire nuts are securely tightened and no bare wire is exposed.
- Carefully tuck all wires into the junction box.
4.4 Securing the Fixture and Shade
- Align the fixture body with the mounting bracket and secure it using the provided screws or decorative nuts.
- Install the required light bulbs (not included) into the sockets. This fixture uses E26 base, A19 shape incandescent or compact fluorescent bulbs, up to 100 watts per socket.
- Carefully place the marbleized glass shade onto the fixture body, ensuring it is properly seated.
- Secure the glass shade with the finial or decorative cap, tightening gently to prevent damage.

Figure 2: Perkins Collection Lighting Features. This image highlights design elements and features of the Perkins Collection, which includes the 6540 WB fixture.
5. Operating Instructions
Once installation is complete and verified, restore power at the circuit breaker.
- Power On/Off: Operate the light fixture using the standard wall switch connected to the circuit.
- Dimming: This fixture is dimmable. If connected to a compatible dimmer switch (sold separately), you can adjust the light intensity. Ensure you use dimmable bulbs if utilizing this feature.
6. Maintenance
Regular maintenance ensures the longevity and appearance of your light fixture.
6.1 Cleaning
- Always disconnect power before cleaning.
- Wipe the fixture with a soft, dry cloth.
- For the glass shade, use a mild glass cleaner applied to a cloth, then wipe the shade. Avoid spraying cleaner directly onto the fixture.
- Do not use abrasive cleaners or polishes, as they may damage the finish.
6.2 Bulb Replacement
- Turn off power at the circuit breaker and allow bulbs to cool completely before replacing.
- Carefully remove the finial and glass shade.
- Unscrew the old bulb and screw in a new E26 base, A19 shape bulb of the correct wattage (max 100W).
- Reattach the glass shade and finial.
7. Troubleshooting
If you experience issues with your light fixture, refer to the following common problems and solutions:
| Problem | Possible Cause | Solution |
|---|---|---|
| Light does not turn on. | No power to the fixture. | Check circuit breaker or fuse. Ensure wall switch is on. |
| Loose wire connections. | Turn off power, check all wire connections. | |
| Faulty bulb. | Replace bulb with a new one. | |
| Light flickers. | Loose bulb or wiring. | Tighten bulb. Turn off power and check wire connections. |
| Incompatible dimmer switch or bulb. | Ensure dimmer and bulbs are compatible with each other and the fixture. | |
| Glass shade is loose. | Finial not tightened. | Gently tighten the finial to secure the shade. |
8. Specifications
| Brand | TRANS GLOBE |
| Model Number | 6540 WB |
| Product Dimensions | 18"L x 18"W x 15.25"H |
| Item Weight | 8 Pounds |
| Color | Weathered Bronze |
| Material | Metal, Glass |
| Shade Material | Marbleized Glass |
| Style | Transitional / Contemporary |
| Light Fixture Form | Close to Ceiling |
| Installation Type | Flush Mount |
| Indoor/Outdoor Usage | Indoor |
| Power Source | Corded Electric |
| Voltage | 120 Volts |
| Number of Light Sources | 3 |
| Light Source Type | Incandescent, Compact Fluorescent |
| Bulb Base | E26 |
| Bulb Shape | A19 |
| Max Wattage | 100 Watts per socket |
| Dimmable | Yes |
| Assembly Required | No (minor assembly for installation) |
| Manufacturer | TransGlobe Lighting |
| UPC | 736916242301 |
9. Warranty and Support
9.1 Warranty Information
This TRANS GLOBE Lighting fixture comes with a 1-year limited warranty from the date of purchase. This warranty covers defects in materials and workmanship under normal use. It does not cover damage resulting from improper installation, accident, misuse, abuse, or unauthorized modifications. For warranty claims, please retain your proof of purchase.
9.2 Customer Support
For technical assistance, missing parts, or warranty inquiries, please contact TransGlobe Lighting customer service. Refer to the manufacturer's website or product packaging for the most current contact information.