La Crosse Technology 616-146-INT
La Crosse Technology Color Projection Alarm Clock
Model: 616-146
Brand: La Crosse Technology
Introduction
This manual provides comprehensive instructions for the setup, operation, and maintenance of your La Crosse Technology Color Projection Alarm Clock (Model 616-146). This device offers accurate atomic time and date, indoor and outdoor temperature display, and a unique projection feature for time and/or outdoor temperature onto your ceiling or wall. It also includes a convenient USB charging port.

Figure 1: Front view of the La Crosse Technology Color Projection Alarm Clock.
Setup and Initial Configuration
1. Powering the Unit
- Connect the provided 5 Volt AC Adapter to the alarm clock and a power outlet.
- For battery backup, install 4 AAA batteries (not included) into the battery compartment, ensuring correct polarity. Use fresh, name-brand alkaline batteries dated at least 7 years in advance, testing voltage to ensure at least 1.48V.
2. Outdoor Sensor Setup
- Install batteries into the wireless outdoor temperature sensor first, following the diagrams in the battery compartment.
- Place the outdoor sensor and the display unit within 5 feet of each other for 15 minutes to establish a strong connection. Do not press any buttons during this time. An outdoor temperature reading should appear within the first minute.
- Mount the TX141 wireless weather-resistant transmitting sensor on a North-facing wall or in a shaded area, preferably under an eave or deck rail. Mount in a vertical position for proper moisture drainage. Avoid direct sunlight or radiating heat sources for accurate readings.
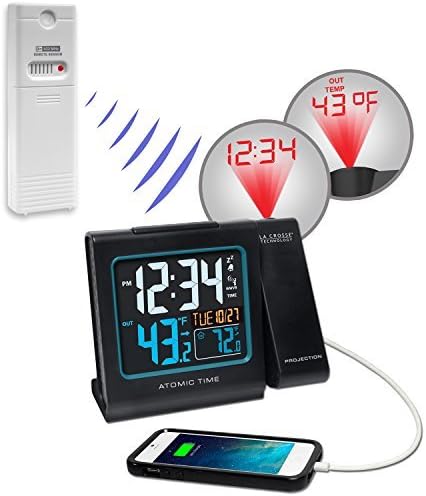
Figure 2: Alarm clock with outdoor sensor and USB charging capability.
3. Initial Time and Date Setting
The clock automatically sets time via WWVB atomic time signal. If manual setting is required or preferred, follow these steps:
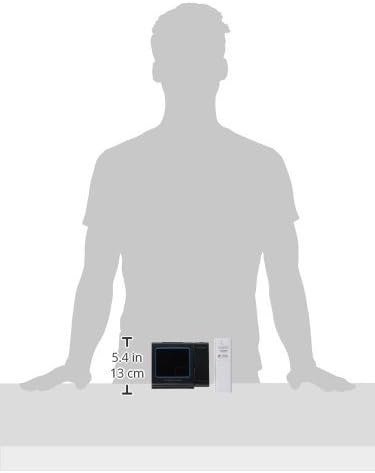
Figure 3: Rear view of the alarm clock with setting buttons.
- WWVB ON/OFF: Hold the SET/°F/°C button for 5 seconds. "WWVB" and "ON" will flash. Press +/TEMP or -/TIME to turn OFF if atomic time reception is not desired. Confirm with SET/°F/°C.
- TIME ZONE: "EST" will flash. Press +/TEMP or -/TIME to select your time zone (AST, EST, CST, MST, PST, AKT, HAT). Confirm with SET/°F/°C.
- DAYLIGHT SAVING TIME (DST): "DST" and "ON" will flash. Press +/TEMP or -/TIME to turn OFF if DST is not observed. Confirm with SET/°F/°C.
- 12/24 HOUR TIME: "12H" will flash. Press +/TEMP or -/TIME to select "24H". Confirm with SET/°F/°C.
- HOUR: The hour will flash. Press +/TEMP or -/TIME to set the correct hour. Confirm with SET/°F/°C.
- MINUTES: The minutes will flash. Press +/TEMP or -/TIME to set the correct minutes. Confirm with SET/°F/°C.
- YEAR: The year will flash. Press +/TEMP or -/TIME to set the correct year. Confirm with SET/°F/°C.
- MONTH: The month will flash. Press +/TEMP or -/TIME to set the correct month. Confirm with SET/°F/°C.
- DATE: The date will flash. Press +/TEMP or -/TIME to set the correct date. Confirm with SET/°F/°C to exit the program menu.
- The Day of the Week will set automatically after the year, month, and date are configured.
- If no buttons are pressed for 20 seconds, the alarm will return to live display, saving any adjustments made.
Operating Instructions
1. Display and Backlight
- The color LCD displays time, indoor temperature, outdoor temperature, and date.
- The display features a nighttime backlight for improved visibility in low light conditions.
- Adjust display brightness using the appropriate button (refer to device for specific button, often labeled "DIM" or similar).
2. Projection Feature
- The projector can display time and/or outdoor temperature onto your ceiling or wall.
- The projection arm has 90-degree rotation for optimal positioning.
- Automatic focus ensures clear projection.

Figure 4: Projection of time and outdoor temperature.
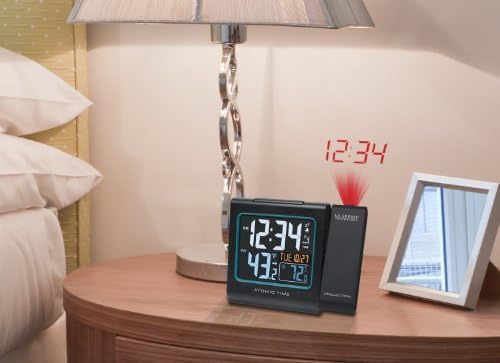
Figure 5: Alarm clock projecting time in a bedroom setting.
3. USB Charging Port
- A USB port is integrated for convenient charging of compatible devices.
Maintenance
To ensure optimal performance and longevity of your alarm clock:
- Clean the display and casing with a soft, damp cloth. Avoid abrasive cleaners or solvents.
- Periodically check the outdoor sensor for debris or obstructions that might affect readings.
- Replace batteries in both the main unit (for backup) and the outdoor sensor annually, or when low battery indicators appear.
Troubleshooting
Outdoor Temperature Shows Dashes or Not Syncing
- Lost Connection: Dashes indicate a lost connection between the display and the outdoor sensor. The station will display the last recorded data for 10 minutes before showing dashes.
- Batteries: Fresh batteries are the most common solution. Ensure batteries are new and properly installed.
- Channels: Confirm that the frequency on the sensor and the display are the same (this display is sold with a 433MHz version).
- Distance/Resistance: Avoid more than one wall, window, or tree between the display and sensor. UV-coated windows or stucco walls can reflect/absorb the signal.
- Repositioning: Try repositioning your sensor or display for better reception. Orient the display 90 degrees towards the thermo sensor for improved signal.
Restart Procedure (for connection issues)
- Bring Sensor In: For best results, bring the outdoor sensor indoors and place it 5 feet from the display unit.
- Remove Power: Remove batteries from the sensor and batteries (and/or AC cord) from the display.
- Discharge Electricity: With power removed, press any button on the display at least 20 times to clear all memory. Verify the display is blank.
- Unpowered for 15 Minutes: Allow both units to remain without power for at least 15 minutes. Failure to do so can result in connection issues or missing segments on the display.
- Install Batteries: Place fresh batteries into the outdoor sensor first, ensuring correct installation. Then, install batteries (or AC cord) into the display.
- Connection: Allow the sensor and display to remain 5 feet apart for 15 minutes to establish a strong connection. Do not press buttons during this time.
Specifications
| Feature | Detail |
|---|---|
| Brand | La Crosse Technology |
| Model Number | 616-146-INT |
| Color | Black |
| Display Type | Digital |
| Power Source | Corded Electric |
| Battery Requirement | 4 AAA batteries (for backup) |
| Product Dimensions | 5.23"W x 4.33"H (7.09" L x 3.62" W x 2.87" H) |
| Item Weight | 12.8 ounces |
| Indoor/Outdoor Usage | Indoor (main unit), Outdoor (sensor) |
| Operation Mode | Atomic |
| Special Feature | Alarm, Projection, USB Port |
Warranty and Support
Warranty Information
This product comes with a Limited Warranty. Please refer to the warranty description for full details: "1 limited warranty."
Additional Support
For further assistance, you may refer to the official user manual:
Additional documents are also available:
Related Documents - 616-146-INT
 |
La Crosse 616-146v3 Atomic Projection Alarm Clock with Indoor/Outdoor Temperature User Manual Comprehensive user manual for the La Crosse 616-146v3 Atomic Projection Alarm Clock, detailing setup, atomic time synchronization, indoor and outdoor temperature monitoring, alarm functions, projection settings, backlight control, USB charging, troubleshooting, warranty, and specifications. |
 |
La Crosse Technology 616-146 Atomic Projection Alarm Clock User Manual Comprehensive user manual for the La Crosse Technology 616-146 Atomic Projection Alarm Clock, detailing setup, features, operation, specifications, and maintenance for indoor/outdoor temperature monitoring and time projection. |
 |
La Crosse Technology 616-146 Atomic Projection Alarm with Indoor and Outdoor Temperature Instruction Manual User manual for the La Crosse Technology 616-146 Atomic Projection Alarm clock. Provides detailed instructions on setup, features, operation, time setting, alarm functions, projection, USB charging, temperature monitoring, care, specifications, and warranty. |
 |
La Crosse Technology Atomic Projection Clock Setup Guide A comprehensive setup guide for the La Crosse Technology Atomic Projection Clock with Indoor/Outdoor Temperature, model numbers 616-1410v2 and 616-12667v2. Learn how to power up, set atomic time, adjust settings, manage backlight and auto-dim, customize display, set alarms, and troubleshoot outdoor temperature readings. |
 |
La Crosse Technology 616-146v4 Atomic Projection Alarm Clock Setup Guide Comprehensive setup guide for the La Crosse Technology 616-146v4 Atomic Projection Alarm Clock, detailing power-up, time setting, alarm functions, and troubleshooting for indoor/outdoor temperature monitoring. |
 |
La Crosse Technology Atomic Projection Clock Setup Guide Comprehensive setup guide for the La Crosse Technology Atomic Projection Clock (Models 616-1410Bv2/616-41667v2), covering power-up, atomic time synchronization, settings, backlight, auto-dim, custom display, projection, alarm functions, and troubleshooting. Includes specifications and warranty information. |