Introduction
Thank you for purchasing the Lorus Clocks LCD Bedside Alarm Clock LHL027S. This digital alarm clock features an LCD display, a color-changing bezel, an ascending beep alarm, snooze function, and a calendar display. This manual provides detailed instructions for setup, operation, and maintenance to ensure optimal performance of your device.
Product Overview and Features
The Lorus LHL027S is designed for convenience and functionality, offering several key features:
- LCD Display: Clear digital time and date display.
- Color-Changing Bezel: The light surrounding the face changes color when the alarm sounds. Seven selectable light colors are available, including red, green, and blue.
- Ascending Beep Alarm: Alarm sound gradually increases in volume.
- Auto Stop Function: Alarm automatically stops after a set duration.
- Snooze Function: Temporarily silences the alarm for a short period.
- Calendar Display: Shows the current date.
- Battery Powered: Operates on 3 AA batteries (not included).
- Compact Design: Dimensions of approximately 9 x 10.1 x 8.2 cm (3.98"W x 3.23"H).

Front view of the Lorus LHL027S alarm clock displaying time and date with a green backlight.
Setup
1. Battery Installation
- Locate the battery compartment on the back of the clock.
- Open the battery compartment cover.
- Insert three (3) AA batteries, ensuring correct polarity (+ and -) as indicated inside the compartment. Note: Batteries are not included.
- Close the battery compartment cover securely.

Rear view of the Lorus LHL027S alarm clock, highlighting the battery compartment and control buttons for setup.
2. Setting Time and Date
Refer to the control buttons on the back of the clock (SET, +, -).
- Press and hold the SET button until the time display starts flashing.
- Use the + or - buttons to adjust the hour.
- Press SET again to move to minutes, then use + or - to adjust.
- Continue pressing SET to cycle through year, month, and day settings, adjusting each with + or -.
- Press SET one last time to confirm all settings and exit the setting mode.
3. Setting the Alarm
- From normal time display, press the SET button once briefly to enter alarm setting mode. The alarm time will flash.
- Use the + or - buttons to adjust the alarm hour.
- Press SET again to move to alarm minutes, then use + or - to adjust.
- Press SET one last time to confirm the alarm time.
- To activate/deactivate the alarm, press the SET button briefly when the alarm time is displayed, or use a dedicated alarm ON/OFF button if present. An alarm icon will appear on the display when activated.
4. Selecting Bezel Color
The clock features a color-changing bezel. To select a static color or cycle through colors:
- Locate the COLOUR SELECT button on the back of the clock.
- Press the COLOUR SELECT button repeatedly to cycle through the seven available colors (red, green, blue, etc.) or to set it to a color-changing mode.
- Release the button when your desired color or mode is displayed.

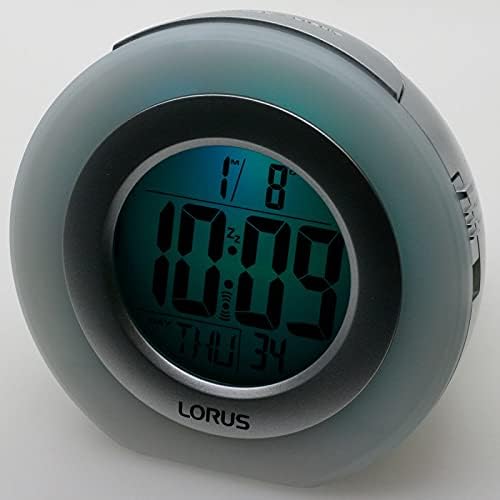
The clock displaying time with a green bezel light (left) and a blue bezel light (right).
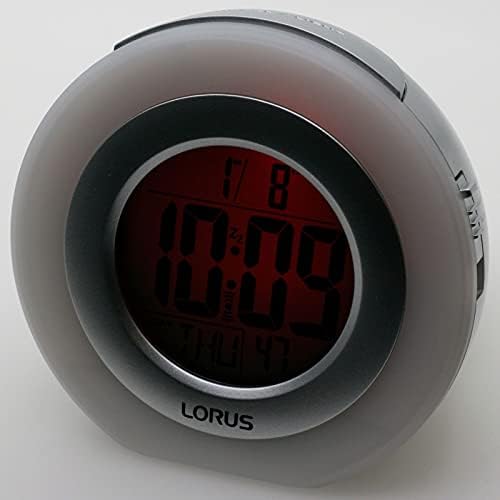

The clock displaying time with a red bezel light (left) and a darker blue bezel light (right).

The clock displaying time with a purple bezel light.
Operating Instructions
1. Time and Date Display
The current time and date are continuously displayed on the LCD screen. The format typically includes hour, minute, day of the week, and date.
2. Alarm Function
- When the alarm sounds, the bezel light will change colors.
- To silence the alarm temporarily, press the SNOOZE/LIGHT button located on the top of the clock. The alarm will sound again after approximately 5-10 minutes (duration may vary).
- To turn off the alarm completely, press any other button (e.g., SET, +, -, or the dedicated alarm ON/OFF button if present). The alarm will reset for the next day.
- The alarm features an auto-stop function, meaning it will cease sounding after a certain period if not manually turned off or snoozed.
3. Backlight / Snooze Button
Press the large button on the top of the clock (labeled SNOOZE/LIGHT) to temporarily illuminate the display or activate the snooze function when the alarm is sounding.
Maintenance
1. Battery Replacement
When the display dims or the clock functions become erratic, it is time to replace the batteries. Follow the battery installation steps outlined in the "Setup" section. Always replace all three AA batteries at the same time with new ones.
2. Cleaning
To clean the clock, use a soft, dry cloth. Do not use abrasive cleaners, solvents, or chemical sprays, as these can damage the casing or display. Avoid getting moisture into any openings.
3. Storage
If the clock will not be used for an extended period, remove the batteries to prevent leakage and potential damage to the device.
Troubleshooting
- Display is blank or dim:
Check if batteries are installed correctly. Replace with fresh AA batteries. Ensure battery compartment cover is securely closed.
- Alarm does not sound:
Verify that the alarm is activated (alarm icon visible on display). Ensure the alarm time is set correctly. Check battery level.
- Incorrect time or date:
Follow the "Setting Time and Date" instructions to reset the time and date. If the issue persists after battery replacement, perform a reset.
- Buttons are unresponsive:
Try removing and reinserting the batteries. If a RESET button (often a small recessed button requiring a pin) is present on the back, press it once to reset the unit to factory defaults. You will need to re-enter time and alarm settings.
Specifications
| Brand | Lorus |
| Model Number | LHL027S |
| Display Type | Digital LCD |
| Power Source | Battery Powered (3 x AA batteries, not included) |
| Special Features | Alarm, Snooze, Calendar, Color-Changing Bezel Light |
| Product Dimensions | 3.98"W x 3.23"H (approximately 9 x 10.1 x 8.2 cm) |
| Material | Plastic (Acrylonitrile Butadiene Styrene frame) |
| Item Weight | 7.7 ounces |
| Indoor/Outdoor Usage | Indoor |
Warranty and Support
This Lorus Clocks product is covered by a manufacturer's warranty. Please refer to the warranty information provided with your purchase for specific terms and conditions. For technical support or service inquiries, please contact your retailer or the official Lorus customer service channels. Specific contact details are typically found on the product packaging or the manufacturer's official website.


