1. Introduction
This manual provides essential instructions for the safe and efficient operation, maintenance, and care of your Generic Commercial Food Slicer, Model B008U91HHI. This appliance is designed for commercial use to slice various food items such as meat, cheese, and deli products. Please read this manual thoroughly before initial use and retain it for future reference.
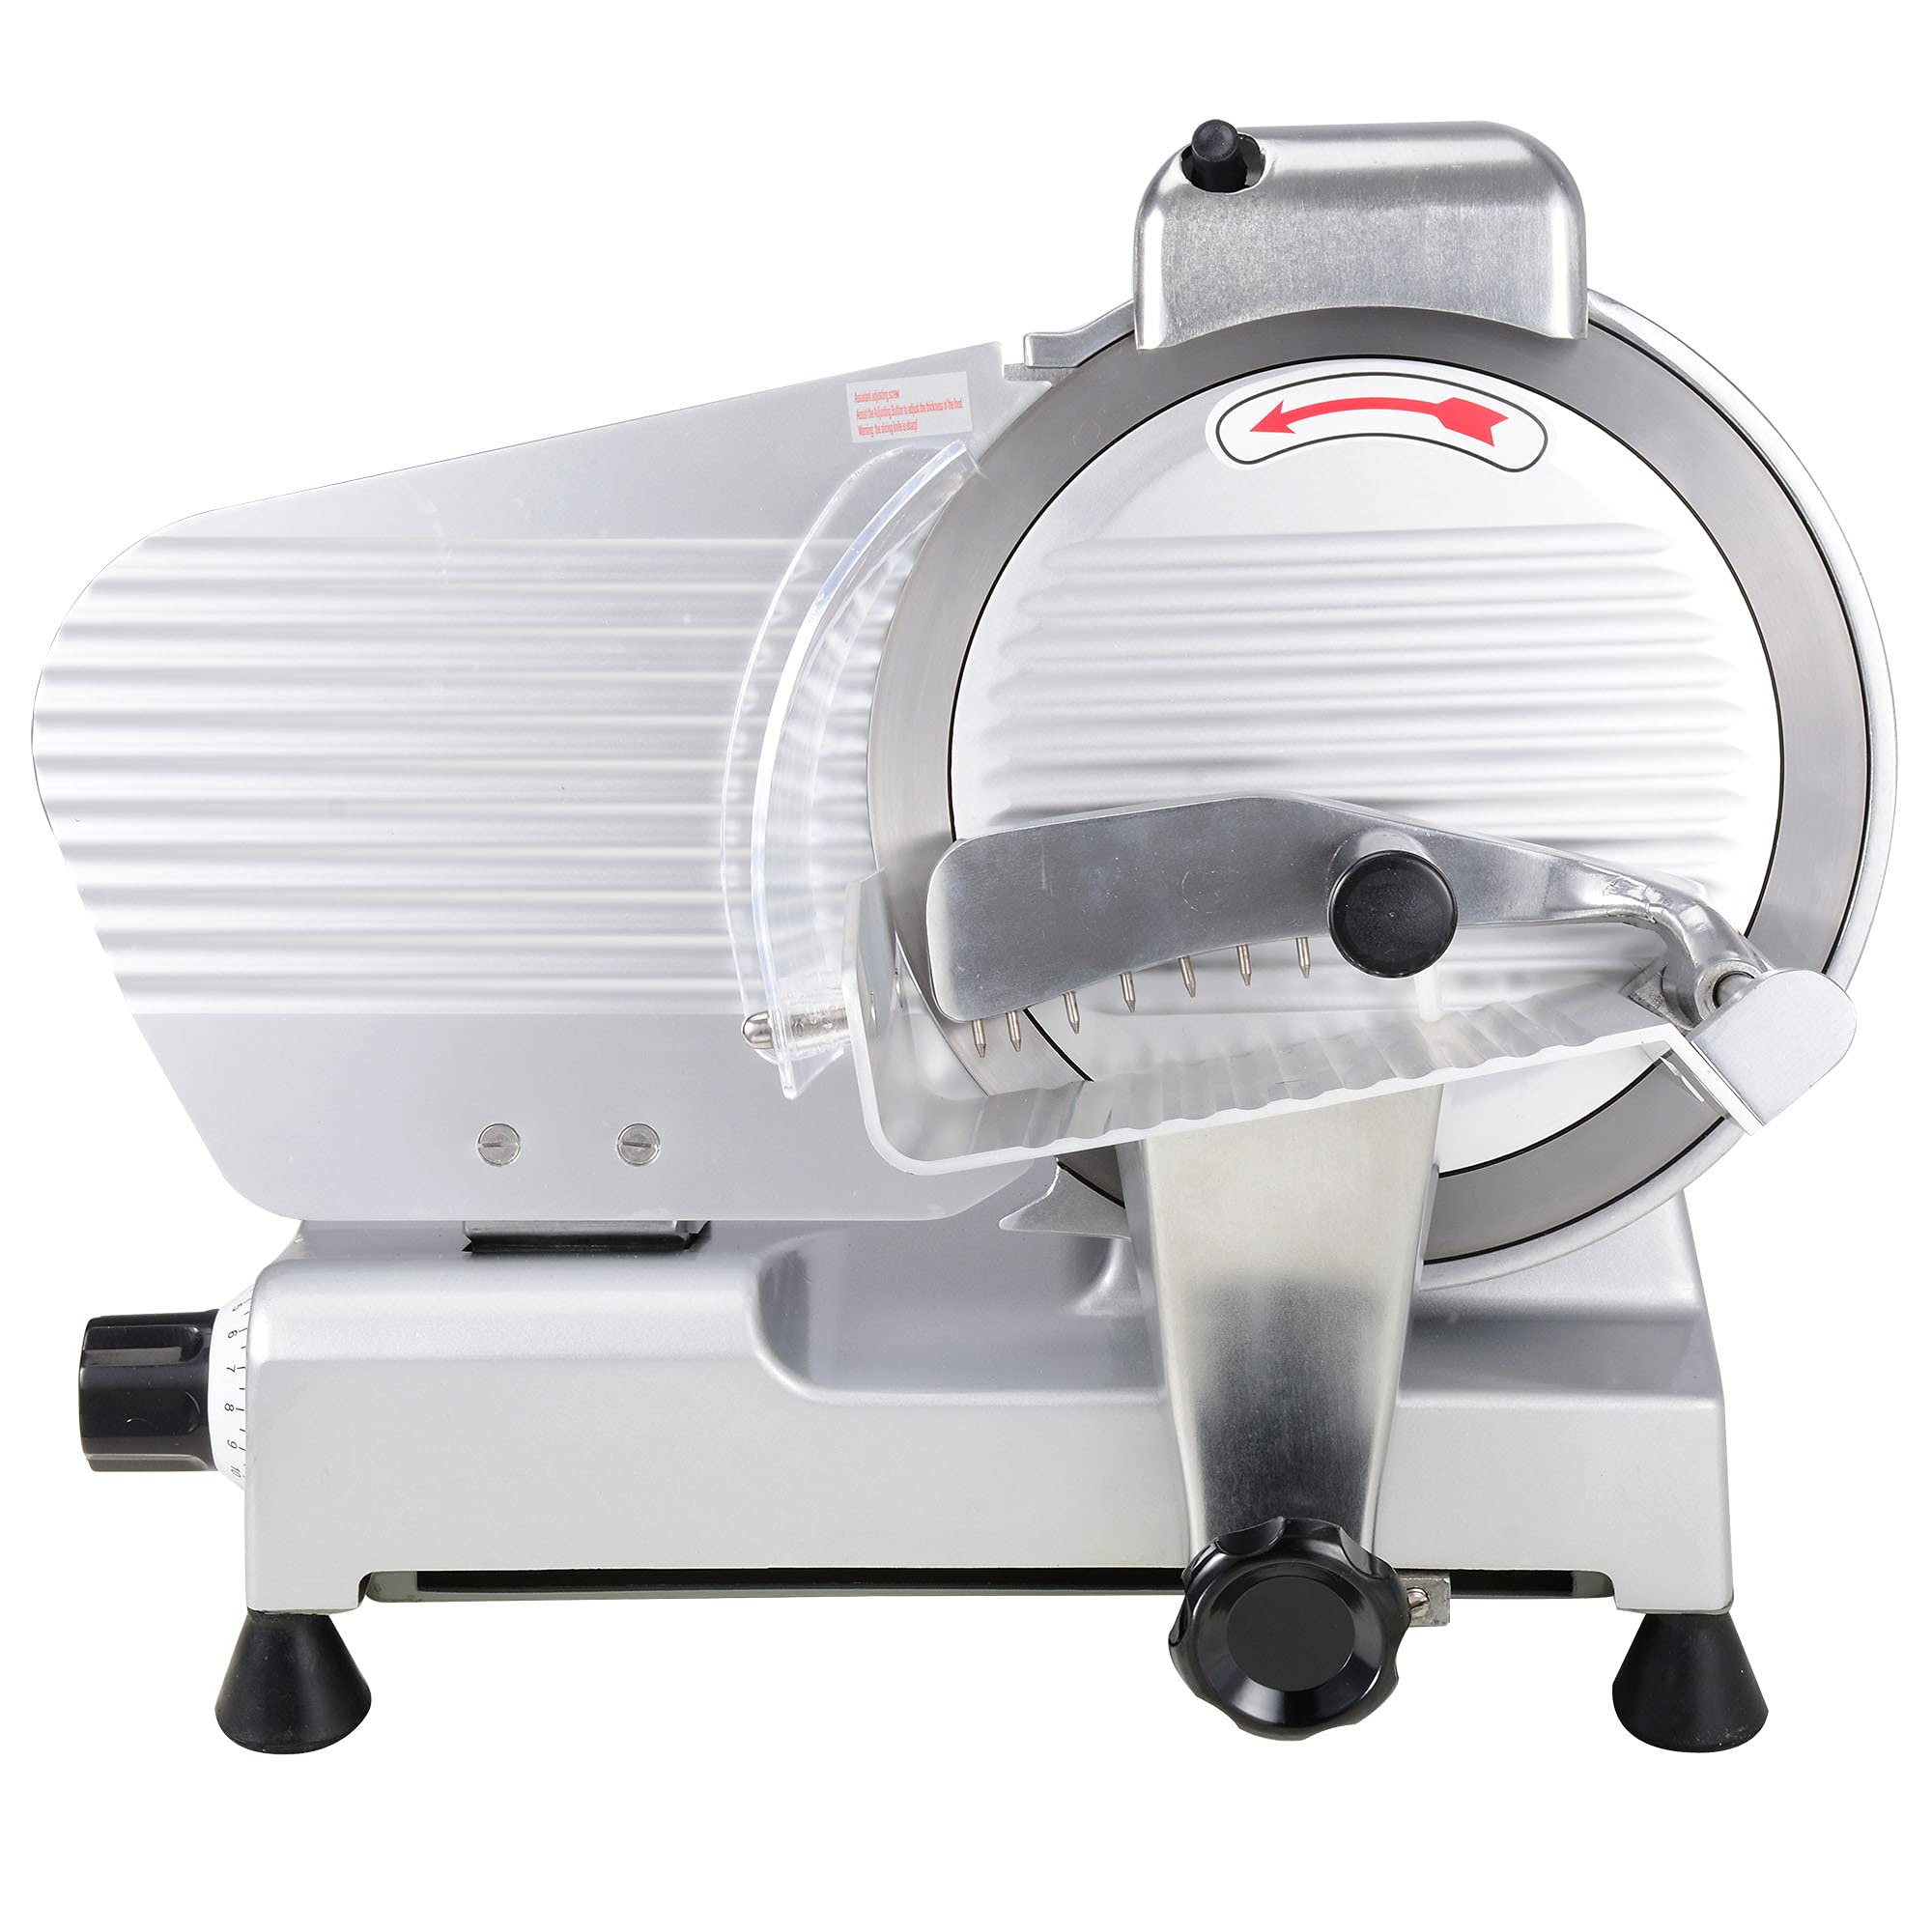
Figure 1: Front view of the Commercial Food Slicer.
2. Safety Instructions
- Always ensure the slicer is placed on a stable, level surface before operation.
- Keep hands and fingers away from the blade during operation. The blade is extremely sharp.
- Unplug the appliance from the power outlet before cleaning, maintenance, or when not in use.
- Do not operate the slicer with a damaged cord or plug, or if the appliance malfunctions or has been damaged in any manner.
- Ensure all safety guards and covers are properly installed before operating the slicer.
- Use the food pusher to guide food, never your bare hands.
- This appliance is not intended for use by persons with reduced physical, sensory, or mental capabilities, or lack of experience and knowledge, unless they have been given supervision or instruction concerning use of the appliance by a person responsible for their safety.

Figure 2: Safety features including the ON/OFF switch with waterproof cover, blade with plastic cover, and non-slip rubber feet.
3. Setup
- Unpacking: Carefully remove the slicer from its packaging. Inspect for any damage. Retain packaging for future transport or storage.
- Placement: Position the slicer on a clean, dry, and stable countertop. Ensure there is adequate space around the unit for ventilation and safe operation. The non-slip rubber feet provide stability.
- Power Connection: Connect the power cord to a grounded 110V electrical outlet.
- Initial Cleaning: Before first use, clean all parts that will come into contact with food according to the cleaning instructions in Section 5.
4. Operating Instructions
4.1 Powering On/Off
- To turn on the slicer, press the green 'I' button on the ON/OFF switch.
- To turn off the slicer, press the red 'O' button.
4.2 Adjusting Slice Thickness
The slicer features a numerical scale knob for precise thickness adjustment, ranging from 0 to 5/8 inches (0 to 15 mm). Rotate the knob to achieve your desired slice thickness. The adjustable plate moves back and forth to set the thickness.

Figure 3: Numerical scale knob for precise thickness adjustment.
4.3 Loading and Slicing Food
- Place the food item (e.g., meat, cheese, bread, vegetables) onto the sliding carriage.
- Secure the food with the stainless steel fixed device and its steel nails to prevent movement during slicing.
- Use the moving handle and the fixed device handle to push the food towards the rotating blade with minimal effort.
- The sliced food will exit behind the machine, sliding out quickly.
- For frozen meat, thaw at room temperature for 15 minutes before slicing. Soft foods should be frozen before cutting to achieve better slices.

Figure 4: The slicer is suitable for various foods including vegetables, bacon, chilled meat, and bread.
5. Maintenance
5.1 Cleaning
Regular cleaning is essential for hygiene and optimal performance. The slicer is designed for easy cleaning and maintenance.
- Disconnect Power: Always unplug the slicer before cleaning.
- Disassembly: The slicer is easy to disassemble for thorough cleaning. Remove the blade cover and other removable parts.
- Wipe Down: Use a damp cloth and mild detergent to clean the blade and all surfaces that come into contact with food. The stainless steel baffle plate and transparent plastic plate help prevent food from falling off and are easy to clean.
- Rinse and Dry: Rinse with clean water and dry thoroughly with a soft cloth to prevent water spots and rust.
- Reassembly: Reassemble all parts securely after cleaning.

Figure 5: Details of the power switch, heat output holes, and integrated sharpener.
5.2 Blade Sharpening
The slicer features sharpening control buttons for controlling the whetstones to sharpen both sides of the blade easily, ensuring the blade remains sharp for efficient slicing.
- Ensure the slicer is unplugged.
- Locate the built-in sharpener mechanism.
- Follow the specific instructions for engaging the whetstones and sharpening the blade. Typically, this involves pressing the sharpening control buttons to bring the whetstones into contact with the blade while it rotates (refer to safety guidelines for powered sharpening).
- Sharpen the front side of the blade first, then the back side.

Figure 6: Close-up of the blade and sharpening mechanism.
6. Troubleshooting
- Slicer not turning on: Check if the power cord is securely plugged into a working outlet. Ensure the ON/OFF switch is pressed to the 'I' position.
- Blade slows down or stops: This may occur if too much pressure is applied to the food or if the food is too hard/frozen. Reduce pressure or ensure food is adequately thawed.
- Uneven slices: Verify that the food is securely held by the fixed device and that the thickness adjustment knob is set correctly.
- Excessive noise: Inspect the blade and motor area for any obstructions or loose parts. If the noise persists, discontinue use and contact support.
7. Specifications
| Feature | Specification |
|---|---|
| Brand | Generic |
| Product Dimensions | 16.56"L x 15.38"W x 18.5"H |
| Material | Alloy Steel, Plastic, Rubber, Stainless Steel |
| Color | Silver |
| Special Feature | Grip Handle |
| Recommended Uses | Meat |
| Product Care Instructions | Dishwasher Safe (for removable parts) |
| Blade Material | Stainless Steel |
| Blade Shape | Round |
| Operation Mode | Automatic |
| Item Weight | 50 pounds |
| Model Number | B008U91HHI |
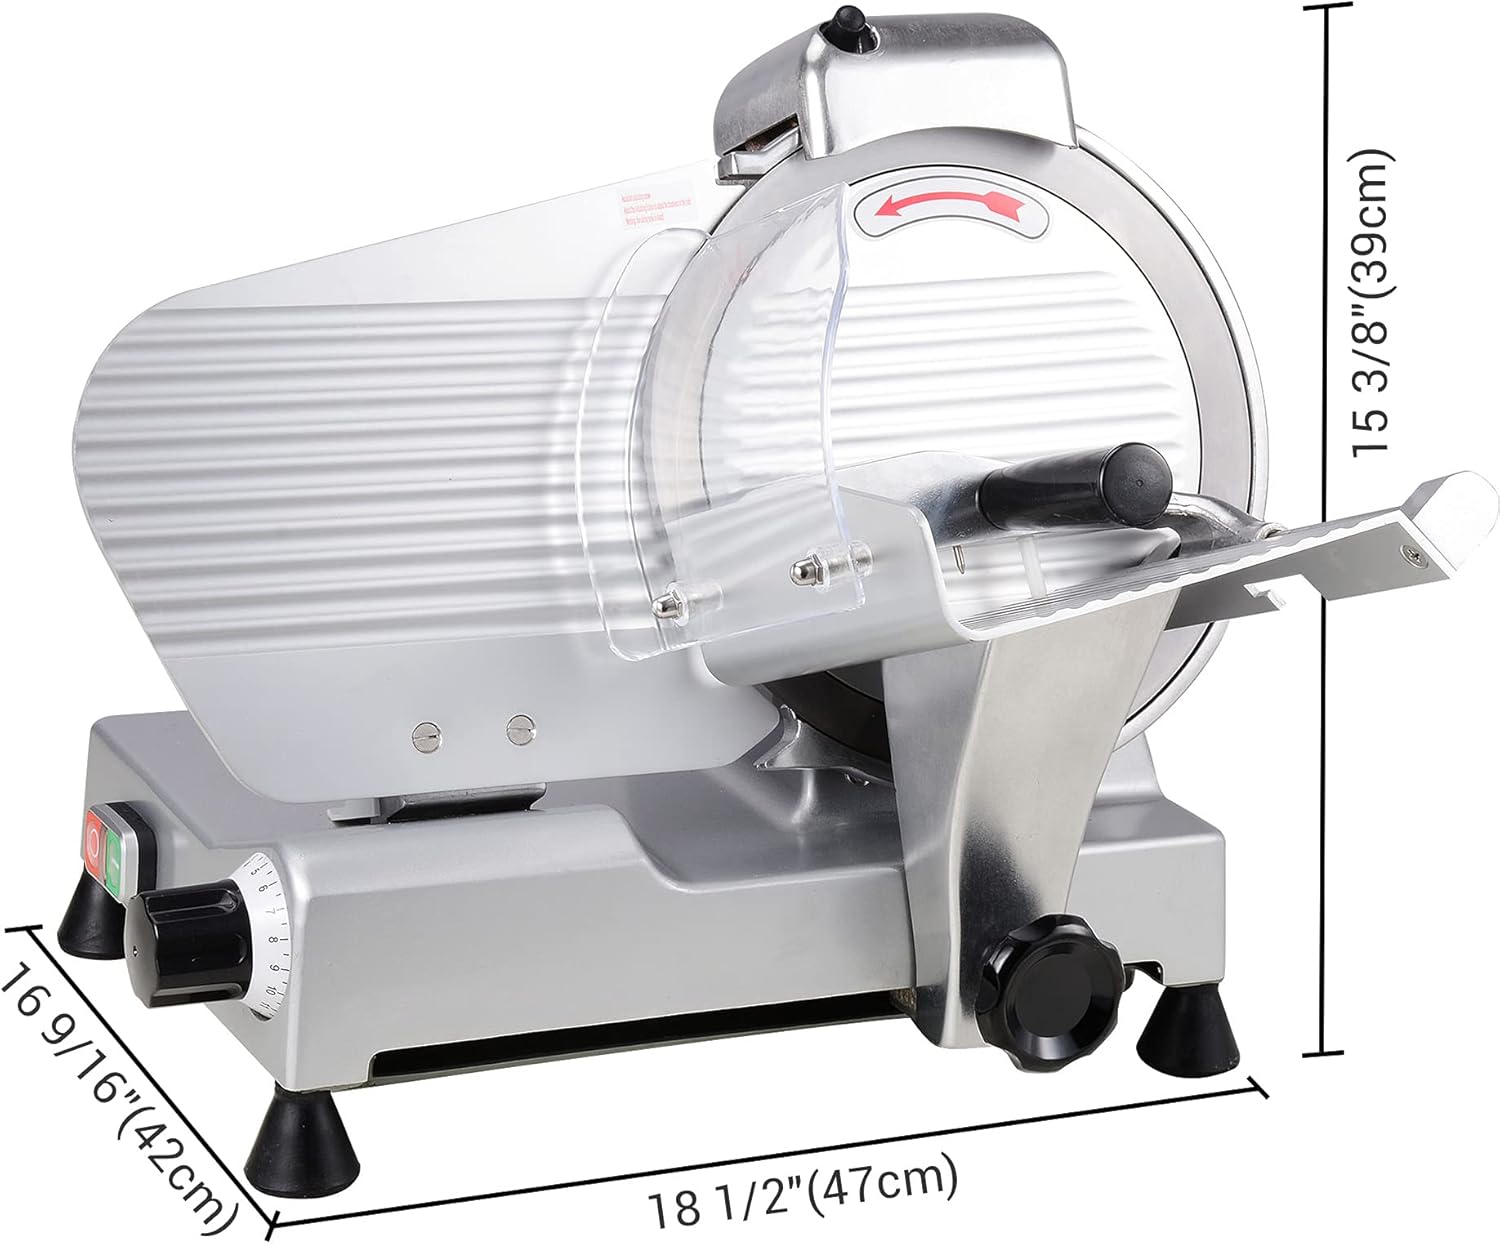
Figure 7: Product dimensions.
8. Warranty and Support
For warranty information or technical support, please refer to the documentation provided at the time of purchase or contact the retailer. Keep your purchase receipt as proof of purchase.