1. Product Overview
The Sta-Rite ProJet™ HN series shallow well jet pumps are designed for reliable water supply in various applications. The HNE 1 model provides excellent performance and good pressure for wells up to 25 feet deep. This pump is self-priming once the priming chamber has been filled with water.
Applications
- Water systems for homes and cottages.
- Sprinkling systems.
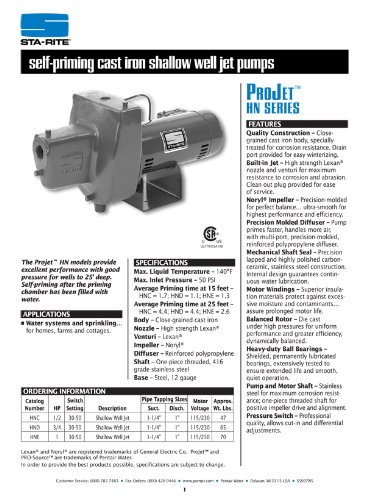
Image 1: Sta-Rite HNE 1 H.P. Shallow Well Jet Pump. This image displays the complete pump unit, featuring the motor and the pump housing, designed for shallow well applications.
2. Key Features
- Quality Construction: Features a close-grained cast iron body, specially treated for corrosion resistance. Includes a drain port for easy winterizing.
- Built-in Jet: Utilizes a high-strength Lexan® nozzle and venturi for maximum resistance to corrosion and abrasion. A clean-out plug is provided for ease of service.
- Noryl® Impeller: Precision-molded for perfect balance, ensuring ultra-smooth operation, high performance, and efficiency.
- Precision Molded Diffuser: Designed to prime faster and handle more air, featuring a multi-port, precision-molded, reinforced polypropylene diffuser.
- Mechanical Shaft Seal: Precision lapped and highly polished carbon-ceramic, stainless steel construction. Internal design guarantees continuous water lubrication.
- Motor Windings: Superior insulation materials protect against excessive moisture and contaminants, ensuring prolonged motor life.
- Balanced Rotor: Die-cast under high pressures for uniform performance and greater efficiency, dynamically balanced.
- Heavy-duty Ball Bearings: Shielded, permanently lubricated bearings, extensively tested for extended life and smooth, quiet operation.
- Pump and Motor Shaft: Stainless steel for maximum corrosion resistance; a one-piece threaded shaft ensures positive impeller drive and alignment.
- Pressure Switch: Professional quality, allowing for cut-in and differential adjustments.
3. Setup and Installation
Proper installation is crucial for the safe and efficient operation of your Sta-Rite HNE 1 pump. It is recommended that installation be performed by a qualified professional.
3.1 Location
- Install the pump as close to the water source as possible.
- Ensure the location is dry, well-ventilated, and protected from freezing temperatures and direct sunlight.
- Mount the pump on a firm, level base to minimize vibration.
3.2 Plumbing Connections
- Use appropriate pipe sizes as specified in the 'Ordering Information' table for suction and discharge.
- Ensure all connections are airtight to prevent air leaks, which can affect priming and pump performance.
- Install a foot valve at the end of the suction line in the well to maintain prime.
- A check valve should be installed on the discharge side to prevent backflow.
3.3 Electrical Wiring
- All electrical wiring must comply with local codes and regulations.
- Ensure the power supply matches the pump's voltage requirements (115/230V).
- Connect the pump to a dedicated, properly fused electrical circuit.
- Ensure proper grounding to prevent electrical shock hazards.
3.4 Priming the Pump
- Before initial startup, remove the priming plug located on the pump housing.
- Fill the pump casing completely with water until it overflows.
- Replace the priming plug securely.
- Open a faucet on the discharge side to allow air to escape during priming.
4. Operating Instructions
4.1 Initial Startup
- After priming, turn on the power to the pump.
- The pump should begin to draw water and build pressure. This may take a few minutes.
- Once a steady stream of water flows from the open faucet and all air has been expelled, close the faucet.
- The pump will continue to run until the system pressure reaches the cut-out setting of the pressure switch, then it will shut off.
4.2 Normal Operation
- The pump will automatically turn on and off as water is used and system pressure fluctuates.
- Monitor the pump periodically for unusual noises or vibrations, which may indicate a problem.
5. Maintenance
Regular maintenance ensures the longevity and optimal performance of your pump.
5.1 Winterizing
If the pump is in an unheated area and freezing temperatures are expected, it must be drained to prevent damage.
- Turn off the power supply to the pump.
- Open the drain plug on the pump casing and any other drain plugs in the plumbing system.
- Allow all water to drain completely.
- Store the drain plugs in a safe place for reinstallation.
5.2 General Inspection
- Periodically check for leaks around plumbing connections.
- Ensure the pump is free from debris and obstructions.
- Inspect electrical connections for any signs of wear or damage.
6. Troubleshooting
This section provides solutions to common issues. For problems not listed or if solutions do not resolve the issue, contact a qualified service technician.
6.1 Pump Does Not Start
- Check Power Supply: Ensure the circuit breaker or fuse is not tripped. Verify the power switch is on.
- Motor Overload: If the motor feels hot, it may have tripped its thermal overload protector. Allow it to cool down and try again.
- Wiring: Inspect electrical connections for loose or corroded wires.
6.2 Pump Runs But Delivers No Water or Low Pressure
- Loss of Prime: Ensure the pump casing is full of water. Re-prime the pump if necessary.
- Air Leaks: Check all suction line connections for air leaks. Tighten fittings or replace seals as needed.
- Clogged Foot Valve/Strainer: Inspect the foot valve and strainer in the well for blockages.
- Low Water Level: The well water level may be too low.
- Impeller/Diffuser Damage: Internal pump components may be worn or damaged. This requires professional service.
6.3 Pump Cycles Too Frequently
- Pressure Tank: Check the air charge in the pressure tank. It may be too low or the tank bladder may be damaged.
- Leaks in System: Inspect the entire plumbing system for leaks, including faucets, toilets, and pipes.
- Pressure Switch: The pressure switch may need adjustment or replacement.
7. Specifications
| Specification | Value |
|---|---|
| Brand | Sta-Rite |
| Model Number | HNE 1 |
| Horsepower (HP) | 1 HP |
| Voltage | 115/230 Volts |
| Max. Liquid Temperature | 140°F (60°C) |
| Max. Inlet Pressure | 50 PSI |
| Body Material | Close-grained Cast Iron |
| Impeller Material | Noryl® |
| Diffuser Material | Reinforced Polypropylene |
| Shaft Material | One-piece threaded, 416 grade Stainless Steel |
| Base Material | 12 gauge Steel |
| Item Weight | 53 Pounds (approx.) |
| Power Source | Corded Electric |
| Average Priming Time (15 ft) | 1.3 minutes |
| Average Priming Time (25 ft) | 2.6 minutes |
8. Ordering Information
The table below provides details for various models in the ProJet™ HN series, including the HNE 1.
| Catalog Number | HP | Switch Setting | Description | Pipe Tapping Size | Motor Voltage | Approx. Wt. Lbs. | |
|---|---|---|---|---|---|---|---|
| Suct. | Disch. | ||||||
| HNC | 1/2 | 30-50 | Shallow Well Jet | 1-1/4" | 1" | 115/230 | 47 |
| HND | 3/4 | 30-50 | Shallow Well Jet | 1-1/4" | 1" | 115/230 | 65 |
| HNE | 1 | 30-50 | Shallow Well Jet | 1-1/4" | 1" | 115/230 | 70 |
9. Warranty and Support
For specific warranty information, please refer to the documentation included with your product or contact Sta-Rite customer service. Keep your purchase receipt as proof of purchase.
For technical assistance, parts, or service, please contact Sta-Rite directly or an authorized service center. Contact information can typically be found on the manufacturer's website or on the product packaging.


