1. Introduction
This manual provides essential instructions for the setup, operation, and maintenance of your Brother FAX-2840 High Speed Mono Laser Fax Machine. The IntelliFAX-2840 is designed for home offices or small office environments, offering reliable faxing and copying capabilities.
Key features include a 33.6K bps modem, 16MB memory, a 20-page auto document feeder, and a 250-sheet paper tray. It supports up to 272 broadcasting locations and 200 speed dial locations, with 22 one-touch keys for efficient use. The device can also receive fax and voice calls on a single telephone line and includes a USB interface for future printing functionality.

This document is intended to help you maximize the performance and longevity of your fax machine.
2. Setup Guide
2.1 Unpacking and Component Verification
Carefully remove all components from the packaging. Ensure the following items are present:
- Brother IntelliFax-2840 High-Speed Laser Fax Machine
- Starter Toner Cartridge
- DR420 Drum Unit
- Telephone Line Cord
- Telephone Handset and Curled Cord
- User's Guide (physical or CD-ROM)
- Quick Setup Guide
- AC Power Cord
2.2 Installing the Drum Unit and Toner Cartridge
- Open the front cover of the fax machine.
- Unpack the DR420 Drum Unit.
- Unpack the Starter Toner Cartridge and gently shake it horizontally several times to distribute the toner evenly.
- Insert the toner cartridge firmly into the drum unit until it locks into place.
- Slide the combined drum unit and toner cartridge assembly into the fax machine until it clicks securely.
- Close the front cover.
2.3 Loading Paper
Open the paper tray located at the bottom front of the machine. Adjust the paper guides to fit the paper size (Letter or Legal). Load up to 250 sheets of plain paper into the tray, ensuring it is flat and below the maximum fill line. Close the paper tray.
2.4 Connecting Power and Telephone Lines
- Connect the AC power cord to the power input port on the rear of the machine, then plug it into a wall outlet.
- Connect one end of the telephone line cord to the port labeled 'LINE' on the rear of the fax machine.
- Connect the other end of the telephone line cord to your wall telephone jack.
- If connecting an external telephone, plug its line cord into the port labeled 'EXT' on the rear of the fax machine.
- Connect the telephone handset to the dedicated handset port on the side of the machine using the curled cord.

2.5 Initial Configuration
Upon first power-on, the machine will prompt you to set the date, time, and your station ID (name and fax number). Follow the on-screen instructions using the control panel buttons.
3. Operating Instructions
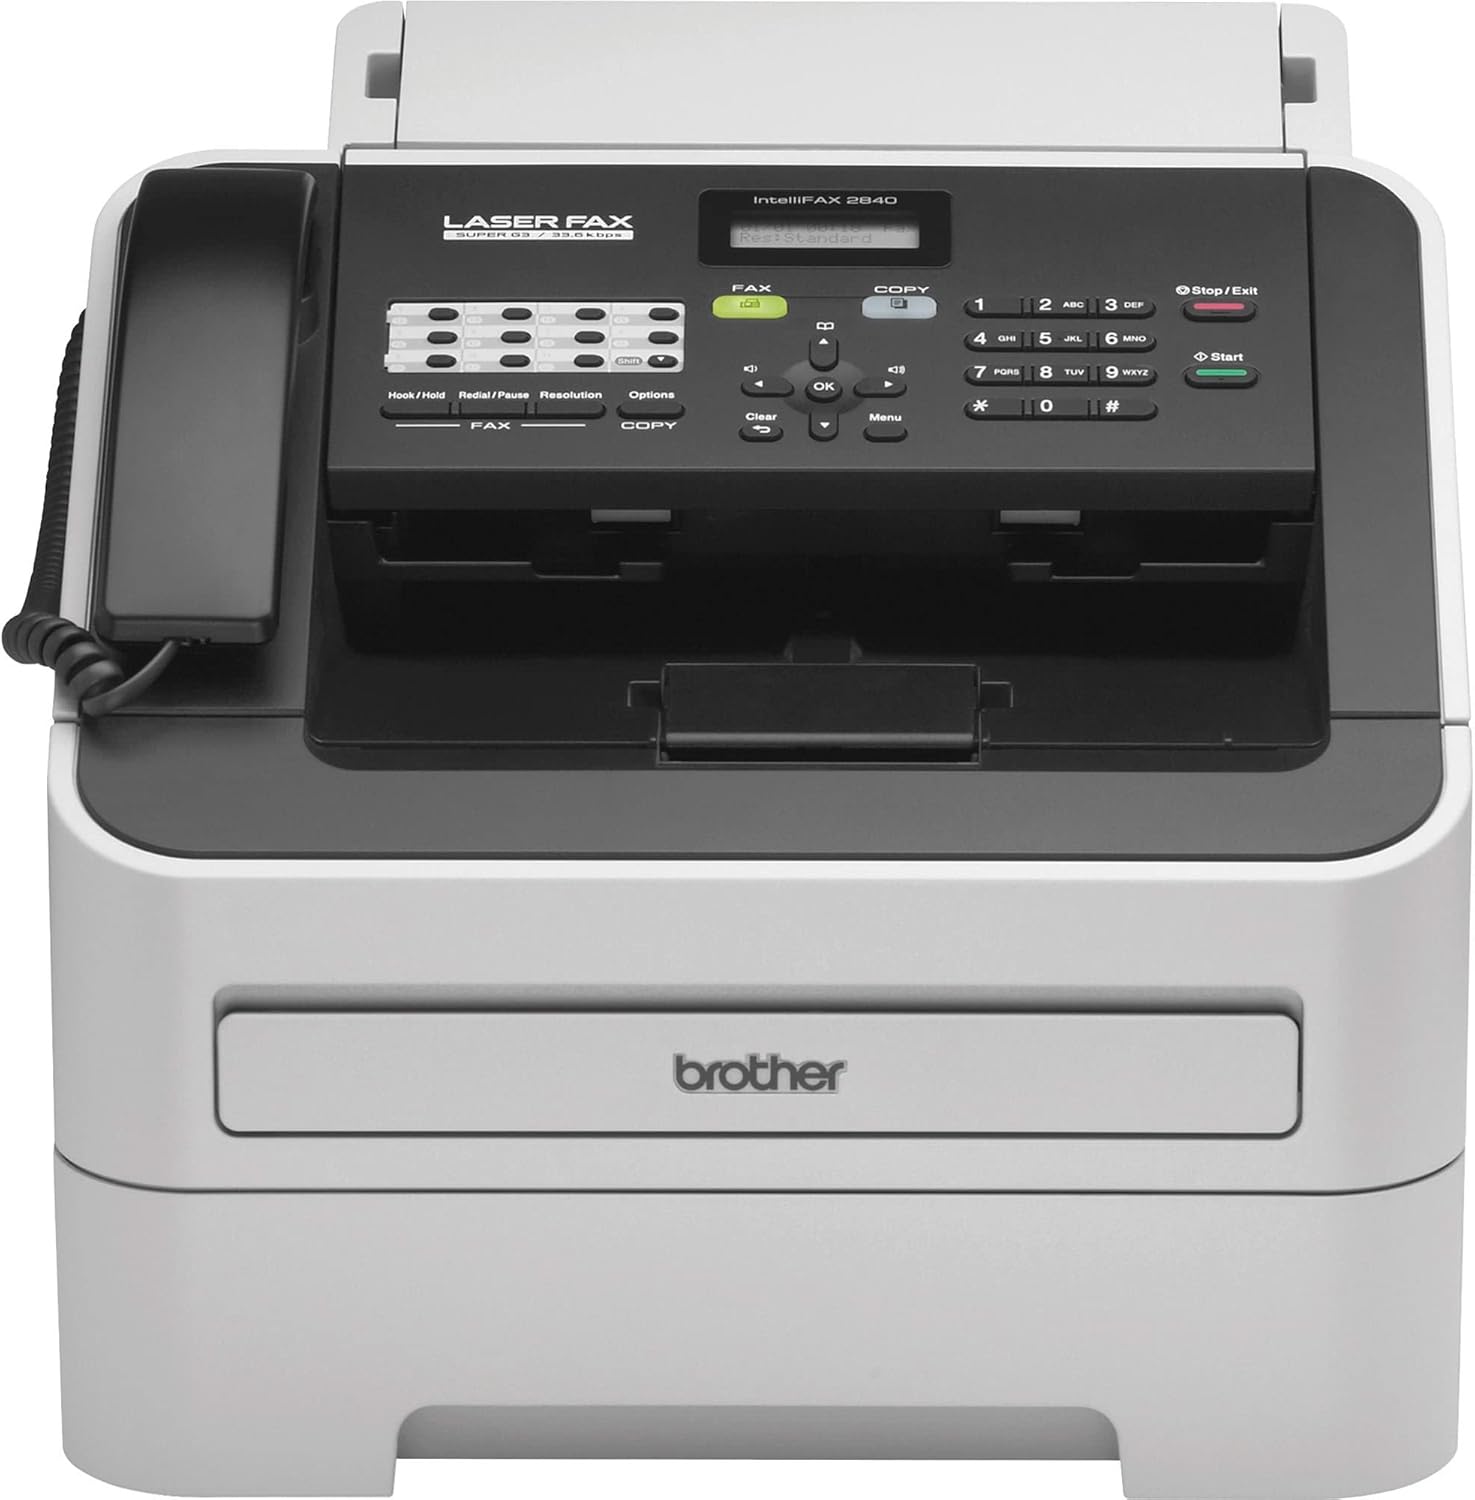
3.1 Control Panel Overview
3.2 Sending a Fax
- Place your document(s) face down in the Automatic Document Feeder (ADF) or face up on the flatbed scanner glass. The ADF can hold up to 20 pages.
- Enter the recipient's fax number using the numeric keypad. For speed dial or one-touch keys, press the corresponding button.
- Press the Start button. The machine will dial the number and transmit the document.
3.3 Receiving a Fax
The FAX-2840 is configured to automatically receive faxes. When an incoming fax call is detected, the machine will answer and print the document. Ensure there is sufficient paper and toner.
3.4 Making Copies
- Place your document(s) face down in the ADF or face up on the flatbed scanner glass.
- Press the Copy button.
- Use the numeric keypad to enter the desired number of copies (up to 99).
- Press the Start button. The machine will scan and print the copies.
3.5 Using Speed Dial and Broadcasting
The machine supports up to 200 speed dial locations and 22 one-touch keys for frequently used numbers. It also allows broadcasting to up to 272 locations. Refer to the detailed user guide for programming these features.
4. Maintenance
4.1 Replacing the Toner Cartridge
When the 'Toner Low' or 'Replace Toner' message appears, it is time to replace the toner cartridge. An optional high-capacity replacement toner cartridge is available to reduce cost per page.
- Open the front cover.
- Remove the drum unit and toner cartridge assembly.
- Press the green lock lever to release the old toner cartridge from the drum unit.
- Unpack the new toner cartridge and shake it gently.
- Insert the new toner cartridge into the drum unit until it locks.
- Clean the corona wire inside the drum unit by gently sliding the green tab from left to right several times. Return the tab to its home position.
- Reinstall the drum unit and new toner cartridge assembly into the machine.
- Close the front cover.
4.2 Replacing the Drum Unit
The drum unit (DR420) is a consumable item that needs replacement after approximately 12,000 pages. The machine will indicate when replacement is necessary.
- Follow steps 1-3 for replacing the toner cartridge to remove the old drum unit and toner.
- Unpack the new drum unit.
- Insert the existing toner cartridge (or a new one) into the new drum unit.
- Install the new drum unit and toner cartridge assembly into the machine.
- Close the front cover.
- Reset the drum counter through the machine's menu system (Menu > 1. General Setup > 4. Replace Drum > Yes).
4.3 Clearing Paper Jams
If a paper jam occurs, the machine display will indicate the location. Carefully open the covers and remove any jammed paper by pulling it gently in the direction of the paper path. Avoid tearing the paper, as small pieces can cause further issues.
5. Troubleshooting
5.1 Deep Sleep Mode
The Brother FAX-2840 features a 'Deep Sleep' mode to conserve power. In this mode, the machine may not immediately respond to incoming faxes or print jobs unless a key is pressed, the handset is lifted, or data is received from a connected computer. If you experience issues with receiving faxes while the machine is idle, you may need to adjust this setting.
To disable Deep Sleep mode:
- Press the Menu button.
- Navigate to 1. General Setup and press OK.
- Navigate to 4. Ecology and press OK.
- Navigate to 2. Sleep Time and press OK.
- While the two-digit sleep time is displayed, simultaneously press the Down Arrow and Start keys.
- The 'Deep Sleep' menu will appear. Select No using the arrow keys to disable it.
- Press OK, then press Stop/Exit to save changes and exit the menu.
5.2 Loss of Stored Memory After Power Off
If the machine loses stored settings (date, time, fax number, speed dials) after being powered off, this indicates a potential internal issue. Ensure the machine is connected to a stable power source. If the problem persists, contact Brother customer support for assistance.
5.3 General Troubleshooting Tips
- No Power: Check power cord connections and wall outlet.
- Cannot Send/Receive Fax: Verify telephone line connections. Ensure the line is active and not in use by another device. Check the telephone line compatibility setting (Menu, 2, 0, 1) for VoIP services.
- Poor Print Quality: Check toner and drum unit status. Clean the corona wire. Ensure paper is loaded correctly.
- Paper Jams: Refer to Section 4.3 for clearing instructions.
6. Specifications
| Feature | Specification |
|---|---|
| Model Name | FAX2840 |
| Printing Technology | Laser |
| Printer Output | Monochrome |
| Connectivity Technology | USB |
| Fax Modem Speed | 33.6K bps |
| Memory Storage Capacity | 16 MB (400 pages) |
| Max Input Sheet Capacity | 250 sheets |
| Auto Document Feeder (ADF) Capacity | 20 pages |
| Max Copy Speed (Black & White) | 21 ppm |
| Max Copy Resolution (Black & White) | 2400 x 600 dpi |
| Product Dimensions (D x W x H) | 14.6" x 14.7" x 12.2" |
| Item Weight | 19.8 pounds |
| Power Consumption | 1080 watts (peak) |
7. Warranty and Support
7.1 Warranty Information
The Brother FAX-2840 comes with a limited warranty. Please refer to the warranty documentation included with your product for specific terms, conditions, and duration.
7.2 Customer Support
For technical assistance, troubleshooting beyond this manual, or warranty claims, please contact Brother customer support. You can also find additional resources, including the full User Guide, on the official Brother support website.
A comprehensive User Guide in PDF format is available for download: Brother FAX-2840 User Guide (PDF)