1. Introduction
This manual provides detailed instructions for the installation, configuration, operation, and maintenance of your D-Link DNS-320L Cloud Storage 2-Bay Network Attached Storage (NAS) device. Please read this manual thoroughly before using the device to ensure proper setup and optimal performance. The DNS-320L is designed to provide a centralized storage solution for your home or small office network, offering data redundancy, remote access, and media streaming capabilities.
2. Safety Information
- Ensure the device is placed on a stable, flat surface to prevent accidental falls.
- Do not expose the device to water, moisture, or extreme temperatures.
- Use only the power adapter supplied with the device. Using an incorrect adapter may damage the device and void the warranty.
- Do not open the device casing. Refer all servicing to qualified personnel.
- Keep ventilation openings clear to prevent overheating.
- Disconnect the power cable before cleaning or moving the device.
3. Package Contents
Verify that your package contains the following items:
- D-Link DNS-320L Cloud Storage 2-Bay NAS Enclosure
- Power Adapter
- Ethernet Cable
- Quick Installation Guide
- Resource CD (may include software and full manual)
If any items are missing or damaged, please contact your retailer or D-Link support.
4. Physical Overview
Familiarize yourself with the ports, buttons, and indicators on your DNS-320L device.
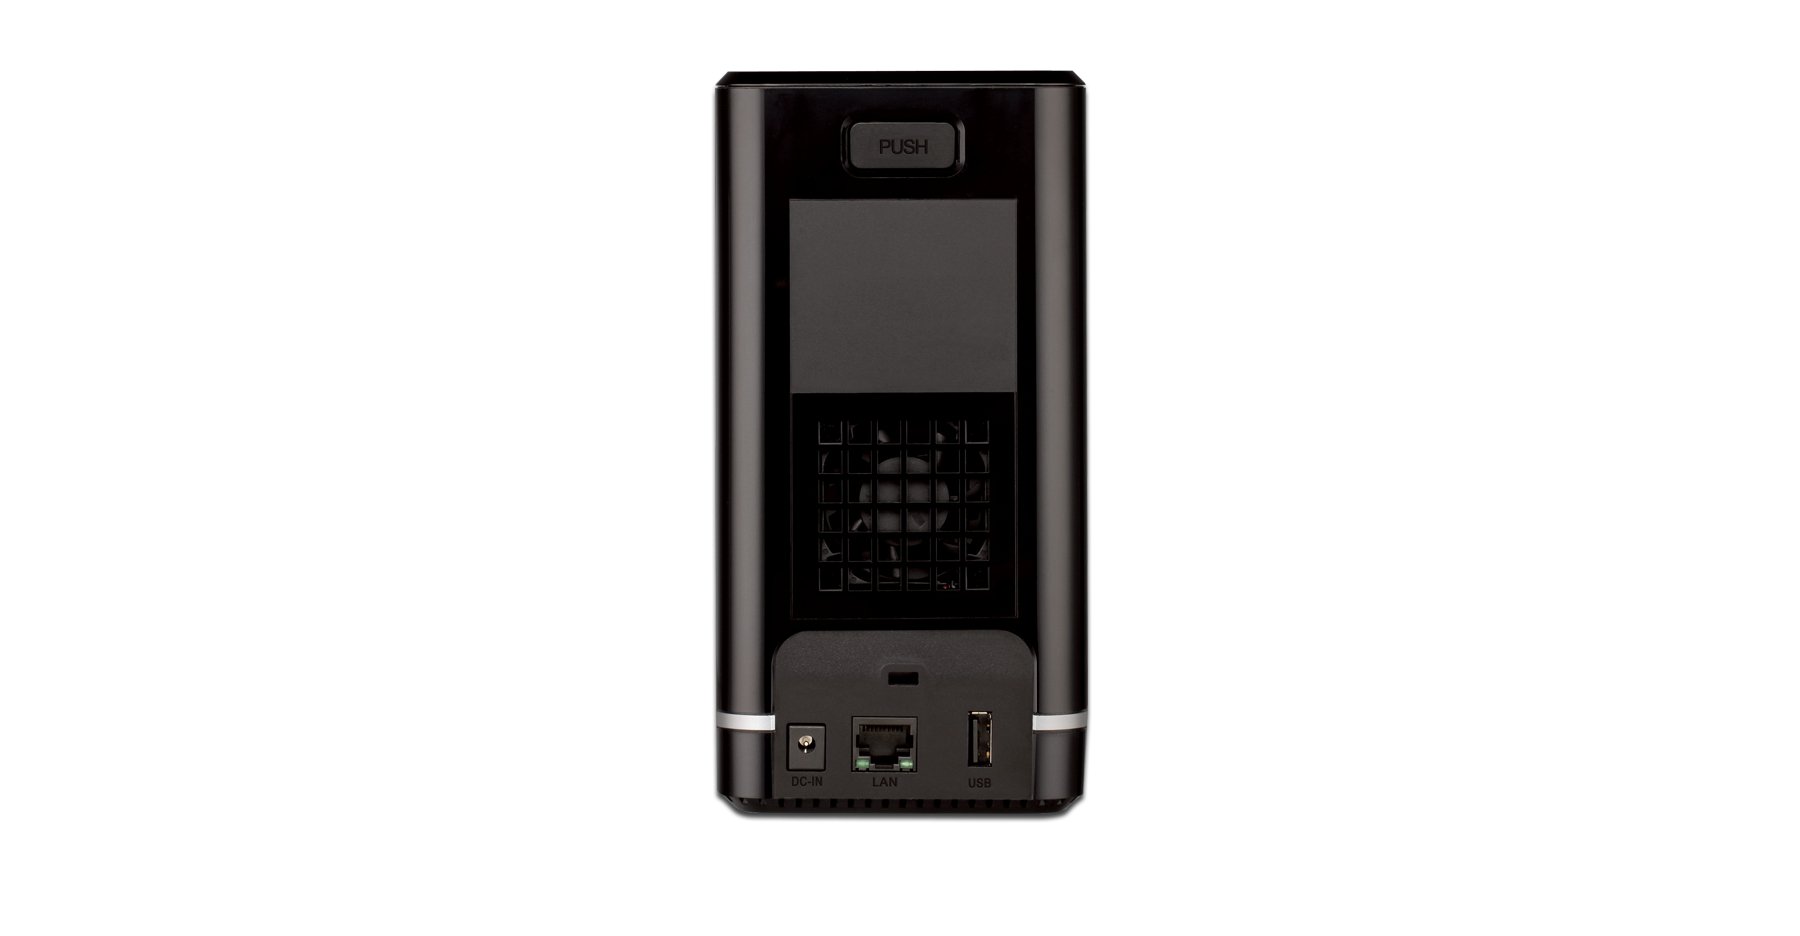
Figure 4.1: Front View of D-Link DNS-320L. This image displays the front panel of the DNS-320L, typically showing LED indicators for power, network activity, and hard drive status. It may also feature a power button and a USB port for quick access.
4.1 Front Panel
- Power LED: Indicates power status.
- HDD 1/2 LEDs: Indicate hard drive activity and status for each bay.
- USB Port: For connecting external USB storage devices or printers.
- Power Button: To power on/off the device.
4.2 Rear Panel
- Gigabit Ethernet Port: Connects the NAS to your network router or switch.
- Power Connector: For connecting the power adapter.
- Reset Button: Used to restore factory default settings (requires a paperclip or similar pointed object).
- Kensington Lock Slot: For physical security.
5. Hardware Installation
This section guides you through installing hard drives and connecting the DNS-320L to your network.
5.1 Installing Hard Drives
The DNS-320L supports two 3.5-inch SATA hard drives. Ensure your drives are compatible and unformatted for initial setup.
- Ensure the DNS-320L is powered off and disconnected from the power outlet.
- Gently slide open the front cover of the NAS enclosure.
- Slide each hard drive into an available bay until it clicks into place, ensuring the SATA connectors align properly. No screws are typically required for tool-less installation.
- Close the front cover securely.
Figure 5.1: Hard Drive Installation. This image illustrates the process of inserting a 3.5-inch SATA hard drive into one of the bays of the DNS-320L, highlighting the tool-less design.
5.2 Connecting the NAS to Your Network
- Connect one end of the Ethernet cable to the Gigabit Ethernet port on the rear of the DNS-320L.
- Connect the other end of the Ethernet cable to an available LAN port on your router or network switch.
- Connect the power adapter to the power connector on the rear of the DNS-320L, then plug the adapter into a power outlet.
- Press the Power button on the front panel to turn on the device. The Power LED will illuminate, and the HDD LEDs will flash during startup.
6. Initial Setup
After hardware installation, you will need to configure the DNS-320L using its web-based management interface.
6.1 Accessing the Web Interface
- Ensure your computer is connected to the same network as the DNS-320L.
- Open a web browser (e.g., Chrome, Firefox, Edge).
- The DNS-320L typically obtains an IP address automatically via DHCP. You can use the D-Link ShareCenter Utility (if provided on the Resource CD or D-Link website) to discover its IP address. Alternatively, try accessing
http://dlinksharecenterorhttp://dlinksharecenter.local. - Enter the default username (usually
admin) and leave the password blank (oradmin) to log in for the first time. You will be prompted to change the password.
6.2 Running the Setup Wizard
Upon first login, a setup wizard will guide you through essential configurations:
- Disk Volume Creation: You will be prompted to create a disk volume. Options typically include:
- Standard: Each drive is treated as a separate volume.
- RAID 0 (Striping): Combines drives for maximum capacity and performance, but offers no data redundancy. If one drive fails, all data is lost.
- RAID 1 (Mirroring): Mirrors data across both drives, providing data redundancy. If one drive fails, data is preserved on the other. Capacity is limited to the size of one drive.
- JBOD (Just a Bunch Of Disks): Combines drives into a single large volume sequentially. No performance or redundancy benefits.
Choose RAID 1 for data protection. RAID 0 offers speed but no protection.
- User Account Creation: Create at least one user account with administrative privileges.
- Network Settings: Confirm or adjust network settings (DHCP or static IP).
- Time Zone: Set the correct date and time.
7. Operating the DNS-320L
This section covers common operational tasks for your NAS.
7.1 Accessing Shared Folders
After setup, shared folders will be accessible from your network:
- Windows: Open File Explorer, type
\DNS-320L(or its IP address) in the address bar, and press Enter. - macOS: In Finder, go to Go > Connect to Server, type
smb://DNS-320L(or its IP address), and click Connect. - Linux: Use your file manager's network browsing feature or mount the share using SMB/CIFS.
7.2 User and Group Management
Manage who can access your NAS and what permissions they have:
- Log in to the web interface as an administrator.
- Navigate to Management > User Management or similar section.
- Create new users, assign passwords, and add them to groups.
- Configure folder permissions for users and groups (Read/Write, Read Only, No Access).
7.3 Cloud Access and Remote Management
The DNS-320L supports D-Link's Cloud features for remote access.
- Register your device with the D-Link Cloud service (if applicable, refer to D-Link's official documentation for specific steps).
- Use the D-Link mobile app (e.g., mydlink ShareCenter) to access files remotely from your smartphone or tablet.
- Configure port forwarding on your router if direct remote access to the web interface is desired (advanced users only, consult your router manual).
7.4 USB Device Functionality
The USB 2.0 port on the front panel can be used for:
- External Storage: Connect USB hard drives or flash drives to expand storage or for backup purposes. These devices will appear as shared folders.
- USB Printer: Connect a compatible USB printer to share it across your network.
8. Maintenance
Regular maintenance ensures the longevity and reliability of your DNS-320L.
8.1 Firmware Updates
Periodically check for and install firmware updates from the D-Link support website. Firmware updates can provide new features, performance improvements, and security patches.
- Download the latest firmware file for your DNS-320L model from the official D-Link support site.
- Log in to the NAS web interface as an administrator.
- Navigate to Management > Firmware Upgrade or a similar section.
- Browse to the downloaded firmware file and initiate the upgrade process. Do not power off the device during the update.
8.2 Data Backup
While RAID 1 provides redundancy against a single drive failure, it is not a substitute for a comprehensive backup strategy. Regularly back up critical data from your NAS to an external drive or another storage location.
8.3 Cleaning
Keep the device clean to ensure proper airflow and prevent dust buildup.
- Power off and unplug the device before cleaning.
- Use a soft, dry cloth to wipe the exterior.
- Use compressed air to clear dust from ventilation openings.
9. Troubleshooting
This section addresses common issues you might encounter with your DNS-320L.
| Problem | Possible Solution |
|---|---|
| Device does not power on. | Ensure the power adapter is securely connected to both the device and a working power outlet. Test the outlet with another device. |
| Cannot access the NAS on the network. | Verify the Ethernet cable is properly connected. Check network settings on your computer and router. Ensure the NAS has an IP address (use the D-Link utility). Try restarting the NAS and your router. |
| Hard drive LED is red or flashing abnormally. | This may indicate a drive error or failure. Check the NAS web interface for drive status. If a drive has failed in a RAID 1 configuration, replace the faulty drive and rebuild the array. |
| Forgot administrator password. | Use the reset button on the rear panel to restore factory default settings. Warning: This will erase all configurations, but typically not data on the drives. You will need to reconfigure the NAS. |
| Slow file transfer speeds. | Ensure all network components (NAS, router, computer) support Gigabit Ethernet. Check for network congestion or faulty cables. |
10. Specifications
Key technical specifications for the D-Link DNS-320L:
| Feature | Detail |
|---|---|
| Model Number | DNS-320L |
| Drive Bays | 2 x 3.5-inch SATA I/II/III HDD |
| RAID Support | Standard, JBOD, RAID 0, RAID 1 |
| Network Interface | 1 x Gigabit Ethernet (10/100/1000 Mbps) |
| USB Ports | 1 x USB 2.0 |
| Hardware Platform | Mac, PC |
| Dimensions (LxWxH) | 3.54 x 5.68 x 7.61 inches |
| Item Weight | 1.39 pounds (without drives) |
| Color | Black |
| Material | Metal |
| Compatible Devices | CPU, Desktop, Laptop, Server |
11. Warranty and Support
For warranty information, please refer to the warranty card included with your product or visit the official D-Link website. D-Link provides technical support and resources to assist you with your DNS-320L.
- Online Support: Visit www.dlink.com/support for FAQs, troubleshooting guides, firmware downloads, and product documentation.
- Technical Support: Contact D-Link technical support for assistance with installation, configuration, or troubleshooting issues that cannot be resolved using this manual or online resources. Contact details are available on the D-Link support website for your region.


