1. Introduction
This manual provides detailed instructions for the proper installation, operation, and maintenance of your Juki MO-600 Series 3 Presser Foot Kit. This kit is designed to enhance the versatility of your compatible Juki serger machine, enabling specialized sewing techniques. Please read this manual thoroughly before using the presser feet to ensure safe and effective operation.
2. Product Overview
The Juki MO-600 Series 3 Presser Foot Kit includes three specialized presser feet, each designed for specific serging applications. These feet are compatible with Juki Serger Models MO623, MO644D, MO655, MO 654DE, MO734DE, and MO735.
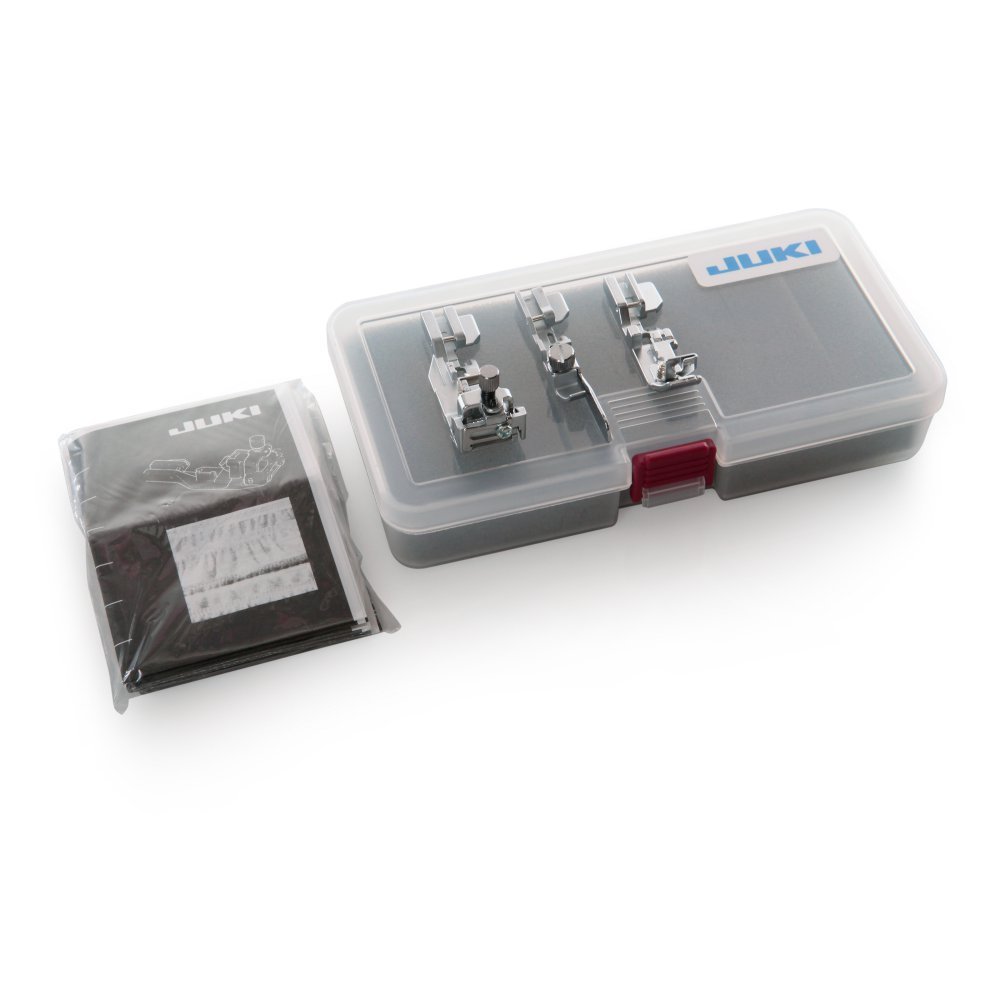
Image 1: The Juki MO-600 Series 3 Presser Foot Kit, showing the three included presser feet.
Kit Components:
- Blind Stitch Foot: This foot is used for creating invisible or blind hems on garments. It features a guide that helps maintain a straight and consistent hemline, ensuring a professional finish.
- Elastic Foot: Designed for easily installing elastic into garments. This foot helps to feed and stretch elastic evenly, resulting in smooth and consistent gathers or shirring without puckering.
- Cording Foot: Ideal for attaching cording or piping to garments and other sewing projects. It allows for precise placement and stitching around cords, creating decorative edges or reinforced seams.
3. Setup and Installation
Before installing any presser foot, ensure your serger machine is turned off and unplugged from the power source for safety.
- Power Off: Turn off your Juki serger and unplug it from the electrical outlet.
- Raise Needle and Presser Foot Lever: Raise the needle to its highest position using the handwheel. Lift the presser foot lever to raise the existing presser foot.
- Remove Current Presser Foot: Locate the presser foot release lever or screw (depending on your serger model). Press the lever or loosen the screw to detach the currently installed presser foot.
- Attach New Presser Foot: Align the pin on the desired Juki kit presser foot with the presser foot holder on your serger. Lower the presser foot lever until the foot snaps into place or tighten the screw to secure it.
- Verify Installation: Gently try to move the presser foot to ensure it is securely attached and does not wobble. Plug in and power on your machine.
4. Operating Instructions
4.1. Using the Blind Stitch Foot
The Blind Stitch Foot is used to create nearly invisible hems on various fabrics.
- Prepare Fabric: Fold and press the hem allowance of your fabric according to your pattern or desired hem depth. Typically, the raw edge is folded under once, then folded again to the final hemline.
- Position Fabric: Place the fabric under the blind stitch foot with the folded edge against the guide on the foot. The guide ensures that the needle catches only a small amount of fabric from the main garment, making the stitches less visible.
- Adjust Settings: Refer to your serger's manual for recommended blind hem stitch settings (e.g., stitch length, width, differential feed). Test on a scrap fabric first.
- Serge: Guide the fabric smoothly, keeping the folded edge against the foot's guide. The serger will create a stitch that barely penetrates the main fabric, resulting in a blind hem.
4.2. Using the Elastic Foot
The Elastic Foot simplifies the process of attaching elastic to fabric, ensuring even tension and distribution.
- Prepare Elastic and Fabric: Cut your elastic to the desired length. Mark quarter points on both the elastic and the fabric edge where it will be attached.
- Position Elastic: Place the elastic under the foot, aligning its edge with the fabric edge. The foot is designed to hold and stretch the elastic as you serge.
- Adjust Settings: Set your serger to a 3- or 4-thread overlock stitch. Adjust the differential feed and stitch length as needed to achieve the desired stretch and gather. Test on a scrap.
- Serge: Begin serging, gently stretching the elastic between the marked points to match the fabric length. The foot will help feed the elastic evenly, creating a consistent gather.
4.3. Using the Cording Foot
The Cording Foot is used for attaching cording or piping, providing a neat and professional finish.
- Prepare Cording/Piping: If using piping, ensure it is pre-made or create your own by encasing cording in bias fabric.
- Position Cording: Place the cording or piping under the foot, with the cord nestled into the groove on the underside of the foot. This groove holds the cord securely and allows the needle to stitch close to it.
- Position Fabric: Place the fabric on top of the cording/piping, aligning the edges. You may need to use pins to hold it in place.
- Adjust Settings: Use a standard overlock stitch. Adjust stitch length and width as necessary to securely attach the cording while maintaining a clean appearance.
- Serge: Guide the fabric and cording smoothly, ensuring the cord remains in the foot's groove. This will create a tight, even stitch line along the edge of the cording.
5. Maintenance
Proper care of your presser feet will ensure their longevity and optimal performance.
- Cleaning: After each use, gently wipe the presser feet with a soft, dry cloth to remove any lint, dust, or fabric fibers. Avoid using harsh chemicals or abrasive materials.
- Storage: Store the presser feet in a clean, dry place, preferably in their original packaging or a dedicated storage box, to prevent damage or loss. Keep them away from direct sunlight and extreme temperatures.
- Inspection: Periodically inspect the feet for any signs of wear, bending, or damage. If a foot appears damaged, discontinue use and consider replacement.
6. Troubleshooting
If you encounter issues while using the presser feet, refer to the following common problems and solutions:
-
Foot Not Attaching Securely:
- Ensure the presser foot release lever is fully engaged or the screw is tightened.
- Verify that the pin on the foot is correctly aligned with the presser foot holder.
-
Uneven Stitching or Fabric Feeding:
- Check your serger's tension settings and adjust as needed.
- Ensure the fabric is being guided smoothly and not pulled or pushed excessively.
- Verify that the correct foot is being used for the specific task.
- Clean any lint buildup around the feed dogs and presser foot area.
-
Needle Hitting the Foot:
- Immediately stop the machine.
- Ensure the presser foot is correctly installed and aligned.
- Check if the needle is bent or installed incorrectly. Replace if necessary.
- Verify that the stitch width setting is appropriate for the foot being used.
If problems persist, consult your Juki serger's main instruction manual or contact Juki customer support.
7. Specifications
| Feature | Detail |
|---|---|
| Brand | JUKI |
| Model Number | 40064939 |
| UPC | 189684000244 |
| Item Weight | 0.4 Pounds |
| Compatible Serger Models | MO623, MO644D, MO655, MO 654DE, MO734DE, MO735 |
| Kit Contents | Blind Stitch Foot, Elastic Foot, Cording Foot |
8. Warranty Information
Specific warranty details for the Juki MO-600 Series 3 Presser Foot Kit are typically provided by the manufacturer or the retailer at the time of purchase. Please refer to your purchase documentation or contact Juki customer service directly for comprehensive warranty information.
9. Support
For further assistance, technical support, or inquiries regarding your Juki MO-600 Series 3 Presser Foot Kit, please contact:
- Juki Customer Support: Refer to the official Juki website or your serger's main manual for contact details.
- Your Retailer: The store or online vendor from whom you purchased the kit.


