
1. Product Overview
The Justrite 12011 Poly Disconnect Replacement is a crucial component designed for use with the Justrite 12012 Disconnect Assembly. This polyethylene replacement part ensures proper functionality and secure connections within industrial electrical systems, specifically for disconnect terminals. Its robust construction provides durability and reliable performance in demanding environments.
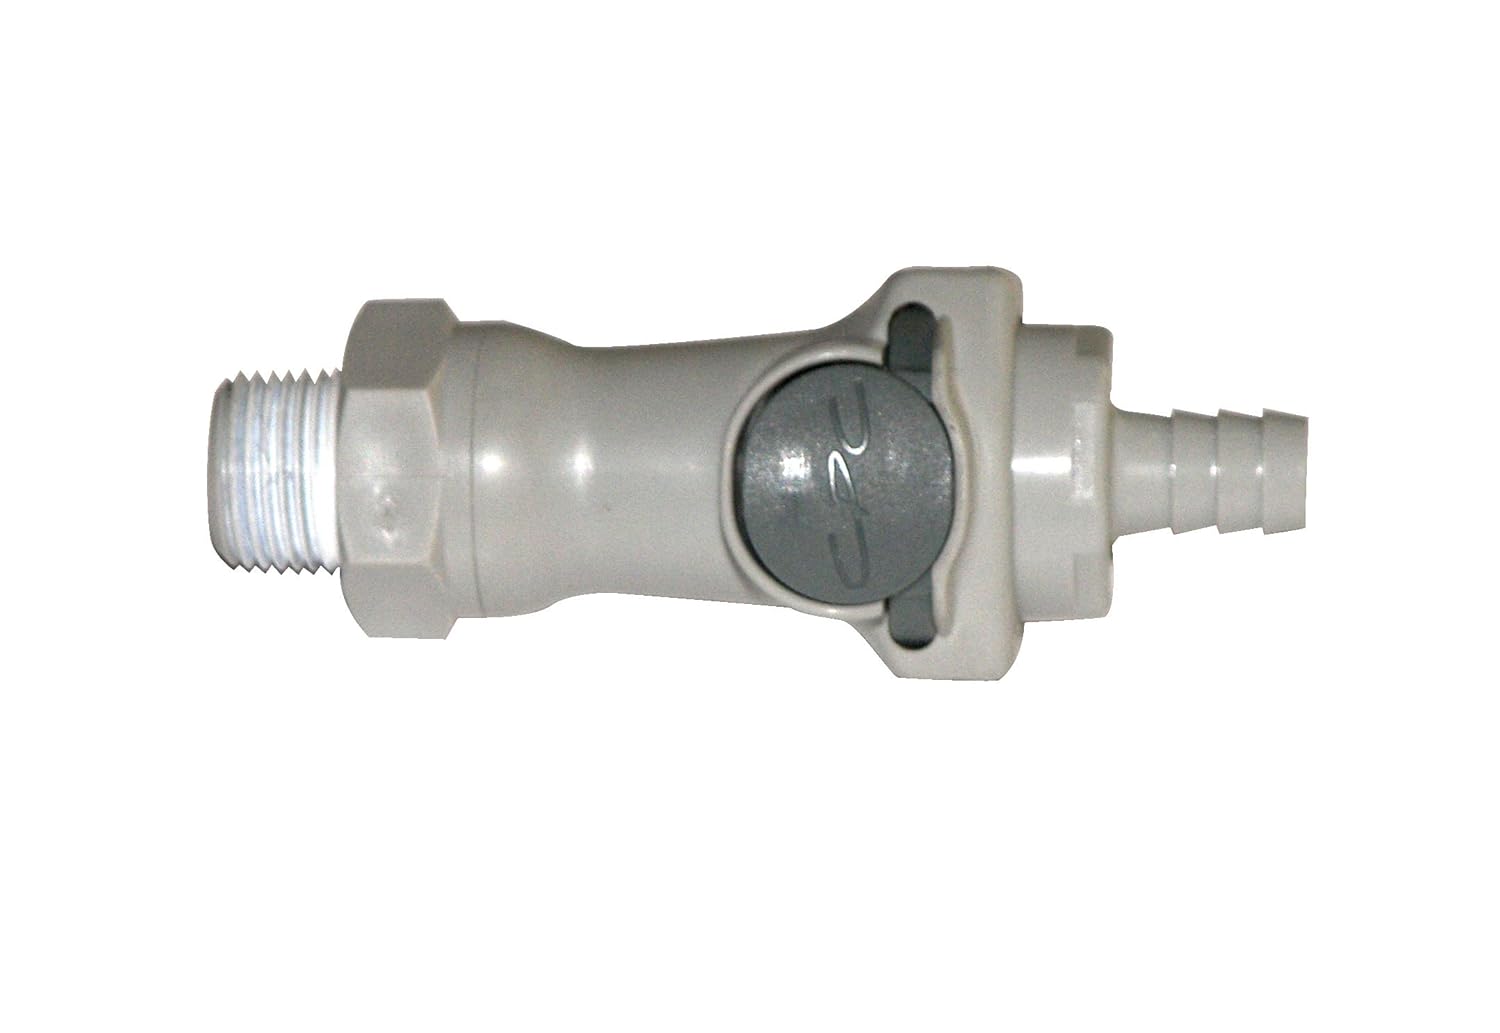
Figure 1.1: The Justrite 12011 Poly Disconnect Replacement. This image shows the grey polyethylene disconnect component with threaded and barbed ends, and a central quick-disconnect mechanism.
2. Setup and Installation
This section provides instructions for the proper installation of the Justrite 12011 Poly Disconnect Replacement. Ensure all power sources are disconnected before beginning installation.
2.1 Safety Precautions
- Always wear appropriate personal protective equipment (PPE) during installation.
- Verify that the power supply to the system is completely shut off and locked out before handling electrical components.
- Refer to the Justrite 12012 Disconnect Assembly manual for specific instructions related to the main assembly.
2.2 Installation Steps
- Identify the existing disconnect: Locate the worn or damaged disconnect component within your Justrite 12012 Disconnect Assembly.
- Disconnect the old part: Carefully unthread or unclip the existing disconnect. Note the orientation and connection points.
- Prepare the new replacement: Inspect the Justrite 12011 for any damage or manufacturing defects.
- Connect the new part: Align the threaded end of the 12011 replacement with the corresponding port on the 12012 assembly. Thread it securely, ensuring a tight seal.
- Secure the barbed connection: If applicable, connect the barbed end to the appropriate hose or tubing, ensuring a snug fit to prevent leaks.
- Verify connection: Gently tug on the installed component to ensure it is firmly seated and will not easily detach.
- Restore power: Once installation is complete and verified, restore power to the system.
3. Operation
The Justrite 12011 Poly Disconnect Replacement facilitates quick and secure connection and disconnection within the 12012 Disconnect Assembly. Its operation is straightforward:
- Connecting: Push the male end of the mating component firmly into the female end of the 12011 until an audible click is heard, indicating a secure lock.
- Disconnecting: Depress the release mechanism (if present, typically a button or collar) on the 12011 and pull the mating component away.
Ensure the connection is fully engaged before operating any connected equipment to prevent leaks or disconnections.
4. Maintenance
Regular maintenance ensures the longevity and optimal performance of your Justrite 12011 Poly Disconnect Replacement.
4.1 Cleaning
- Clean the exterior of the disconnect with a damp cloth and mild detergent as needed.
- Avoid using abrasive cleaners or solvents that could damage the polyethylene material.
- Ensure no debris enters the connection points.
4.2 Inspection
Periodically inspect the disconnect for signs of wear, damage, or degradation:
- Check for cracks, chips, or discoloration on the polyethylene body.
- Examine the threaded and barbed connections for any signs of stripping or deformation.
- Test the quick-disconnect mechanism to ensure it engages and disengages smoothly and securely.
- Look for any signs of leakage around the connection points when the system is under pressure.

Figure 4.1: Regular inspection of industrial components, such as the disconnect, is crucial for safety and performance. This image shows a worker inspecting equipment in an industrial setting.
4.3 Storage
Store unused replacement disconnects in a cool, dry place away from direct sunlight and harsh chemicals to prevent material degradation.
5. Troubleshooting
If you encounter issues with your Justrite 12011 Poly Disconnect Replacement, refer to the following common problems and solutions:
| Problem | Possible Cause | Solution |
|---|---|---|
| Leakage at connection point | Improperly seated connection, damaged O-ring/seal, cracked component. | Ensure connection is fully engaged. Inspect and replace O-rings/seals if worn. Replace the disconnect if cracked. |
| Difficulty connecting/disconnecting | Debris in mechanism, misaligned components, worn mechanism. | Clean the connection points. Check for proper alignment. If mechanism is worn, replacement may be necessary. |
| Component feels loose after installation | Insufficient tightening, damaged threads. | Ensure the threaded connection is tightened securely. If threads are stripped, replace the disconnect. |
If the problem persists after attempting these solutions, contact Justrite customer support for further assistance.
6. Specifications
Key specifications for the Justrite 12011 Poly Disconnect Replacement:
- Model Number: 12011
- Material: Polyethylene
- Compatibility: Designed for use with Justrite 12012 Disconnect Assembly
- Product Dimensions: 3 x 3 x 3 inches (approximate)
- Item Weight: 1.6 ounces (approximate)
- Manufacturer: Justrite Manufacturing
- First Available: June 15, 2012
Note: Specifications are subject to change without notice.
7. Warranty and Support
For information regarding product warranty, technical support, or to purchase additional replacement parts, please contact Justrite Manufacturing directly or visit their official website.
Justrite Official Website: www.justrite.com
Always ensure you are purchasing genuine Justrite replacement parts to maintain product integrity and safety standards.