1. Introduction
The SIRUI PH-20 Carbon Fiber Gimbal Head is designed for stable and smooth operation with large and heavy camera and lens combinations. Its carbon fiber and aluminum construction ensures durability while maintaining a lightweight profile. This manual provides essential information for the proper setup, operation, and maintenance of your PH-20 gimbal head.
Key features include:
- High strength, lightweight 8-layer Carbon Fiber for the curved arm and forged aircraft aluminum for the L-platform.
- 360° Panorama rotation capability.
- Tilting angle range between +150° and -60°.
- Maximum load capacity of 20kg.
- Integrated scales for tilt, rotation, and vertical displacement to assist with nodal point adjustment.
- Arca-Swiss compatible 120mm Quick Release plate with rubber surface and both 1/4" and 3/8" screws.

Figure 1: The SIRUI PH-20 Carbon Fiber Gimbal Head.
2. Product Components
The SIRUI PH-20 Gimbal Head consists of the following main components:
- Base Plate: Connects to the tripod. Features a 360° panoramic rotation mechanism.
- Curved Arm: The main carbon fiber structure providing the tilt axis.
- L-Platform: The vertical arm that holds the quick release clamp.
- Quick Release Clamp: Secures the camera/lens plate.
- Quick Release Plate (120mm): Attaches to your camera or lens tripod collar.
- Tension Knobs: For adjusting panning and tilting friction.
- Scales: Markings for precise adjustments of tilt, rotation, and vertical position.
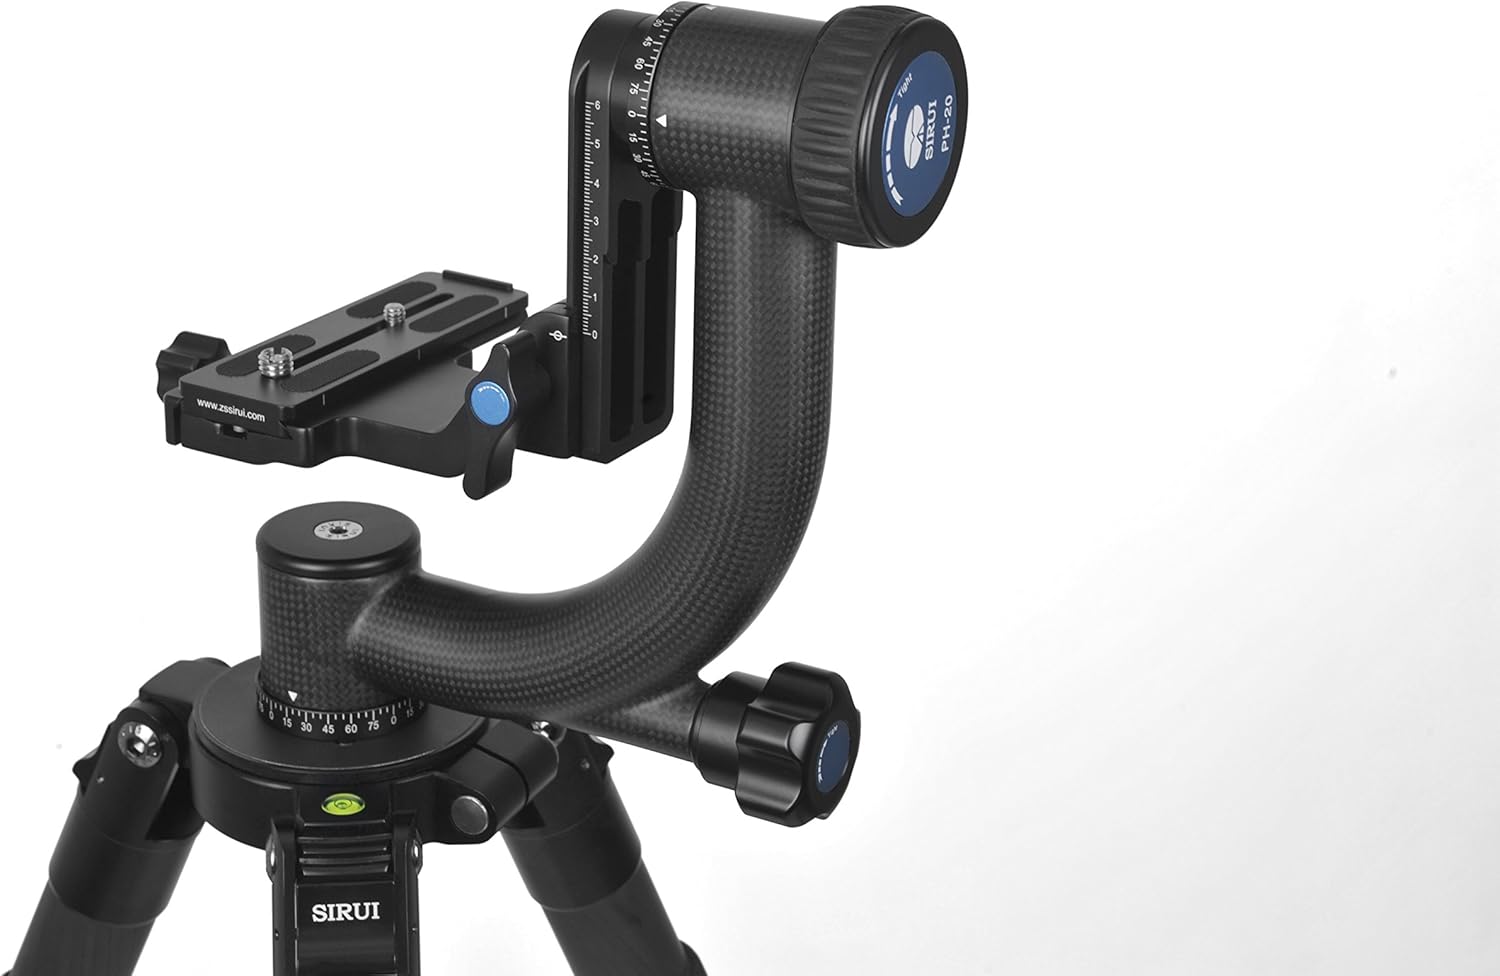
Figure 2: Overview of the PH-20 Gimbal Head components.
3. Setup Instructions
3.1 Mounting the Gimbal Head to a Tripod
- Ensure your tripod is stable and securely set up on a level surface.
- Locate the 3/8" mounting thread on the bottom of the gimbal head's base plate.
- Screw the gimbal head onto your tripod's mounting screw until it is firmly secured. Do not overtighten.
3.2 Attaching Camera and Lens
- Attach the 120mm Arca-Swiss compatible quick release plate to the tripod collar of your telephoto lens or the base of your camera if using a shorter lens. Ensure the screws are tight.
- Open the quick release clamp on the gimbal head by turning the locking knob counter-clockwise.
- Slide the quick release plate with your camera/lens into the clamp.
- Tighten the locking knob clockwise until the plate is securely held. Verify that the camera/lens combination is firmly attached and cannot slide out.
3.3 Balancing the Gimbal Head
Proper balancing is crucial for smooth operation and to prevent accidental tipping. The goal is for the camera and lens to remain stationary at any tilt angle when the tension knobs are loosened.
- Horizontal Balance (Fore-Aft):
- Loosen the quick release clamp knob slightly.
- Slide the camera/lens forward or backward on the quick release plate until the system is balanced horizontally. The lens should not tip forward or backward when the tilt tension is loose.
- Once balanced, tighten the quick release clamp knob.
- Vertical Balance (Up-Down):
- Loosen the vertical adjustment knob on the L-platform.
- Move the L-platform up or down until the camera/lens remains level at any tilt angle when the tilt tension is loose. The center of gravity should align with the tilt axis.
- Use the integrated scales to note your preferred vertical position for future reference.
- Tighten the vertical adjustment knob.
- Nodal Point Adjustment: For distortion-free panoramic shots, especially with wide-angle lenses, the nodal point (no-parallax point) of the lens should be aligned with the axis of rotation. This typically involves fine-tuning the fore-aft position of the camera/lens using the quick release plate and the vertical position using the L-platform. Refer to advanced photography resources for detailed nodal point calibration specific to your lens.
4. Operating Instructions
4.1 Panning (Horizontal Rotation)
The base plate allows for 360° horizontal rotation. To pan:
- Loosen the panning tension knob located at the base of the gimbal head.
- Rotate the camera and lens smoothly to your desired position.
- Tighten the panning tension knob to lock the position or adjust for desired friction.
4.2 Tilting (Vertical Movement)
The curved arm allows for vertical tilting between +150° and -60°. To tilt:
- Loosen the tilting tension knob on the curved arm.
- Adjust the camera and lens to the desired vertical angle.
- Tighten the tilting tension knob to secure the position or adjust for desired friction.

Figure 3: Adjustment knobs and scales for precise control.
5. Maintenance
To ensure the longevity and optimal performance of your SIRUI PH-20 Gimbal Head, follow these maintenance guidelines:
- Cleaning: Use a soft, dry cloth to wipe down the gimbal head after each use. For stubborn dirt, a slightly damp cloth can be used, followed by immediate drying. Avoid using harsh chemicals or abrasive materials.
- Lubrication: The internal mechanisms are factory-lubricated. Do not attempt to lubricate moving parts yourself unless specifically instructed by SIRUI support, as this can attract dust and impair performance.
- Storage: Store the gimbal head in a clean, dry environment, away from extreme temperatures and humidity. The included carry case is ideal for protection during storage and transport.
- Inspection: Periodically check all screws and connections to ensure they are tight. Do not overtighten.
6. Troubleshooting
If you encounter issues with your SIRUI PH-20 Gimbal Head, consider the following common solutions:
- Difficulty Balancing: Ensure all tension knobs are sufficiently loosened during the balancing process. Re-check the horizontal and vertical balance adjustments carefully. For very heavy or unusually shaped setups, minor adjustments may be needed when changing zoom or accessories.
- Stiff Panning/Tilting: Verify that the respective tension knobs are adequately loosened. If the movement remains stiff, ensure no foreign objects are obstructing the mechanism. Avoid forcing movement.
- Camera/Lens Not Secure: Confirm that the quick release plate is correctly seated in the clamp and the locking knob is fully tightened. Ensure the quick release plate is securely attached to your camera or lens tripod collar.
- Unstable Setup: Check that the gimbal head is firmly mounted to a stable tripod. Ensure tripod legs are fully extended and locked, and the tripod itself is on a solid surface.
If problems persist, please contact SIRUI customer support for further assistance.
7. Specifications
Detailed technical specifications for the SIRUI PH-20 Carbon Fiber Gimbal Head:
| Feature | Specification |
|---|---|
| Product Dimensions | 4.72 x 9.06 x 9.06 inches (120 x 230 x 230mm) |
| Item Weight | 2.86 pounds (1.3 Kilograms) |
| Max. Load Capacity | 20kg |
| Material | Carbon Fiber (arm), Forged Aircraft Aluminum (L-platform) |
| Panning Rotation | 360° |
| Tilting Angle | +150° to -60° |
| Quick Release Plate | Arca-Swiss compatible, 120mm with 1/4" and 3/8" screws |
| Model Number | 6581 |
| GTIN | 06952060000718 |
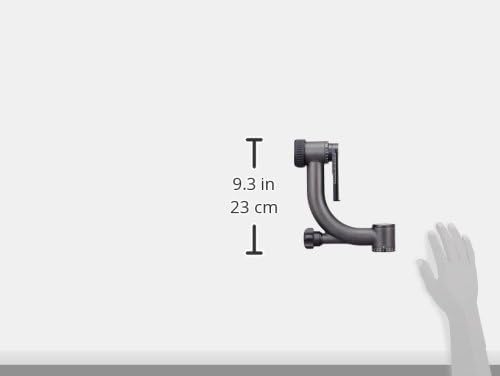
Figure 4: Dimensional overview of the PH-20 Gimbal Head.
8. Warranty and Support
SIRUI products are manufactured to high-quality standards. For information regarding warranty coverage, product registration, or technical support, please refer to the official SIRUI website or contact your local distributor. Keep your purchase receipt as proof of purchase.
For direct support, you may visit the SIRUI Store on Amazon.