1. Introduction
This manual provides essential information for the safe and efficient use of your NEC Display Solutions 22-inch LCD Desktop Monitor with LED Backlight. Please read this manual thoroughly before operating the monitor and retain it for future reference. This monitor is designed for general office and home computing tasks, offering a clear and vibrant display experience.
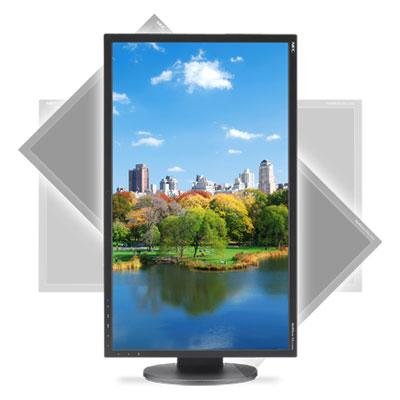
Figure 1: Front view of the NEC 22-inch LCD Desktop Monitor.
2. Safety Information
Observe the following safety precautions to prevent damage to the monitor and to ensure your personal safety:
- Power Source: Use only the power cord supplied with the monitor and connect it to a properly grounded electrical outlet.
- Ventilation: Do not block ventilation openings. Ensure adequate space around the monitor for proper airflow.
- Liquid Exposure: Keep the monitor away from liquids. Do not expose it to rain or moisture.
- Cleaning: Disconnect the power cord before cleaning. Use a soft, dry cloth. Avoid liquid or aerosol cleaners.
- Placement: Place the monitor on a stable, flat surface. Avoid placing it in direct sunlight or near heat sources.
- Servicing: Do not attempt to service this product yourself. Refer all servicing to qualified service personnel.
3. Package Contents
Verify that all items are present in the package:
- NEC 22-inch LCD Desktop Monitor
- Monitor Stand (Base and Neck)
- Power Cord
- VGA Cable
- DVI Cable
- User Manual (this document)
4. Setup
4.1 Attaching the Stand
- Carefully place the monitor face down on a soft, clean cloth to prevent scratching the screen.
- Align the stand neck with the mounting slot on the back of the monitor.
- Secure the neck to the monitor using the provided screws (if applicable).
- Attach the stand base to the bottom of the stand neck and tighten the thumb screw or screws.
- Carefully lift the monitor and place it upright on a stable surface.
4.2 Connecting Cables
Connect the video and power cables as follows:
- Video Cable: Connect one end of the VGA or DVI cable to the corresponding port on your computer's graphics card and the other end to the VGA or DVI input port on the back of the monitor. Ensure the connection is secure.
- Power Cable: Connect the power cord to the monitor's power input port, then plug the other end into a grounded electrical outlet.
4.3 Powering On
Press the power button located on the front or bottom bezel of the monitor. The power indicator light should illuminate. Turn on your computer. The monitor should automatically detect the input signal and display your desktop.
5. Operating
5.1 On-Screen Display (OSD) Menu
The OSD menu allows you to adjust various monitor settings. The control buttons are typically located on the front or bottom bezel of the monitor.
- Menu Button: Press to open the OSD menu.
- Navigation Buttons (Up/Down or Left/Right): Use these to navigate through menu options.
- Select/Enter Button: Press to confirm a selection or enter a sub-menu.
- Exit Button: Press to exit the current menu or the OSD entirely.
5.2 Adjusting Settings
Common settings you can adjust include:
- Brightness: Adjusts the overall luminance of the screen.
- Contrast: Adjusts the difference between light and dark areas of the image.
- Color Temperature: Changes the color warmth or coolness (e.g., 6500K for standard, 9300K for cooler).
- Input Select: Manually switch between VGA and DVI inputs if the monitor does not auto-detect.
- Auto Adjust: (For VGA input only) Automatically optimizes the image position, phase, and clock.
6. Maintenance
6.1 Cleaning the Monitor
To maintain the monitor's appearance and performance:
- Screen: Gently wipe the screen with a soft, lint-free cloth. For stubborn marks, lightly dampen the cloth with water or a specialized screen cleaner (apply to cloth, not directly to screen).
- Casing: Wipe the monitor casing with a soft, dry cloth.
- Avoid: Do not use abrasive cleaners, waxes, or solvents as they can damage the surface.
7. Troubleshooting
If you encounter issues with your monitor, refer to the following common problems and solutions:
| Problem | Possible Cause | Solution |
|---|---|---|
| No image on screen / Power LED off | Power cable disconnected; Monitor not powered on. | Ensure power cable is securely connected to monitor and outlet. Press the monitor's power button. |
| No signal / "Input Not Supported" message | Video cable disconnected; Incorrect input selected; Computer not sending signal. | Check video cable connections. Use the OSD menu to select the correct input (VGA/DVI). Ensure computer is on and outputting video. |
| Image too dark/bright or colors incorrect | Brightness/Contrast settings incorrect; Color settings incorrect. | Adjust Brightness and Contrast via the OSD menu. Reset color settings to default or adjust color temperature. |
| Image is blurry or distorted (VGA only) | Timing issues with analog signal. | Run the 'Auto Adjust' function from the OSD menu. Ensure the display resolution on your computer matches the monitor's native resolution. |
8. Specifications
Key technical specifications for the NEC 22-inch LCD Desktop Monitor:
- Display Size: 22 inches (diagonal)
- Panel Type: LCD with LED Backlight
- Native Resolution: 1920 x 1080 (Full HD)
- Aspect Ratio: 16:9
- Input Ports: 1 x VGA, 1 x DVI-D
- Power Consumption: Typically 20W (Operating), <0.5W (Standby)
- VESA Mount Compatible: Yes (100mm x 100mm)
- Date First Available: May 24, 2012
9. Warranty and Support
For detailed warranty information and technical support, please refer to the official NEC Display Solutions website or contact their customer service. Warranty terms may vary by region and purchase date.
Online Support: Visit www.necdisplay.com/support
Contact: Refer to the support section of the website for regional contact numbers and email addresses.


