
1. Introduction
This manual provides essential information for the proper setup, operation, and maintenance of your Seismic Audio SAJT-12x4x50 12 Channel 50' XLR Snake Cable with 1/4" Returns. This audio snake is designed for professional sound applications, facilitating the connection of multiple microphones and instruments to a mixing console over a single, durable cable run.
The SAJT-12x4x50 features 12 XLR sends and 4 1/4" TRS returns, making it suitable for various live sound and studio environments. Please read this manual thoroughly before use to ensure optimal performance and longevity of your equipment.

Image 1.1: Overview of the Seismic Audio SAJT-12x4x50 snake cable, showing the stage box and fantail ends.
2. Product Features
- Model Number: SAJT-12x4x50
- Sends: 12 XLR channels for microphone and line-level inputs.
- Returns: 4 1/4" TRS channels for sending signals back to the stage (e.g., monitor mixes).
- Length: 50 Feet (approximately 15.24 meters).
- Construction: Heavy-duty steel stage box with handle, individually shielded pairs, heavy-duty strain relief at both ends.
- Connectors: High-quality XLR and 1/4" TRS connectors.
- Fantail: Color-coded for easy identification of channels.
3. Setup Instructions
Proper setup ensures reliable audio transmission and protects your equipment.
- Unpack the Snake: Carefully uncoil the snake cable. Avoid sharp bends or kinks that could damage the internal wiring.
- Position the Stage Box: Place the stage box (the end with multiple XLR and 1/4" jacks) on the stage or near the input sources. Ensure it is in a stable location where it will not be stepped on or tripped over.
- Run the Main Cable: Extend the main trunk cable from the stage box to your mixing console or audio interface. Secure the cable path to prevent hazards.
- Connect Inputs (Sends):
- Connect microphones, direct boxes, or other line-level sources to the XLR input jacks (labeled 1-12) on the stage box.
- Ensure all connections are secure.
- Connect Outputs (Returns):
- At the mixing console end, connect the color-coded XLR male connectors (sends) to the corresponding input channels on your mixer.
- Connect the 1/4" TRS male connectors (returns, labeled A-D) to the appropriate output jacks on your mixer (e.g., auxiliary sends for monitor mixes).
- Verify Connections: Double-check all connections before powering on any audio equipment.

Image 3.1: Close-up of the stage box with 12 XLR inputs and 4 1/4" TRS returns.
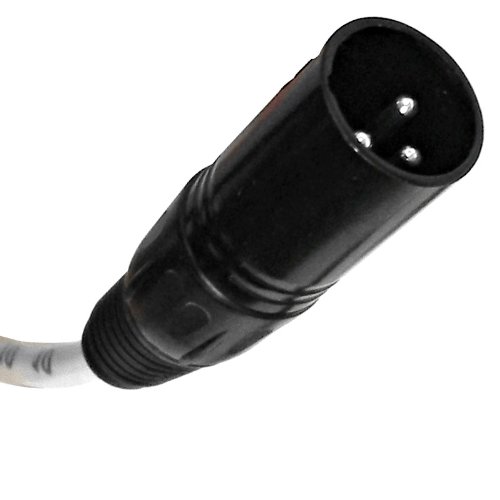
Image 3.2: Detail of an XLR male connector, used for inputs on the fantail.
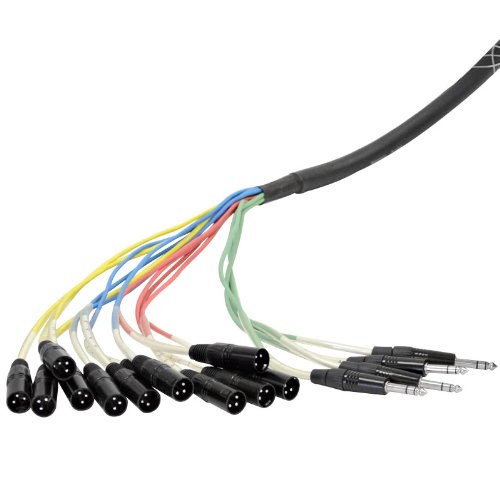
Image 3.3: The fantail end of the snake cable, showing color-coded XLR and 1/4" TRS connectors.
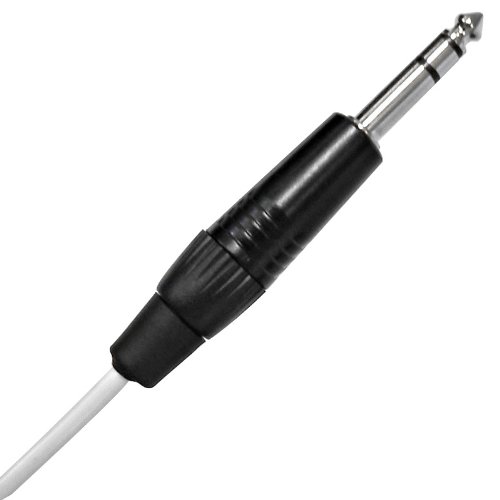
Image 3.4: Detail of a 1/4" TRS connector, used for returns on the fantail.
4. Operating Instructions
Once the snake cable is properly connected, operate your audio system as follows:
- Power On Sequence: Power on your audio equipment in the recommended sequence: sources (microphones, instruments) first, then mixer, then amplifiers/powered speakers.
- Signal Flow:
- Audio signals from the stage (microphones, instruments) will travel through the XLR inputs on the stage box, down the main cable, and out the XLR male connectors on the fantail to your mixer's inputs.
- Monitor mixes or other return signals from your mixer will travel through the 1/4" TRS outputs on the fantail, down the main cable, and out the 1/4" TRS jacks on the stage box to your stage monitors or other return destinations.
- Gain Staging: Adjust gain levels on your mixer for each input channel to achieve optimal signal-to-noise ratio without clipping.
- Monitor Mixes: Use the return channels to send independent monitor mixes to musicians on stage, if applicable.
- Power Off Sequence: When finished, power off your audio equipment in reverse order: amplifiers/powered speakers first, then mixer, then sources.
5. Maintenance
Regular maintenance helps extend the life of your snake cable.
- Cleaning: Wipe down the cable and connectors with a soft, dry cloth after each use. Avoid using harsh chemicals or solvents.
- Coiling: Coil the cable properly after each use to prevent tangles and internal damage. Use the "over-under" coiling method for best results.
- Storage: Store the snake cable in a cool, dry place, away from extreme temperatures and direct sunlight. Protect connectors from dust and moisture.
- Inspection: Periodically inspect the cable for any signs of wear, cuts, or damage to the jacket or connectors. Address any issues promptly.
- Strain Relief: Ensure that the strain relief at both ends of the cable and on individual connectors is intact and functioning to prevent stress on the internal wiring.
6. Troubleshooting
If you encounter issues, refer to the following common troubleshooting steps:
| Problem | Possible Cause | Solution |
|---|---|---|
| No sound from a channel |
|
|
| Hum or Buzz |
|
|
| Intermittent signal |
|
|
7. Specifications
| Feature | Detail |
|---|---|
| Model | SAJT-12x4x50 |
| Sends | 12 XLR |
| Returns | 4 1/4" TRS |
| Length | 50 Feet (approx. 15.24 meters) |
| Connector Type | XLR, 1/4" TRS |
| Cable Type | Audio Snake Cable |
| Compatible Devices | Mixer, Audio Interface, Amplifier, Professional Equipment |
| Indoor/Outdoor Usage | Indoor, Outdoor |
| UPC | 847861006396 |
8. Warranty and Support
Warranty: This Seismic Audio product comes with a one-year warranty covering parts and labor. Please retain your proof of purchase for warranty claims.
Support: For technical assistance, troubleshooting beyond this manual, or warranty inquiries, please contact Seismic Audio customer support. Refer to the official Seismic Audio website for current contact information.