1. Introduction
This manual provides essential information for the safe and efficient operation, maintenance, and troubleshooting of your SKIL 6002CA Impact Drill. Please read these instructions carefully before using the tool and keep them for future reference.
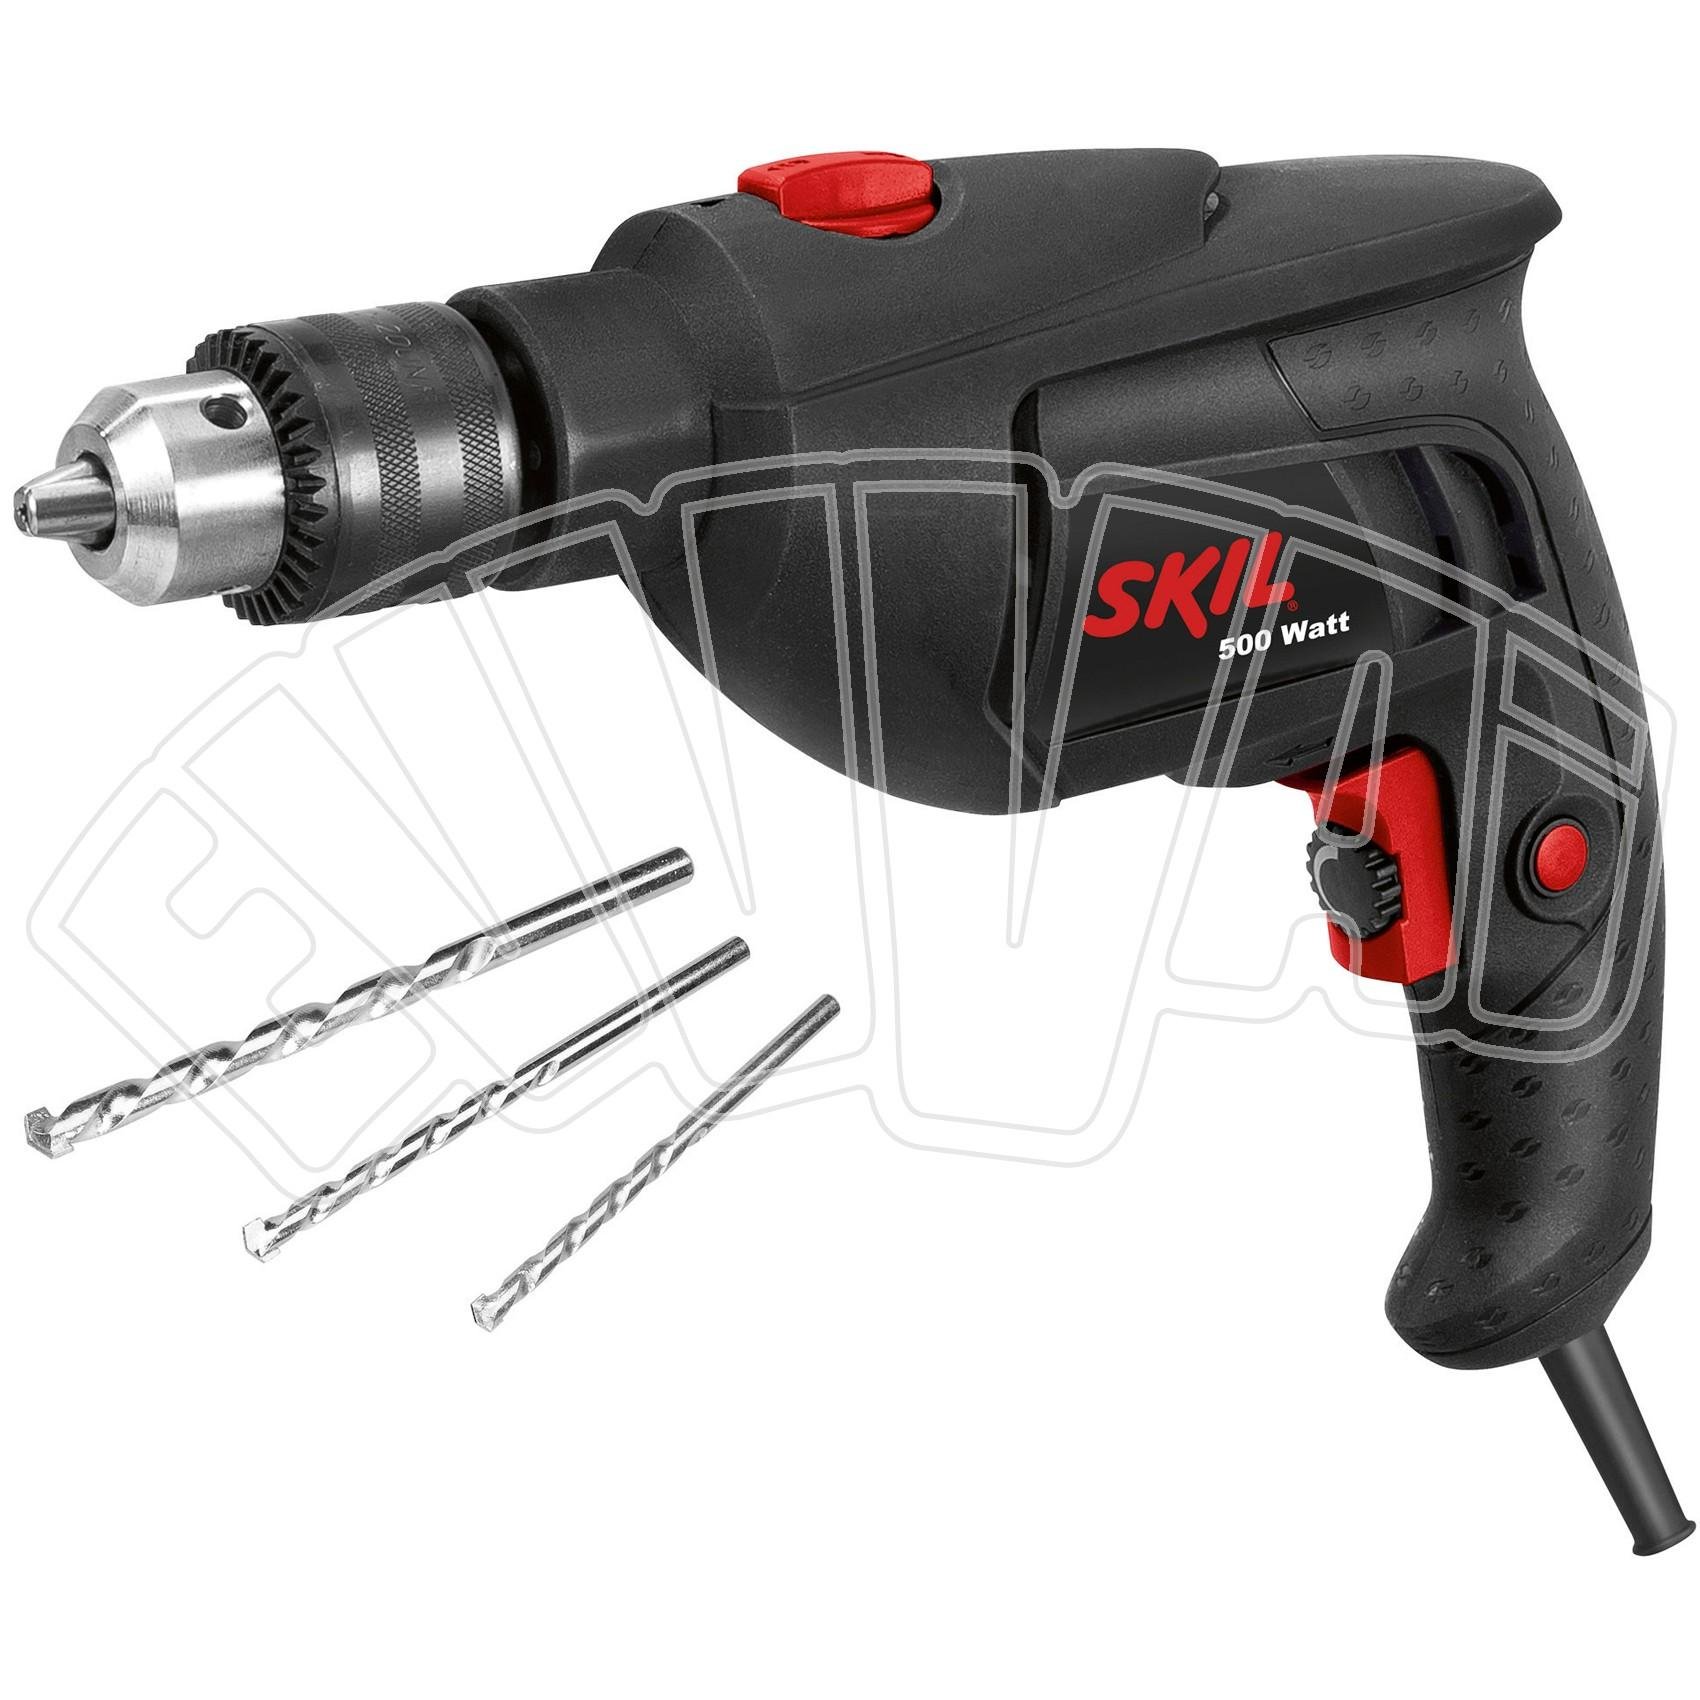
Image 1.1: The SKIL 6002CA Impact Drill, a versatile tool for various drilling tasks.
2. Safety Instructions
Always observe basic safety precautions to reduce the risk of fire, electric shock, and personal injury. Keep your work area clean and well-lit. Do not operate power tools in explosive atmospheres, such as in the presence of flammable liquids, gases, or dust.
- Wear appropriate personal protective equipment, including safety glasses, hearing protection, and gloves.
- Ensure the power tool is switched off before making any adjustments, changing accessories, or storing it.
- Secure the workpiece. Use clamps or a vise to hold the workpiece firmly.
- Avoid accidental starting. Ensure the switch is in the off-position before plugging in.
- Do not overreach. Maintain proper footing and balance at all times.
- Keep children and bystanders away while operating a power tool.
3. Product Components
Familiarize yourself with the main parts of your SKIL 6002CA Impact Drill:
- Keyed Chuck: For securely holding drill bits.
- Depth Stop: For precise drilling depth control.
- Variable Speed Switch: Allows adjustment of drilling speed.
- Lock-on Button: For continuous operation without holding the trigger.
- Speed Pre-selection Dial: To set the maximum speed for specific applications.
- Forward/Reverse Switch: Changes the rotation direction for drilling and screwdriving.
- Impact/Drill Mode Selector: Switches between standard drilling and impact drilling modes.

Image 3.1: Close-up view of the speed pre-selection dial and mode selector on the drill.
4. Setup
4.1 Attaching the Drill Bit
- Ensure the drill is unplugged from the power source.
- Insert the drill bit into the chuck.
- Use the chuck key to tighten the chuck jaws securely around the drill bit. Ensure it is centered and firmly held.
- Remove the chuck key before operating the drill.
4.2 Adjusting the Depth Stop
The depth stop allows you to drill to a consistent, predetermined depth.
- Loosen the depth stop locking screw.
- Adjust the depth stop to the desired drilling depth.
- Tighten the depth stop locking screw to secure its position.
5. Operating Instructions
5.1 Selecting Operating Mode
- For drilling in wood, metal, or plastic, set the mode selector to the drill symbol.
- For drilling in masonry or concrete, set the mode selector to the hammer drill symbol.
5.2 Adjusting Speed and Direction
- Use the speed pre-selection dial to set the maximum speed suitable for your material and drill bit.
- The variable speed switch allows fine-tuning of the speed during operation.
- For screwdriving or removing jammed bits, use the forward/reverse switch to change the rotation direction.
- For continuous operation, press the lock-on button after engaging the variable speed switch. Press the switch again to release.
5.3 Drilling in Wood and Metal

Image 5.1: Drilling into wood with the SKIL 6002CA Impact Drill.
- Select the appropriate drill bit for the material.
- Set the drill to standard drilling mode.
- Apply steady, even pressure. Do not force the drill.
5.4 Drilling in Masonry
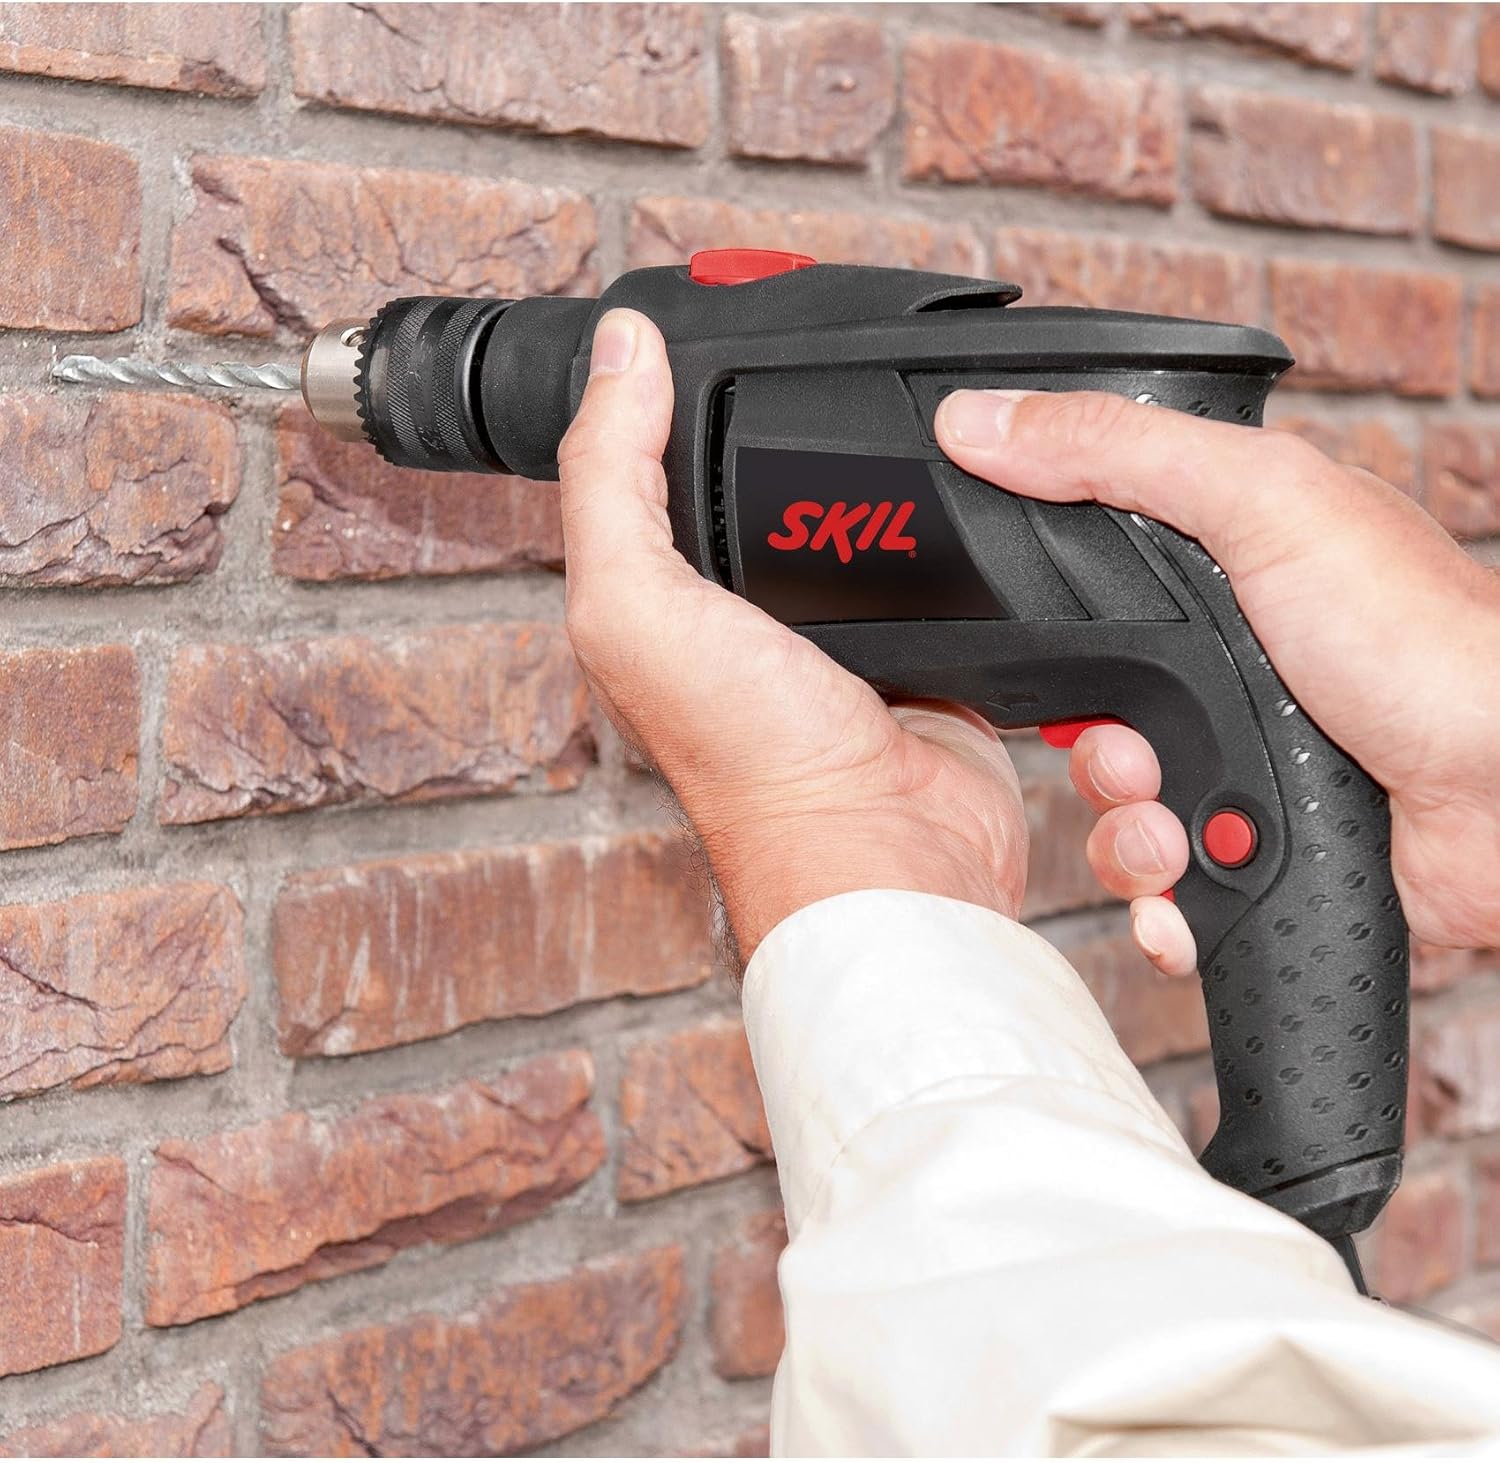
Image 5.2: Impact drilling into a brick wall using the SKIL 6002CA.
- Use carbide-tipped masonry drill bits.
- Set the drill to impact drilling mode.
- Apply firm, consistent pressure. The impact action will assist in breaking through hard materials.
6. Maintenance
Regular maintenance ensures the longevity and optimal performance of your drill.
- Cleaning: Keep the ventilation openings clear and clean. Regularly clean the tool housing with a soft, damp cloth. Do not use solvents.
- Chuck Maintenance: Periodically clean the chuck jaws to ensure proper grip.
- Cord Inspection: Regularly inspect the power cord for damage. If damaged, have it replaced by a qualified service technician.
- Storage: Store the drill in a dry, secure place, out of reach of children.
7. Troubleshooting
| Problem | Possible Cause | Solution |
|---|---|---|
| Drill does not start. | No power supply; faulty switch. | Check power connection; contact service center. |
| Drill bit slips in chuck. | Chuck not tightened sufficiently; worn chuck jaws. | Tighten chuck with key; replace chuck if worn. |
| Reduced drilling performance. | Dull drill bit; incorrect mode selected; insufficient pressure. | Replace or sharpen drill bit; select correct mode (e.g., impact for masonry); apply firm, consistent pressure. |
| Overheating. | Continuous heavy load; blocked ventilation. | Allow drill to cool; clear ventilation openings. |
8. Specifications
- Brand: SKIL
- Model Number: F0156002CA
- Power Source: Electric
- Max Power: 500 Watts
- Voltage: 240 Volts
- Max Rotation Speed: 3000 RPM
- Max Chuck Size: 13 mm
- Max Torque: 35 Newton-meters
- Drill Type: Impact Drill
- Special Feature: Reverse Rotation
- Material: Synthetic material
- Color: Black
- Product Weight: 1800 Grams
- Included Components: Drill bit set
9. Warranty and Support
9.1 Warranty Information
The warranty period for the SKIL 6002CA Impact Drill is 24 months for consumer use. For professional or similar use, the warranty period is 12 months. The validity of the warranty commences on the date of purchase by the first buyer, as determined by the original proof of purchase.
Please retain your proof of purchase for warranty claims.
9.2 Customer Support
For technical assistance, spare parts, or warranty claims, please contact your local SKIL service center or authorized dealer. You can find contact information on the official SKIL website or through your retailer.
When contacting support, please have your model number (F0156002CA) and proof of purchase ready.