Introduction
This manual provides detailed instructions for the safe installation, operation, and maintenance of your Dainolite Lighting DLSL701-WBM-SC 1-Light Pendant. Please read this manual thoroughly before beginning installation and retain it for future reference. This pendant light features a white black marble glass shade and a satin chrome finish, designed for indoor use.
Safety Instructions
WARNING: Risk of electric shock. Disconnect power at the circuit breaker or fuse box before installation or servicing. All electrical connections must be in accordance with local and National Electrical Code (NEC) standards.
- Ensure the power supply is turned off before installation.
- Consult a qualified electrician if you are unsure about the installation process.
- Do not exceed the maximum wattage specified for the bulb (50 watts).
- Use only the specified bulb type (MR16).
- Handle glass components with care to prevent breakage.
- This fixture is designed for 120 Volts AC supply.
Package Contents
Verify that all components are present and undamaged before proceeding with installation. If any parts are missing or damaged, do not attempt to assemble or install the fixture. Contact Dainolite customer service for assistance.
- 1 x Pendant Light Fixture (DLSL701-WBM-SC)
- 1 x White Black Marble Glass Shade
- 1 x MR16 Halogen Bulb (50 watts)
- 1 x Mounting Hardware Kit (includes mounting bracket, screws, wire nuts)
- 1 x Instruction Manual
Setup and Installation
Follow these steps carefully for proper installation. It is recommended to have two people for installation.
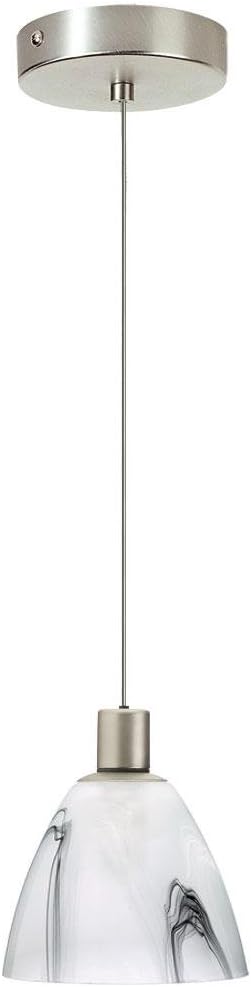
Image: The Dainolite DLSL701-WBM-SC 1-Light Pendant, featuring a cylindrical satin chrome canopy, a thin suspension wire, and a bell-shaped glass shade with white and black marble patterns. The fixture is designed for ceiling mounting.
- Turn Off Power: Locate the circuit breaker or fuse box that controls the power to the light fixture location. Turn off the main power supply. Verify power is off using a voltage tester.
- Prepare Mounting: Remove the existing fixture (if any). Attach the mounting bracket from the hardware kit to the electrical junction box in the ceiling using the provided screws. Ensure it is securely fastened.
- Adjust Cord Length: The pendant cord length can be adjusted. Carefully push the cord up into the canopy or pull it down from the canopy to achieve the desired hanging height. Secure the cord in place using the provided strain relief mechanism within the canopy.
- Make Electrical Connections:
- Connect the bare copper ground wire from the fixture to the bare copper ground wire from the junction box (or to the green ground screw on the mounting bracket).
- Connect the white (neutral) wire from the fixture to the white (neutral) wire from the junction box using a wire nut.
- Connect the black (hot) wire from the fixture to the black (hot) wire from the junction box using a wire nut.
- Secure Fixture: Carefully tuck all wires into the junction box. Align the canopy of the pendant fixture with the mounting bracket and secure it in place using the decorative nuts or screws provided.
- Install Bulb: Insert the MR16 halogen bulb into the socket. Do not touch the glass of the bulb directly with bare hands; use a clean cloth or glove to avoid oil residue.
- Restore Power: Once the fixture is securely installed and the bulb is in place, restore power at the circuit breaker or fuse box.
Operating Instructions
The Dainolite DLSL701-WBM-SC pendant light is operated via a standard wall switch connected to the electrical circuit. Ensure the bulb is correctly installed and power is supplied to the fixture.
- To Turn On: Flip the wall switch to the "ON" position.
- To Turn Off: Flip the wall switch to the "OFF" position.
Note: While some specifications mention "Remote" control, this typically refers to compatibility with external dimmer switches or smart home systems that use remote control functionality, not an included remote control with the basic fixture.
Maintenance
Regular maintenance will help preserve the appearance and functionality of your pendant light.
- Cleaning: To clean the fixture, ensure the power is off and the fixture is cool. Wipe with a soft, dry or slightly damp cloth. Do not use abrasive cleaners, solvents, or polishes as they may damage the finish or glass.
- Bulb Replacement:
- Turn off power to the fixture at the circuit breaker.
- Allow the bulb to cool completely before touching.
- Carefully remove the old MR16 bulb from the socket.
- Insert a new MR16 halogen bulb (maximum 50 watts) into the socket. Avoid touching the glass of the new bulb with bare hands.
- Restore power.
Troubleshooting
If you encounter issues with your pendant light, refer to the following common problems and solutions:
| Problem | Possible Cause | Solution |
|---|---|---|
| Light does not turn on. |
|
|
| Light flickers. |
|
|
If troubleshooting steps do not resolve the issue, contact a qualified electrician or Dainolite customer support.
Specifications
| Feature | Detail |
|---|---|
| Brand | Dainolite |
| Model Number | DLSL701-WBM-SC |
| Light Fixture Form | Pendant |
| Body Material | Metal/Glass |
| Finish Type | Satin Chrome Finish |
| Shade Material | Glass (White Black Marble) |
| Bulb Type | MR16 Halogen |
| Number of Light Sources | 1 |
| Wattage | 50 watts (Max) |
| Voltage | 120 Volts |
| Power Source | Corded Electric |
| Mounting Type | Ceiling Mount |
| Item Weight | 2 Pounds |
| Product Dimensions | 5 x 5 x 5 inches |
| Special Feature | Bulb Included, UL Listed |
Warranty and Support
Dainolite products are manufactured to high quality standards. Specific warranty information for your DLSL701-WBM-SC pendant light is typically provided with the product packaging or can be found on the official Dainolite website. Please retain your proof of purchase for warranty claims.
For technical support, missing parts, or warranty inquiries, please contact Dainolite customer service directly. Contact information can usually be found on the manufacturer's website or on the product packaging.
Manufacturer: Dainolite Lighting


