1. Introduction
Thank you for purchasing the WEP 858D SMD Hot Air Rework Station. This device is designed for precise soldering and desoldering of surface-mount components (SMD) using controlled hot air. It features a heat control sensor for stable temperature, adjustable air volume, and an automatic cold air function to prolong the heating element's lifespan. Please read this manual thoroughly before operation to ensure safe and efficient use.
2. Safety Instructions
Always observe the following safety precautions to prevent injury or damage to the equipment:
- Ensure the power supply matches the voltage specified on the unit (220 VAC).
- Do not operate the unit in damp or wet conditions.
- Keep flammable materials away from the hot air gun. The nozzle can reach very high temperatures.
- Always place the hot air gun in its holder when not in use. The automatic shutdown feature will activate.
- Do not touch the hot air nozzle or heated components directly. Use appropriate tools.
- Ensure adequate ventilation in the work area to dissipate fumes.
- Unplug the unit from the power outlet before cleaning or maintenance.
- This device is not intended for use by persons with reduced physical, sensory, or mental capabilities unless supervised.
3. Package Contents
Verify that all items are present in the package:
- 1 x WEP 858D Main Unit
- 1 x Hot Air Gun
- 1 x Handle Holder
- 3 x Nozzles (various sizes)
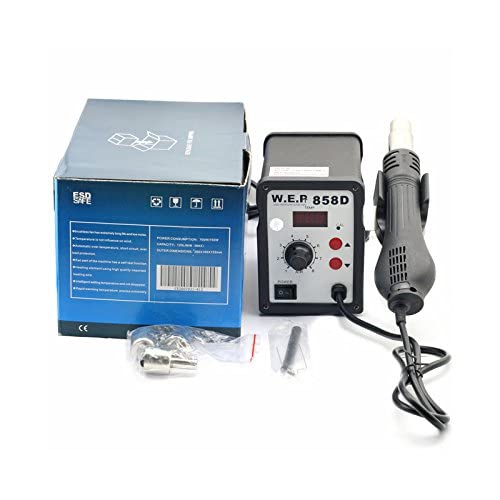
Figure 1: WEP 858D unit with hot air gun, handle holder, and three nozzles.
4. Product Overview
The WEP 858D consists of a main control unit and a hot air gun. The main unit features controls for temperature and air volume, along with a digital LED display for temperature feedback.
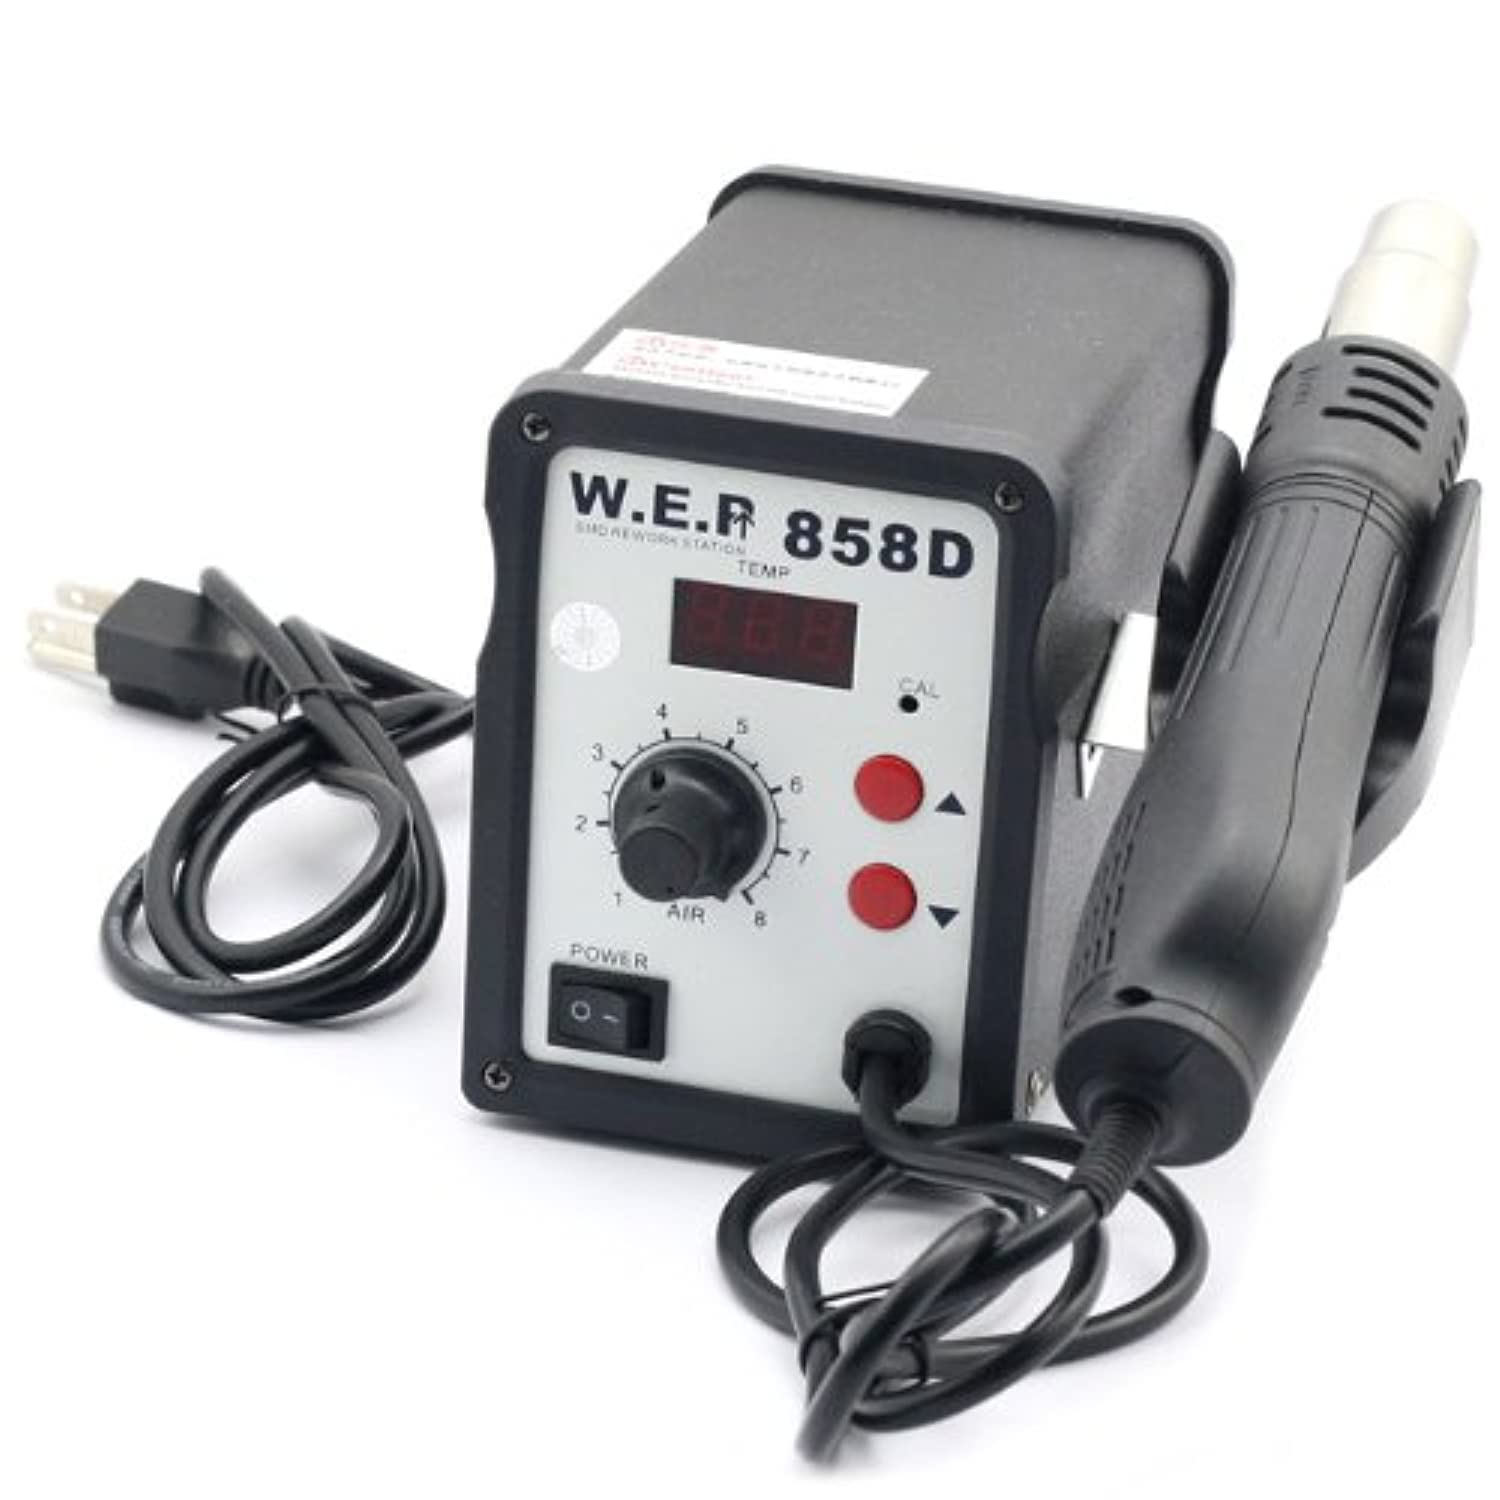
Figure 2: Front view of the WEP 858D main unit with power switch, temperature controls, air volume knob, and LED display.
Main Unit Controls:
- Power Switch: Turns the unit ON/OFF.
- Temperature Control Buttons: Up and down buttons to adjust the desired temperature.
- Air Volume Knob: Rotary knob to adjust the hot air flow rate.
- LED Display: Shows the current operating temperature.
5. Setup
- Unpacking: Carefully remove all components from the packaging.
- Placement: Place the main unit on a stable, heat-resistant surface in a well-ventilated area.
- Connect Hot Air Gun: Plug the hot air gun's connector into the designated port on the main unit. Ensure a secure connection.
- Install Handle Holder: Attach the handle holder to the side of the main unit or a convenient location on your workbench. This holder is crucial for the automatic cool-down and shutdown function.
- Select Nozzle: Choose an appropriate nozzle for your application and securely attach it to the hot air gun.
- Power Connection: Connect the power cord to the main unit and then plug it into a grounded 220 VAC power outlet.
6. Operating Instructions
- Power On: Flip the power switch on the main unit to the 'ON' position. The LED display will light up.
- Set Temperature: Use the 'Up' and 'Down' buttons to set the desired temperature. The LED display will show the set temperature and then quickly rise to it.
- Adjust Air Volume: Rotate the air volume knob to adjust the airflow rate. Start with a lower setting and increase as needed.
- Operation: Once the desired temperature is reached, remove the hot air gun from its holder. The unit will begin blowing hot air. Direct the hot air stream onto the component to be worked on.
- Automatic Cool-down: When you place the hot air gun back into its holder, the unit will automatically switch to a cool-down mode, blowing cold air until the heating element has cooled sufficiently. The LED display will show the temperature decreasing. Once cooled, the unit will enter standby or shut down, depending on the model's specific logic. This feature protects the heating element and extends its lifespan.
- Power Off: After use and cool-down, turn off the power switch and unplug the unit from the power outlet.
7. Maintenance
Regular maintenance ensures optimal performance and longevity of your WEP 858D rework station:
- Cleaning: Periodically clean the exterior of the unit and the hot air gun with a soft, dry cloth. Do not use abrasive cleaners or solvents.
- Nozzle Inspection: Ensure nozzles are free from solder residue or blockages. Clean them carefully if necessary.
- Air Inlet: Keep the air inlet vents on the main unit clear of dust and debris to ensure proper airflow and cooling.
- Storage: Store the unit in a dry, dust-free environment when not in use.
8. Troubleshooting
If you encounter issues, refer to the following common problems and solutions:
- No Power:
- Check if the power cord is securely plugged into the unit and the wall outlet.
- Ensure the power switch is in the 'ON' position.
- Verify the wall outlet is functional.
- No Hot Air / Incorrect Temperature:
- Ensure the hot air gun is properly connected to the main unit.
- Check if the hot air gun is removed from its holder; the unit will not blow hot air if it's in the holder during cool-down.
- Verify the temperature setting on the LED display.
- Weak Airflow:
- Adjust the air volume knob to a higher setting.
- Check for any blockages in the nozzle or the air gun's outlet.
- Ensure the air inlet vents on the main unit are not obstructed.
- Unit Does Not Cool Down Automatically:
- Ensure the hot air gun is correctly placed in its holder, triggering the sensor.
If problems persist, contact customer support.
9. Specifications
| Parameter | Value |
|---|---|
| Input Voltage | 220 VAC ±10% 50 Hz |
| Power Consumption | 700 W |
| Temperature Display | LED |
| Air Blower Type | Brushless Fan |
| Air Volume | 120 L/minute (max) |
| Temperature Range | 100°C - 450°C |
| Adjustment Mode | Buttons (Temperature), Rotary Knob (Air Volume) |
| Noise Level | <45 dB |
| Handle Length | 120 cm (including wire) |
| Dimensions (H×W×L) | 13.8 × 10 × 15 mm |
10. Warranty and Support
For warranty information and technical support, please refer to the documentation provided with your purchase or visit the official WEP website. Contact details for customer service can typically be found on the manufacturer's website or your purchase receipt.


