
1. Introduction
This manual provides essential information for the safe and efficient installation, operation, and maintenance of your Century SQ1202 2 HP Pool Motor. Please read these instructions thoroughly before installation or use to ensure proper function and longevity of the product. Retain this manual for future reference.
The Century SQ1202 is a 2 HP, 3450 RPM, 48Y Frame, Capacitor Start/Capacitor Run, ODP Enclosure, Square Flange Pool Motor designed for pool and spa applications.
2. Safety Information
WARNING: Risk of electrical shock or electrocution. This product must be installed and serviced by a qualified professional in accordance with all applicable local and national electrical codes.
- Always disconnect power to the motor at the circuit breaker before performing any installation, maintenance, or service.
- Ensure proper grounding of the motor to prevent electrical shock.
- Do not operate the motor if it is damaged or if any electrical components are exposed to water.
- Keep children and unauthorized persons away from the pool equipment area.
- This product contains chemicals known to the State of California to cause cancer and birth defects or other reproductive harm (Proposition 65 warning).
3. Package Contents
Verify that all components are present before beginning installation:
- Century SQ1202 2 HP Pool Motor
- Instruction Manual (this document)
Note: Additional mounting hardware or pump components are typically sold separately and are not included with the motor.
4. Setup and Installation
Installation should be performed by a qualified technician. Incorrect installation can lead to equipment damage, personal injury, or void the warranty.
4.1 Pre-Installation Check
- Ensure the new motor's specifications (HP, RPM, Frame, Voltage) match the existing pump requirements.
- Confirm the power supply voltage and circuit breaker amperage are appropriate for the motor's electrical requirements (11.2 Amps).
- Inspect the motor for any shipping damage.
4.2 Mounting the Motor
The SQ1202 features a square flange for direct attachment to compatible pool pump wet ends.
- Disconnect all electrical power to the pump system at the main circuit breaker.
- Drain the pump and disconnect any plumbing.
- Carefully remove the old motor from the pump wet end. Note the orientation of any seals or gaskets.
- Clean the mounting surface of the pump wet end.
- Install new shaft seals and gaskets as required by the pump manufacturer. Failure to replace seals can lead to leaks and motor damage.
- Align the new Century SQ1202 motor with the pump wet end and secure it using appropriate bolts and fasteners. Ensure a tight, leak-free connection.
4.3 Electrical Connections
All electrical wiring must comply with local and national electrical codes.
- Ensure the power is still disconnected.
- Open the motor's wiring compartment.
- Connect the power supply wires (Line, Neutral, Ground) to the corresponding terminals inside the motor's wiring compartment. Refer to the wiring diagram located on the motor's nameplate or inside the wiring compartment cover.
- Ensure all connections are secure and insulated.
- Close the wiring compartment cover securely.
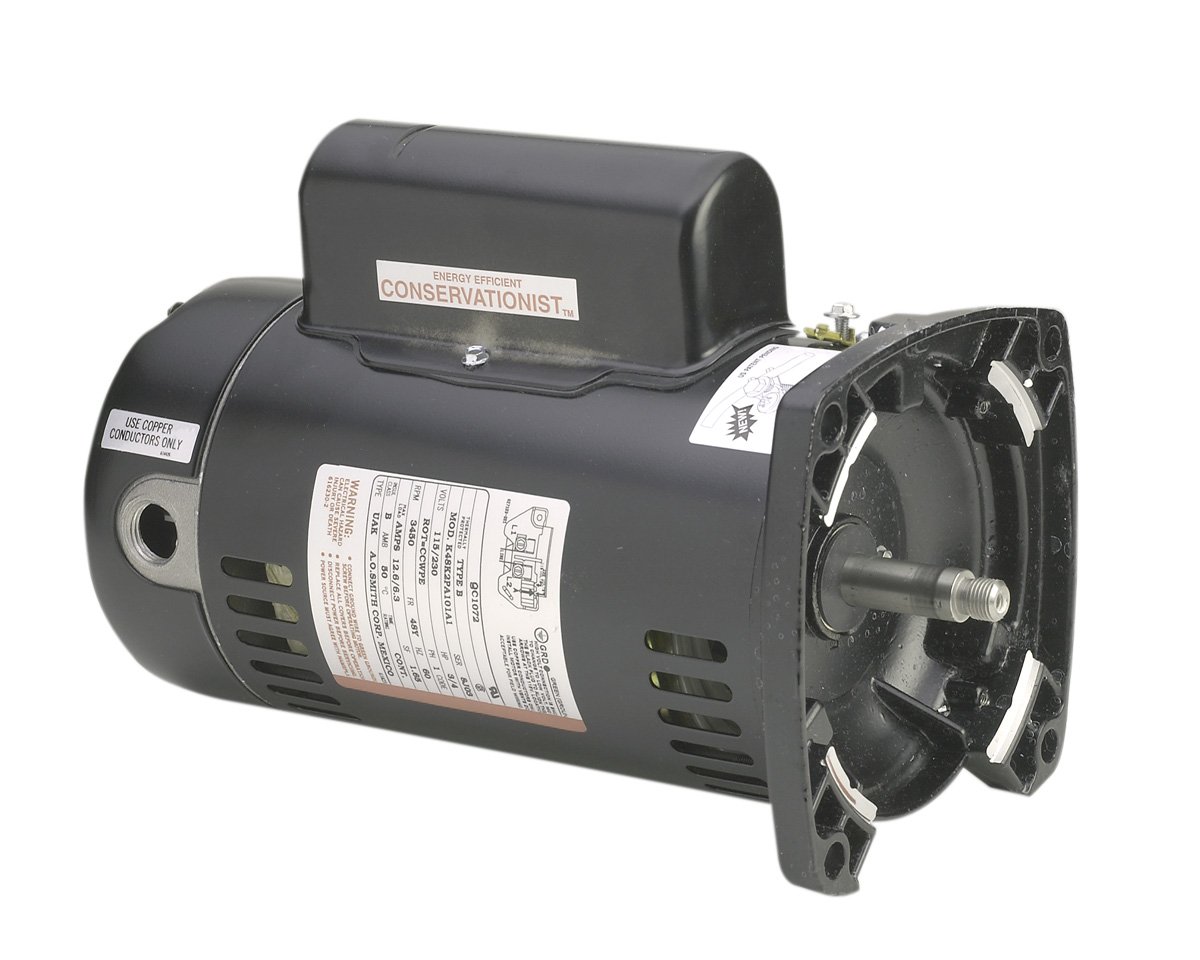
Figure 1: Century SQ1202 2 HP Pool Motor. This image shows the general appearance of the motor, highlighting its robust construction and square flange design for easy integration with pool pump systems.
5. Operating Instructions
5.1 Initial Start-Up
- Before restoring power, ensure the pump is primed according to the pump manufacturer's instructions. Running the pump dry can cause severe damage.
- Restore electrical power to the pump system at the circuit breaker.
- Observe the motor for smooth operation, unusual noises, or leaks.
- Allow the pump to run for a few minutes to ensure proper water flow and pressure.
5.2 Normal Operation
- The motor is designed for continuous duty in appropriate pool environments.
- Monitor the pump and motor regularly for any changes in performance or sound.
- Ensure adequate ventilation around the motor to prevent overheating. The ODP (Open Drip Proof) enclosure requires air circulation for cooling.
6. Maintenance
Regular maintenance helps ensure the longevity and efficient operation of your pool motor.
- Keep Clean: Periodically clean the exterior of the motor to remove dirt, dust, and debris that can impede cooling. Use a soft, dry cloth. Do not spray water directly onto the motor.
- Ventilation: Ensure that the motor's ventilation openings are clear and unobstructed.
- Noise and Vibration: Listen for any unusual noises or excessive vibration. These could indicate worn bearings or other mechanical issues that require professional attention.
- Shaft Seals: Inspect the pump shaft seal regularly for leaks. A leaking seal can allow water to enter the motor, causing damage. Replace seals as needed.
- Electrical Connections: Annually, have a qualified technician inspect electrical connections for tightness and corrosion.
The motor bearings are typically sealed and do not require lubrication. Attempting to lubricate sealed bearings may cause damage.
7. Troubleshooting
Before attempting any troubleshooting, always disconnect power to the motor at the circuit breaker.
| Problem | Possible Cause | Solution |
|---|---|---|
| Motor does not start | No power; tripped breaker; faulty wiring; seized pump impeller; faulty capacitor | Check power supply and breaker; inspect wiring; clear impeller obstruction; consult a professional for capacitor replacement. |
| Motor hums but does not start | Faulty start capacitor; seized pump impeller; low voltage | Consult a professional for capacitor replacement; clear impeller obstruction; verify voltage supply. |
| Motor overheats and shuts off | Insufficient ventilation; low voltage; excessive load; faulty thermal overload protector | Ensure clear ventilation; verify voltage; check for pump obstruction; consult a professional. |
| Excessive noise or vibration | Worn bearings; misaligned pump; cavitation (air in pump) | Consult a professional for bearing replacement; check pump alignment; ensure pump is properly primed. |
| Water leaking from pump seal area | Worn or damaged shaft seal | Replace the pump shaft seal. |
If you are unable to resolve an issue using this troubleshooting guide, contact a qualified pool equipment technician.
8. Specifications
- Model: SQ1202
- Horsepower (HP): 2 HP
- Revolutions Per Minute (RPM): 3450 RPM
- Frame: 48Y Frame
- Motor Type: Capacitor Start/Capacitor Run
- Enclosure: ODP (Open Drip Proof)
- Mounting: Square Flange
- Amperage: 11.2 Amp
- Product Dimensions: 21.5 x 9 x 10.5 inches
- Item Weight: 32.4 pounds
- Manufacturer: Century Electric/AO Smith Motors Co
- Country of Origin: United States
9. Warranty and Support
For specific warranty information, please refer to the documentation provided with your purchase or contact Century Electric/AO Smith Motors Co directly. Warranty terms typically cover manufacturing defects for a limited period from the date of purchase.
For technical support, replacement parts, or service inquiries, please contact the manufacturer or an authorized service center. Always provide your motor's model number (SQ1202) and serial number when seeking support.

