1. Introduction
Thank you for purchasing the Panasonic SC-BTT195 Energy Star 5.1-Channel 1000-Watt Full HD 3D Blu-Ray Home Theater System. This manual provides essential information for the safe and efficient operation of your new home theater system. Please read these instructions carefully before use and retain them for future reference.
The SC-BTT195 system is designed to deliver an immersive audio-visual experience with its 5.1-channel surround sound, Full HD 3D Blu-Ray playback, and network connectivity features.
2. Safety Information
WARNING: To reduce the risk of electric shock, fire, or damage to the unit, observe the following precautions:
- Do not expose this unit to rain, moisture, dripping, or splashing.
- Do not place objects filled with liquids, such as vases, on the unit.
- Use only the recommended accessories.
- Do not remove covers. Refer servicing to qualified service personnel.
- Ensure proper ventilation. Do not block ventilation openings.
- Do not install near any heat sources such as radiators, heat registers, stoves, or other apparatus (including amplifiers) that produce heat.
- Protect the power cord from being walked on or pinched, particularly at plugs, convenience receptacles, and the point where they exit from the apparatus.
3. Package Contents
Please check that all items are included in the package:
- Blu-Ray Disc Player/Receiver Unit
- Front L/R Tallboy Speakers (2)
- Surround Speakers (2)
- Center Speaker (1)
- Subwoofer (1)
- Remote Control (with 2 AA batteries)
- Speaker Cables
- FM Indoor Antenna
- AC Power Cord
- Operating Instructions (this manual)
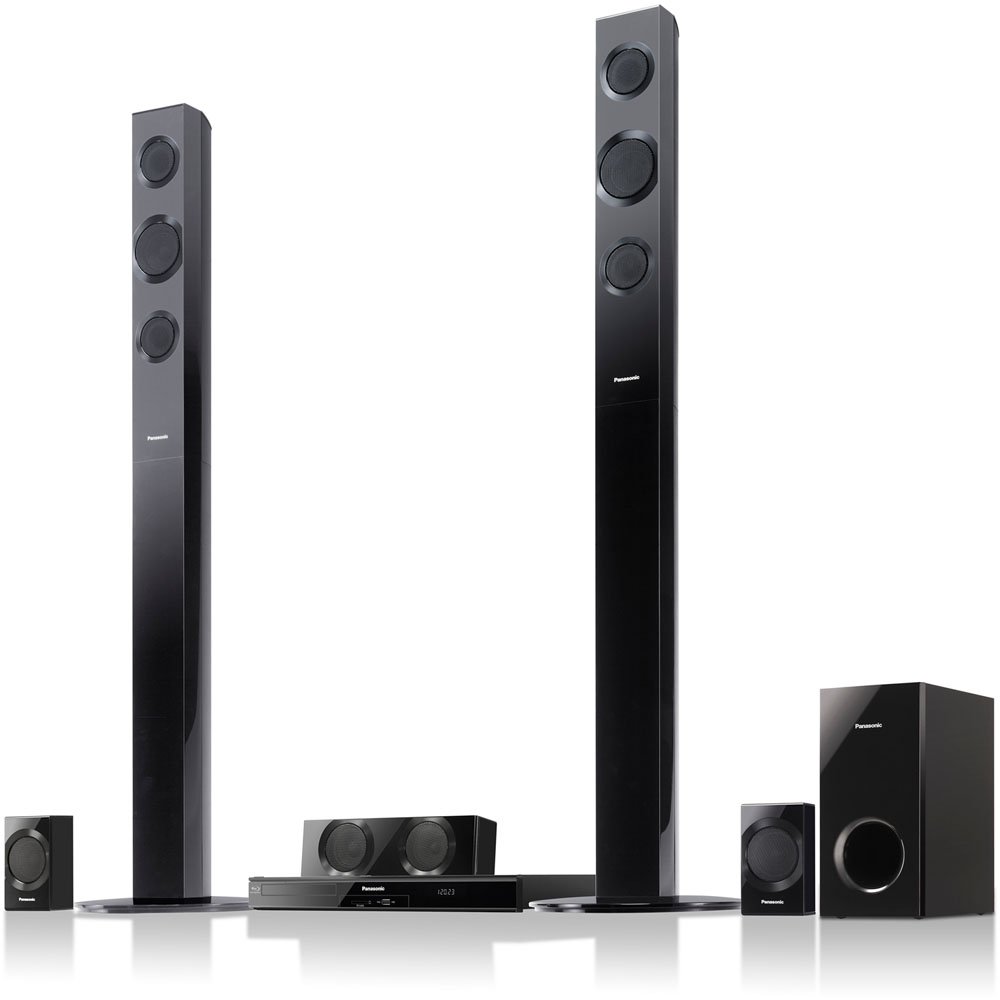
Image: Overview of the Panasonic SC-BTT195 Home Theater System, showing the main unit, tallboy front speakers, surround speakers, center speaker, and subwoofer.
4. Setup
4.1 Speaker Connection and Placement
Connect each speaker to the corresponding terminal on the main unit using the provided speaker cables. Ensure correct polarity (+ to + and - to -) for optimal sound quality.
- Front Speakers (L/R): Place these tallboy speakers to the left and right of your television, equidistant from the viewing position.
- Center Speaker: Position this speaker directly above or below your television, centered with the screen.
- Surround Speakers (L/R): Place these speakers to the sides or slightly behind your main listening position, facing inwards.
- Subwoofer: Position the subwoofer on the floor, preferably in a corner or near a wall for enhanced bass response.
Note: While the system is described as "Wi-Fi Ready," the rear speakers are wired. An optional accessory may be required for wireless rear speaker functionality.
4.2 Connecting to Your Television and Other Devices
- HDMI Connection (Video & Audio Out): Connect an HDMI cable from the HDMI OUT terminal on the SC-BTT195 main unit to an HDMI IN terminal on your television. This single cable transmits both video and audio signals to your TV.
- Optical Audio Input (External Devices): To receive 5.1 channel audio from external devices (e.g., game console, satellite box) that are connected directly to your TV via HDMI, you will need to use the optical audio input.
- Connect an optical cable from the optical audio output of your TV or an optical switcher to the OPTICAL IN terminal on the SC-BTT195.
- Important: Many TVs cannot pass through 5.1 surround sound from their HDMI inputs to their optical output. For true 5.1 surround sound from multiple external devices, consider using an optical audio switcher connected to the SC-BTT195's optical input, with each device connected to the switcher via its own optical cable.
- Network Connection: For internet features like Viera Connect, connect an Ethernet cable from the LAN terminal on the SC-BTT195 to your home router. This system is WIRED for network connectivity. A separate Wi-Fi adapter (not included) is required for wireless network access.
- Power Connection: After all other connections are made, plug the AC power cord into the main unit and then into a wall outlet.
5. Operating Instructions
5.1 Basic Playback
- Power On: Press the POWER button on the remote control or the main unit.
- Insert Disc: Gently insert a Blu-Ray Disc or DVD into the disc slot. The system will typically begin playback automatically.
- Select Input: Use the INPUT SELECTOR button on the remote to switch between sources (e.g., Disc, Optical, FM, iPod).
- Volume Control: Adjust the volume using the VOL +/- buttons on the remote.
- Playback Controls: Use PLAY, PAUSE, STOP, SKIP buttons for disc playback.
The system supports Dolby TrueHD and DTS-HD Master Audio for high-quality surround sound from compatible Blu-ray discs. It can also upscale DVDs to near 1080p resolution.
5.2 Network Features (Viera Connect)
Once connected to your home network (via Ethernet or optional Wi-Fi adapter), you can access Panasonic's Viera Connect platform.
- Press the VIERA CONNECT button on the remote to access the smart TV interface.
- Navigate through available applications such as Netflix, MLB.tv, and others using the remote's directional buttons.
- Note: The performance and interface of Viera Connect applications may vary. Ensure a stable internet connection for optimal streaming.
5.3 Smartphone Remote App
A smartphone remote app is available for enhanced control. Download the official Panasonic remote app from your device's app store and follow the in-app instructions to pair it with your SC-BTT195 system.
6. Maintenance
- Cleaning the Unit: Wipe the exterior of the unit with a soft, dry cloth. For stubborn stains, use a cloth lightly dampened with water and a mild detergent, then wipe dry. Do not use abrasive cloths, thinners, alcohol, or other chemical cleaners.
- Disc Care: Handle discs by their edges. Keep them clean and free of scratches. Store discs in their cases when not in use.
- Ventilation: Ensure that the ventilation openings on the unit are not blocked to prevent overheating.
- Batteries: Replace remote control batteries (2 AA) when the remote's range decreases or it becomes unresponsive.
7. Troubleshooting
Before seeking service, please check the following points.
No Power
- Ensure the AC power cord is securely plugged into both the unit and a working wall outlet.
- Check if the power outlet is functioning by plugging in another device.
No Picture on TV
- Verify the HDMI cable is correctly connected between the SC-BTT195 and your TV.
- Ensure your TV is set to the correct HDMI input source.
- Check the resolution settings on the SC-BTT195 (if accessible without picture).
No Sound or Incorrect Surround Sound
- Check all speaker cable connections for correct polarity and secure fit.
- Ensure the volume is not muted or set too low.
- If using an external device (e.g., game console, cable box) connected to your TV, and audio is routed via the TV's optical output to the SC-BTT195:
- Confirm the TV's audio output settings are configured to output digital audio.
- Note: Many TVs cannot pass 5.1 surround sound from their HDMI inputs to their optical output. If you are not getting 5.1 from an external device, connect the device's optical output directly to the SC-BTT195 (possibly via an optical switcher if multiple devices are used).
- For 5.1 surround sound, the source material (Blu-ray, game, streaming content) must be encoded with a 5.1 soundtrack. Stereo sources will only output sound from the front speakers.
- Ensure the correct audio input is selected on the SC-BTT195.
Network Connection Issues
- Verify the Ethernet cable is securely connected to both the SC-BTT195 and your router.
- Check your router and internet connection for proper operation.
- If using an optional Wi-Fi adapter, ensure it is correctly installed and configured.
8. Specifications
| Brand Name | Panasonic |
| Model Number | SC-BTT195 |
| Output Wattage | 1000 Watts |
| Product Dimensions | 29.7 x 16 x 19.6 inches |
| Item Weight | 34.6 pounds |
| Built-In Decoders | Dolby® Digital, Dolby® Digital Plus/ Dolby® TrueHD, Dolby® Pro Logic® II, DTS™-HD Master Audio Essential/ DTS™-HD High Resolution Audio |
| Number of Component Inputs | Optical (1) |
| Number of Component Outputs | HDMI (1) |
| Color | Black |
| Batteries Required | 2 AA batteries (included for remote) |
| First Available Date | March 15, 2012 |
9. Warranty and Support
For warranty information and customer support, please refer to the warranty card included with your product or visit the official Panasonic support website. Keep your purchase receipt as proof of purchase for warranty claims.
Online resources and FAQs may also be available on the Panasonic website to assist with common inquiries and technical support.