Introduction
Thank you for choosing the Remington RM3100 18-Inch Reel Push Mower. This manual provides essential information for the safe assembly, operation, and maintenance of your new mower. Please read all instructions carefully before use to ensure optimal performance and longevity of your product. Keep this manual for future reference.
Safety Information
Always prioritize safety when operating any lawn care equipment. Failure to follow these safety guidelines may result in injury or damage to the mower.
- Read the Manual: Familiarize yourself with all controls and proper use before operating the mower.
- Personal Protective Equipment: Wear appropriate footwear, long pants, and eye protection. Do not operate barefoot or in open-toed sandals.
- Clear the Area: Before mowing, remove all objects such as rocks, toys, wires, or other debris from the lawn that could be thrown by the blades.
- Inspect Mower: Ensure all parts are securely fastened and in good working condition before each use. Check for loose bolts or damaged components.
- Mow Dry Grass: For best results and safety, mow only when the grass is dry. Wet grass can be slippery and difficult to cut.
- Maintain Control: Always maintain a firm grip on the handle. Push the mower at a comfortable, steady pace.
- Slope Safety: Exercise extreme caution when mowing on slopes. Mow across the face of slopes, never up and down. Avoid excessively steep slopes.
- Children and Bystanders: Keep children and pets away from the mowing area. Do not allow anyone to approach the mower while it is in operation.
- Storage: Store the mower in a dry, secure location, out of reach of children.
Setup and Assembly
Your Remington RM3100 reel mower requires minimal assembly. Follow these steps to prepare your mower for use.
1. Handle Assembly
Attach the upper and lower handle sections using the provided hardware. Ensure all bolts are tightened securely. The handle should feel stable and firm.

Figure 1: Fully assembled Remington RM3100 reel push mower, showing the handle, cutting reel, and grass catcher.
2. Attaching the Grass Catcher
The grass catcher is designed to collect clippings as you mow. Hook the grass catcher onto the designated points on the mower frame, typically located behind the cutting reel. Ensure it is securely attached to prevent it from dislodging during operation.
3. Adjusting Cutting Height
The RM3100 features a dual-lever height adjustment system, offering multiple cutting positions from 0.75 to 2.5 inches. To adjust the cutting height:
- Locate the two adjustment levers, one on each side of the mower near the wheels.
- Simultaneously pull both levers outwards to disengage them from their current position.
- Move the levers up or down to select your desired cutting height. Refer to the markings for specific height settings.
- Release the levers, ensuring they snap firmly into place in the chosen notch. Verify that both sides are set to the same height to ensure an even cut.
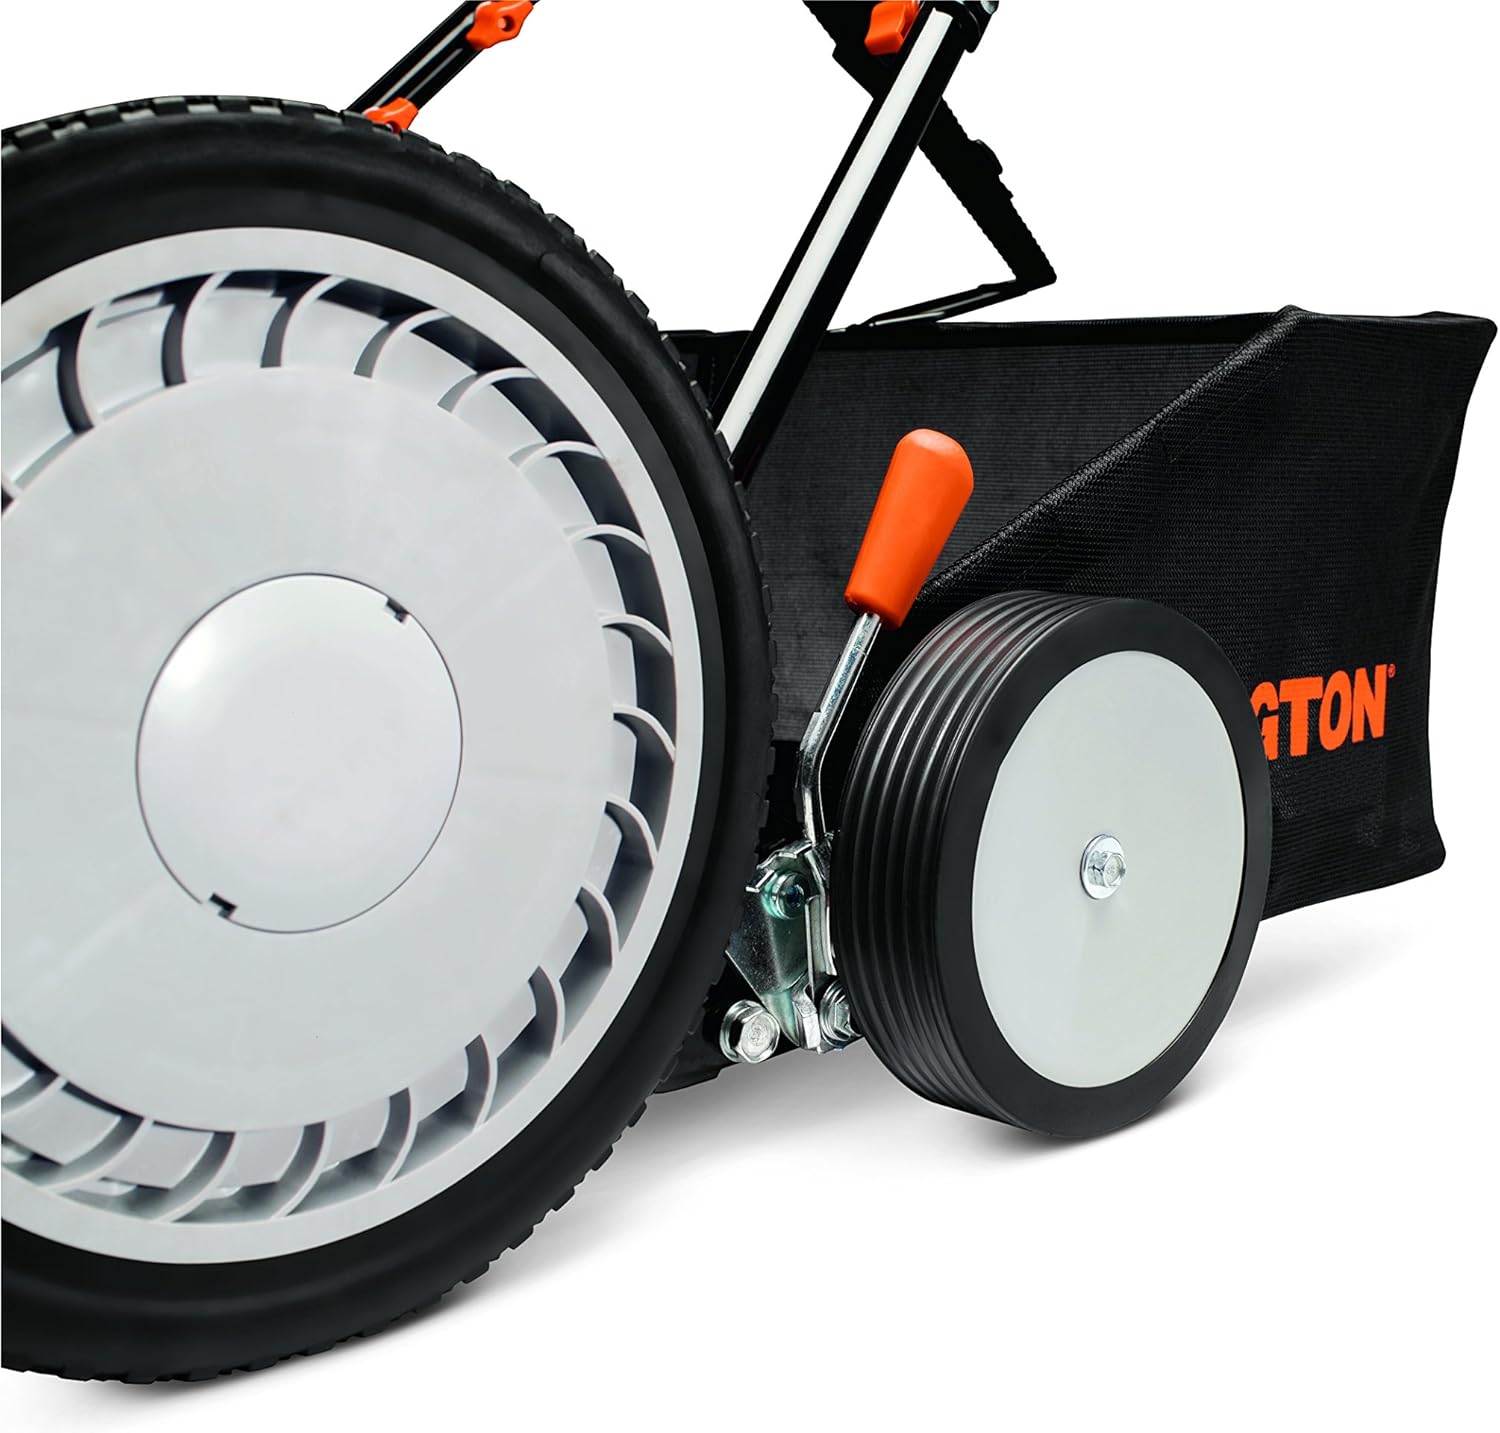
Figure 2: Detail of the wheel and height adjustment mechanism. The orange lever allows for easy adjustment of the cutting height.
Operating Instructions
Proper operation ensures an efficient cut and extends the life of your mower.
1. Pre-Operation Check
- Ensure the grass catcher is securely attached, if using.
- Verify the cutting height is set correctly for your lawn conditions.
- Clear the mowing area of any debris.
2. Mowing Technique
Push the mower forward at a consistent, comfortable pace. The blades will rotate as the wheels turn, shearing the grass against the stationary bed knife. Overlap each pass slightly to ensure complete coverage and avoid missed strips.

Figure 3: Front view of the Remington RM3100, highlighting the 18-inch cutting path and the reel blades.
3. Grass Height Considerations
- For best results, avoid cutting more than one-third of the grass blade length at a time.
- If grass is excessively tall, it may require multiple passes, gradually lowering the cutting height with each pass.
- Reel mowers perform optimally on light to medium duty yard work and well-maintained lawns.
Maintenance
Regular maintenance ensures your mower remains in top condition and provides a clean cut.
1. Cleaning
- After each use, clean grass clippings from the blades, cutting deck, and grass catcher.
- Use a stiff brush or cloth. Avoid using water hoses directly on the blades to prevent rust, especially on the cutting reel.
- Ensure the mower is completely dry before storage.
2. Blade Care
- The 5-blade adjustable reel is designed for durability. Over time, blades may dull.
- Sharpening should be performed by a qualified service technician or using a specialized reel mower sharpening kit.
- Lightly oil the blade before putting it away to prevent rust and ensure smooth operation.
3. Storage
- Store the mower in a dry, covered area to protect it from weather elements.
- Ensure the mower is clean and dry before storing for extended periods.
Troubleshooting
Refer to this section for solutions to common issues you might encounter.
| Problem | Possible Cause | Solution |
|---|---|---|
| Mower jams or stops | Obstruction (rock, branch), excessively tall/thick grass, dull blades. | Remove obstruction. Raise cutting height and make multiple passes. Sharpen blades. |
| Uneven cut | Cutting height not set equally on both sides, dull blades, uneven terrain. | Verify both height adjustment levers are in the same notch. Sharpen blades. Adjust mowing path for uneven areas. |
| Grass catcher falls off | Improper attachment, excessive vibration, bent attachment points. | Ensure catcher is securely hooked. Check and adjust metal loops for tighter fit if necessary. |
| Mower difficult to push | Grass too tall/wet, dull blades, debris in cutting mechanism. | Mow dry grass. Raise cutting height. Sharpen blades. Clear any debris. |
Specifications
| Feature | Detail |
|---|---|
| Brand | Remington |
| Model Number | RM3100 (15A-3100783) |
| Power Source | Manual |
| Material | Alloy Steel |
| Item Weight | 13 Pounds |
| Cutting Width | 18 Inches |
| Adjustable Cutting Height | 0.75 - 2.5 Inches (9 positions) |
| Assembly Required | Yes |
| GTIN (UPC) | 043033556267 |
Warranty & Support
Warranty Information
This Remington RM3100 18-Inch Reel Push Mower is backed by a 2-year limited warranty. This warranty covers defects in material and workmanship under normal use. Please retain your proof of purchase for warranty claims. For full details regarding warranty terms and conditions, refer to the documentation included with your product or visit the official Remington website.
Customer Support
If you have questions about assembly, operation, maintenance, or require technical assistance, please contact Remington customer support. Contact information can typically be found on the product packaging or the official Remington website. When contacting support, please have your model number (RM3100) and purchase date available.


