Introduction
The ednet 87072 Universal Remote Control is designed to consolidate up to four different remote controls into a single, convenient device. It is compatible with a wide range of electronic equipment, including televisions, satellite receivers, DVD players, DVRs, and audio systems. This remote features pre-programmed codes for over 1000 manufacturers and includes a learning function for custom control. Its slim and modern design ensures comfortable handling.
Package Contents
- 1 x ednet 87072 Universal Remote Control
- 1 x User Manual (this document)
Note: 2 x AAA batteries are required and are not included in the package.
Product Overview
Familiarize yourself with the layout and functions of your ednet 87072 Universal Remote Control.
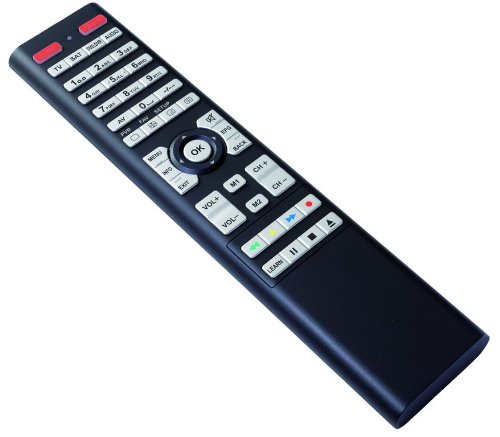
Image: The ednet 87072 Universal Remote Control. This image displays the remote control from a top-down, slightly angled perspective, highlighting its black body and white, grey, and red buttons. Key buttons visible include the red device selection buttons (TV, SAT, PROG, AUDIO), numeric keypad (0-9), navigation cluster with 'OK' button, volume and channel controls (VOL+, VOL-, CH+, CH-), and media playback buttons. The 'LEARN' button is also visible towards the bottom.
Button Functions:
- Device Selection Buttons (Red): TV, SAT (Satellite), PROG (Program/DVD/DVR), AUDIO. Press to select the device you wish to control.
- Numeric Keypad (0-9): For direct channel input and menu navigation.
- PVR, FAV, SETUP: Specific functions for Personal Video Recorders, Favorite channels, and Setup menus.
- MENU, INFO, EXIT: Standard menu, information display, and exit functions.
- Navigation Pad (with OK): Used for navigating menus and confirming selections.
- BACK, EPG: Go back to the previous screen or access the Electronic Program Guide.
- VOL+, VOL-: Adjust volume up and down.
- CH+, CH-: Change channels up and down.
- M1, M2: Macro or custom function buttons.
- Media Control Buttons (Red, Green, Yellow, Blue): Often used for teletext, specific menu functions, or media playback controls.
- Playback Controls (<<, ||, >>, |<, >|): Rewind, Play/Pause, Fast Forward, Previous Track, Next Track.
- LEARN: Activates the learning function to copy commands from an original remote.
Setup
1. Battery Installation
- Open the battery compartment cover on the back of the remote control.
- Insert two (2) AAA batteries, ensuring correct polarity (+/-) as indicated inside the compartment.
- Close the battery compartment cover securely.
2. Device Programming (Pre-programmed Codes)
The remote is pre-programmed for over 1000 manufacturers. Follow these steps to set up your devices:
- Turn on the device you wish to control (e.g., TV).
- Press and hold the desired device selection button (e.g., TV) for approximately 3 seconds until the LED indicator lights up.
- Enter the 3-digit code for your device's brand from the provided code list (refer to the separate code list document, if applicable, or search online for ednet 87072 codes). The LED will flash once for each digit entered.
- If the code is valid, the LED will turn off. Point the remote at your device and test its functions (e.g., Power, Volume).
- If the device does not respond, repeat the process with the next code listed for your brand.
3. Learning Function
If a device code is not available or you wish to customize specific buttons, use the learning function:
- Place the ednet 87072 remote and your original remote control head-to-head, approximately 1-3 cm apart.
- Press and hold the LEARN button on the ednet 87072 remote for 3 seconds until the LED indicator lights up steadily.
- Press the device selection button (e.g., TV) for the device you want to program. The LED will flash slowly.
- Press the button on the ednet 87072 remote that you want to teach a function (e.g., M1). The LED will flash rapidly.
- Press and hold the corresponding button on your original remote control. The LED on the ednet 87072 will flash three times and then light up steadily, indicating successful learning.
- Repeat steps 4 and 5 for any other buttons you wish to program.
- To exit learning mode, press the LEARN button again. The LED will turn off.
Operating Instructions
1. Switching Between Devices
To control a specific device, simply press the corresponding device selection button (TV, SAT, PROG, or AUDIO). The remote will then send commands for that selected device.
2. Basic Functions
- Power: The red power button (usually top right) turns the selected device on or off.
- Volume Control: Use VOL+ and VOL- to adjust the sound level.
- Channel Control: Use CH+ and CH- to change channels.
- Numeric Input: Use the 0-9 buttons for direct channel entry or menu selections.
- Menu Navigation: Use the MENU, INFO, EXIT, and the navigation pad with OK to interact with device menus.
3. All Off Function
The remote may feature an 'All Off' function to power down all programmed devices simultaneously. Consult the specific code list or remote documentation for activation details, as this often involves a specific button combination or a dedicated 'All Off' button.
Maintenance
Cleaning
To clean the remote control, use a soft, dry cloth. For stubborn dirt, slightly dampen the cloth with water. Avoid using abrasive cleaners, solvents, or harsh chemicals, as these can damage the remote's surface or internal components.
Battery Replacement
When the remote's range decreases or buttons become unresponsive, it is likely time to replace the batteries. Follow the battery installation steps in the Setup section. Always replace both AAA batteries at the same time with new ones. Dispose of used batteries responsibly according to local regulations.
Troubleshooting
- Remote not working:
- Ensure batteries are inserted correctly and are not depleted. Replace if necessary.
- Verify that the correct device selection button (TV, SAT, etc.) is pressed for the device you intend to control.
- Ensure there are no obstructions between the remote and the device's infrared receiver.
- Device not responding to commands:
- Re-enter the device code. Try alternative codes for your brand if the first one doesn't work.
- If using the learning function, ensure the original remote was working and the learning process was completed successfully. Repeat the learning steps if needed.
- Some buttons not working after programming:
- Some device codes may not support all functions. Use the learning function to copy missing commands from your original remote.
- LED indicator not lighting up:
- Check battery installation and charge.
- If the issue persists, the remote may be faulty.
Specifications
| Feature | Detail |
|---|---|
| Model Name | 87072 |
| Brand | ednet |
| Connectivity Technology | Infrared |
| Compatible Devices | Television, Satellite, DVD, DVR, Audio |
| Maximum Supported Devices | 4 |
| Maximum Range | 10 Meters |
| Battery Type | 2 x AAA (not included) |
| Special Features | Pre-programmed codes, Learning function, All Off function |
Warranty and Support
For warranty information and technical support, please refer to the documentation provided at the time of purchase or visit the official ednet website. Keep your proof of purchase for warranty claims.


