1. Product Overview
The Corona Lighting CL-505-BZ is a low voltage mini aluminum bullet directional light designed for outdoor landscape illumination. This durable fixture is constructed from die-cast aluminum with a bronze UV powder coat finish, engineered to withstand various outdoor conditions. It features a 360-degree rotatable shroud and an adjustable knuckle, allowing precise direction of light to highlight specific areas.
The light utilizes an MR16 halogen bulb with a maximum rating of 50 watts. Its clear, tempered glass lens is heat-resistant and includes a silicone gasket to prevent moisture intrusion. This fixture is suitable for enhancing security and aesthetic appeal in outdoor environments.
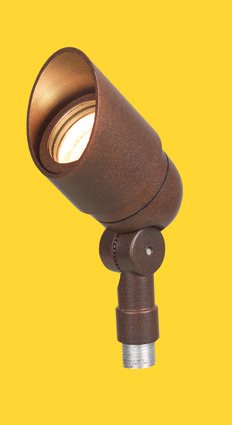
Image of the Corona Lighting CL-505-BZ mini aluminum bullet directional light in bronze finish, showing its compact design and adjustable head.
2. Safety Information
- Low Voltage System: This product operates on a 12V low voltage system. It requires a remote 12V transformer (not included) for operation. Do not connect directly to high voltage power.
- Professional Installation Recommended: If you are unfamiliar with low voltage wiring, consult a qualified electrician.
- Water and Moisture: Ensure all connections are properly sealed and protected from moisture. The fixture includes a silicone gasket for the lens, but external connections require additional protection.
- Bulb Handling: Allow the bulb to cool completely before attempting to replace it. Avoid touching halogen bulbs with bare hands, as oils can reduce bulb life.
- Grounding: Ensure proper grounding according to local electrical codes.
- Heat: The fixture and bulb can become hot during operation. Avoid touching the light when it is on or immediately after it has been turned off.
3. Package Contents
Verify that all components are present before beginning installation:
- CL-505-BZ Mini Aluminum Bullet Directional Light Fixture
- 8-inch Ground Spike
- Pre-wired 3-foot Cable for Direct Burial
- 20W MR16 Halogen Bulb (initial bulb)
Items NOT Included (Required for Operation):
- Remote 12V Transformer
- Wire Connector (Corona Lighting CX839 Low Voltage Universal Cable Connector is recommended)
4. Setup and Installation
- Plan Placement: Determine the desired location for your light fixture. Ensure the location allows for proper cable routing to your 12V transformer.
- Install Ground Spike: Securely insert the 8-inch ground spike into the soil at the chosen location. Ensure it is stable and upright.
- Mount Fixture: Attach the light fixture to the ground spike. The adjustable knuckle allows for initial positioning.
- Wiring Connections:
- Ensure the 12V transformer is unplugged from the power source.
- Route the pre-wired 3-foot cable from the fixture to the main low voltage cable connected to your transformer.
- Using a suitable low voltage wire connector (e.g., Corona Lighting CX839), securely connect the fixture's cable to the main low voltage cable. Ensure all connections are tight and protected from moisture.
- Bury the cable for direct burial, ensuring it is protected from damage.
- Insert Bulb: The fixture comes with a 20W MR16 bulb. If replacing, carefully insert the MR16 bulb into the socket. Do not exceed the maximum 50W rating.
- Adjust Direction: Once wired, plug in the 12V transformer. Adjust the light direction using the adjustable knuckle and the 360-degree rotatable shroud to achieve the desired illumination angle.
5. Operating Instructions
- Power On/Off: The light fixture is controlled by the connected 12V transformer. Turn the transformer on or off to power the light. If your transformer has a timer or remote control, operate the light according to the transformer's instructions.
- Adjusting Light Direction: The fixture features an adjustable knuckle and a 360-degree rotatable shroud. Loosen the knuckle to adjust the vertical angle of the light. Rotate the shroud to adjust the horizontal direction. Tighten the knuckle once the desired position is achieved.
6. Maintenance
- Cleaning: Periodically clean the tempered glass lens and the fixture's exterior with a soft, damp cloth to remove dirt and debris. Avoid abrasive cleaners that could damage the finish or lens.
- Bulb Replacement:
- Ensure the power to the fixture is off and the bulb has cooled completely.
- Carefully remove the shroud and access the MR16 bulb.
- Gently pull the old MR16 bulb straight out from its socket.
- Insert a new MR16 halogen bulb (maximum 50W) into the socket. Avoid touching the glass of the new bulb with bare hands.
- Reattach the shroud, ensuring the silicone gasket is properly seated to maintain moisture resistance.
- Connection Check: Annually inspect all wire connections for corrosion or damage. Ensure they remain secure and waterproof.
7. Troubleshooting
| Problem | Possible Cause | Solution |
|---|---|---|
| Light does not turn on. |
|
|
| Light flickers. |
|
|
| Reduced light output. |
|
|
8. Specifications
| Model Number | CL-505-BZ |
| Brand | Corona Lighting |
| Voltage | 12 Volts (Low Voltage) |
| Wattage (Max) | 50 Watts |
| Bulb Type | MR16 Halogen (20W MR16 included) |
| Bulb Base | MR16 (Bi-pin, typically GU5.3 for low voltage). Note: Product description specifies MR16 halogen bulb. Some specifications may incorrectly list GU10. |
| Material | Die-cast Aluminum Housing, Tempered Glass Lens, Silicone Gasket |
| Finish | Bronze UV Powder Coat |
| Indoor/Outdoor Usage | Outdoor |
| Shroud Rotation | 360 Degrees |
| Item Weight | 1.1 Pounds |
9. Warranty and Support
Specific warranty details for the Corona Lighting CL-505-BZ are not provided in this manual. Please refer to the manufacturer's official website or contact your retailer for comprehensive warranty information.
For technical support or further assistance, please contact Corona Lighting customer service through their official channels. Keep your purchase receipt and model number (CL-505-BZ) handy when seeking support.