Introduction
This manual provides essential information for the safe and effective operation, maintenance, and troubleshooting of your Central Pneumatic 1-1/2 Gallon Texture Paint Spray Gun. Please read this manual thoroughly before initial use and retain it for future reference.
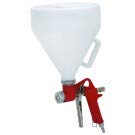
Image: Central Pneumatic 1-1/2 Gallon Texture Paint Spray Gun with a large white hopper and a red and silver gun body.
Safety Information
Always observe basic safety precautions when using this product to reduce the risk of injury or damage.
- Handle with care.
- Avoid direct skin or eye contact with contents.
- Use in a well-ventilated area.
- Keep out of reach of children.
- Wear appropriate personal protective equipment (PPE) such as safety glasses, gloves, and a respirator.
- Ensure proper air pressure settings are used as specified for the material being sprayed.
Product Features
The Central Pneumatic Texture Paint Spray Gun is designed for efficient application of various textured materials. Key features include:
- Three Nozzle Sizes: Includes 3/16", 1/4", and 5/16" nozzles for versatile application.
- Gravity Feed System: Ensures consistent material flow for even application.
- Large 1-1/2 Gallon Hopper: Reduces the need for frequent refills, increasing productivity.
- Lightweight, Durable Cast Aluminum Gun Body: Provides robust construction while minimizing user fatigue.
- Powder Coated Finish: Offers enhanced durability and corrosion resistance.
Components and Parts
Familiarize yourself with the main components of your spray gun:
- Hopper (1-1/2 gallon capacity)
- Gun Body (cast aluminum)
- Trigger
- Air Inlet (for connecting to an air compressor)
- Nozzles (3/16", 1/4", 5/16")
- Nozzle Cap/Retaining Ring
- Material Flow Adjustment
- Air Flow Adjustment
Setup
- Unpack and Inspect: Carefully remove all components from the packaging. Inspect for any damage during shipping. Do not operate if damaged.
- Connect Air Supply: Attach a suitable air hose (not included) to the air inlet on the gun body. Ensure the connection is secure and leak-free. An air compressor capable of providing sufficient CFM (Cubic Feet per Minute) for your chosen material is required.
- Select Nozzle: Choose the appropriate nozzle size (3/16", 1/4", or 5/16") based on the viscosity of the material you intend to spray and the desired texture. Screw the selected nozzle firmly onto the gun.
- Prepare Material: Prepare your texture paint or material according to the manufacturer's instructions. Ensure it is properly mixed and free of lumps that could clog the gun.
- Fill Hopper: Pour the prepared material into the 1-1/2 gallon hopper. Do not overfill.
Operating Instructions
- Adjust Air Pressure: Connect the air hose to your compressor and set the air pressure. Start with a lower pressure (e.g., 20-30 PSI) and adjust as needed to achieve the desired spray pattern and texture. Refer to your material's specifications for recommended pressure.
- Test Spray: Before applying to your final surface, perform a test spray on a scrap piece of material or cardboard. This allows you to fine-tune air pressure and material flow adjustments.
- Apply Material: Hold the spray gun perpendicular to the surface, maintaining a consistent distance (typically 12-24 inches, depending on desired texture). Move the gun in smooth, even passes, overlapping each pass slightly.
- Adjusting Texture:
- For finer texture: Increase air pressure or use a smaller nozzle.
- For coarser texture: Decrease air pressure or use a larger nozzle.
- Adjust the material flow knob to control the amount of material being sprayed.
- Stopping Operation: Release the trigger to stop spraying. If taking a break, place the gun in a secure position to prevent accidental discharge.
Maintenance
Proper cleaning and maintenance are crucial for the longevity and performance of your spray gun.
- Immediate Cleaning: Clean the spray gun immediately after each use. Do not allow material to dry inside the gun or hopper.
- Empty Hopper: Empty any remaining material from the hopper.
- Rinse: Fill the hopper with an appropriate cleaning solution (water for water-based materials, mineral spirits or solvent for oil-based materials). Spray the cleaning solution through the gun until it runs clear.
- Disassemble and Clean: Disassemble the nozzle and any removable parts. Use a brush and cleaning solution to thoroughly clean all components, paying close attention to the nozzle and fluid passages.
- Lubrication: Apply a few drops of air tool oil to the air inlet after cleaning to lubricate internal components.
- Storage: Store the clean, dry spray gun in a safe, dry place away from extreme temperatures.
Troubleshooting
| Problem | Possible Cause | Solution |
|---|---|---|
| No spray or weak spray |
|
|
| Inconsistent spray pattern |
|
|
| Material dripping from nozzle |
|
|
Specifications
| Brand | Central Pneumatic |
| Model Number | 66103 |
| Tank Volume | 1.5 Gallons |
| Nozzle Sizes | 3/16", 1/4", 5/16" |
| Material | Cast Aluminum (Gun Body) |
| Power Source | Air Powered |
| Item Weight | 3.4 pounds |
| UPC | 792363661034 |
Warranty and Support
For warranty information or technical support, please refer to the documentation included with your purchase or contact Central Pneumatic customer service directly. Keep your purchase receipt for warranty claims.
Note: Specific warranty terms and contact information may vary. Please consult the official Central Pneumatic website or your retailer for the most current details.