1. Introduction
This manual provides instructions for the proper installation, operation, and maintenance of your Jaclo 8023-ACU Drop-In Showerarm Mount. This product is designed to securely hold a shower arm in place, integrating seamlessly with your plumbing fixtures. Please read all instructions carefully before beginning installation to ensure safe and correct usage.
2. Safety Information
WARNING: Failure to follow these instructions could result in property damage or personal injury.
- Always turn off the main water supply before performing any plumbing work.
- Wear appropriate personal protective equipment, such as safety glasses and gloves, during installation.
- Ensure all connections are secure and watertight to prevent leaks.
- If you are unsure about any part of the installation process, consult a qualified plumber.
- Keep small parts away from children.
3. Parts List
Verify that all components are present before beginning installation.
- Jaclo 8023-ACU Drop-In Showerarm Mount (1)
- Mounting Hardware (screws, anchors - quantity may vary based on model/packaging)
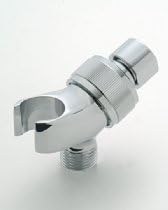
Figure 1: Jaclo 8023-ACU Drop-In Showerarm Mount. This image shows the Jaclo 8023-ACU Drop-In Showerarm Mount in an Antique Copper finish. The mount is designed to securely hold a shower arm in place, typically on a wall surface.
4. Setup & Installation
This section outlines the steps for installing your Jaclo 8023-ACU Drop-In Showerarm Mount. Ensure you have all necessary tools and materials before proceeding.
Tools Required:
- Drill
- Drill bits (appropriate for wall material and anchor size)
- Screwdriver (Phillips or flathead, as required)
- Pencil
- Measuring tape
- Level
- Sealant (plumber's putty or thread sealant, if connecting to water lines)
Installation Steps:
- Prepare the Installation Area: Identify the desired location for the showerarm mount on the wall. Ensure there are no hidden pipes or electrical wires behind the wall at the drilling location.
- Mark Drilling Points: Hold the showerarm mount against the wall at the desired height and use a pencil to mark the locations for the mounting screws. Use a level to ensure the mount is straight.
- Drill Pilot Holes: Using a drill bit appropriate for your wall material and the provided anchors (if applicable), drill pilot holes at the marked locations.
- Insert Wall Anchors (if necessary): If installing into drywall or other hollow walls, insert the appropriate wall anchors into the pilot holes.
- Secure the Mount: Align the showerarm mount with the drilled holes. Insert the mounting screws through the mount and into the wall anchors or directly into studs. Tighten the screws firmly until the mount is secure against the wall. Do not overtighten.
- Install Shower Arm: Insert the shower arm into the opening of the mount. Ensure it is seated correctly. If the shower arm connects to a water supply, apply plumber's putty or thread sealant to the threads and tighten securely.
- Test for Stability: Gently pull on the installed shower arm to ensure the mount is stable and does not wobble.
5. Operating Instructions
The Jaclo 8023-ACU Drop-In Showerarm Mount functions as a fixed support for your shower arm. Once properly installed, it requires no active operation. Its purpose is to securely hold the shower arm and attached shower head in position, directing water flow as intended by the shower system.
- Ensure the shower arm is fully inserted and stable within the mount.
- Avoid applying excessive force or weight to the shower arm, as this could compromise the mount's integrity.
6. Maintenance
Regular cleaning and inspection will help maintain the appearance and functionality of your showerarm mount.
Cleaning:
- Clean the surface of the mount with a soft, damp cloth.
- For stubborn spots, use a mild soap solution.
- Avoid abrasive cleaners, harsh chemicals, or scouring pads, as these can damage the finish.
- Rinse thoroughly with clean water and dry with a soft cloth to prevent water spots.
Inspection:
- Periodically check the mounting screws for tightness. If loose, gently tighten them.
- Inspect the mount for any signs of wear, damage, or corrosion.
7. Troubleshooting
| Problem | Possible Cause | Solution |
|---|---|---|
| Mount feels loose or wobbly. | Mounting screws are not tight enough or wall anchors are insufficient. | Tighten mounting screws. If the problem persists, consider using more robust wall anchors or relocating the mount to a stud. |
| Shower arm does not fit securely. | Incorrect shower arm size or improper insertion. | Ensure the shower arm diameter matches the mount's opening. Re-insert the shower arm, ensuring it is fully seated. |
| Finish is discolored or damaged. | Use of abrasive cleaners or harsh chemicals. | Refer to the cleaning instructions in the Maintenance section. Damage from improper cleaning is typically not reversible. |
8. Specifications
| Feature | Detail |
|---|---|
| Model Number | 8023-ACU |
| Brand | Jaclo |
| Color | Antique Copper |
| Material | Copper |
| Mounting Type | Wall Mount |
| Product Dimensions | 3 x 2 x 3 inches |
| Item Weight | 9.9 ounces |
| Manufacturer | Standard Plumbing Supply |
| Country of Origin | United States |
9. Warranty & Support
Specific warranty information for the Jaclo 8023-ACU Drop-In Showerarm Mount is not provided in this document. For details regarding warranty coverage, terms, and conditions, please refer to the official Jaclo website or contact Jaclo customer support directly.
Customer Support:
For technical assistance, replacement parts, or further inquiries, please contact Jaclo customer service. Contact information can typically be found on the manufacturer's official website:
Jaclo Official Website: www.jaclo.com