Maxtec Max-O2 Plus Analyzer W/External Sensor User Manual
Model: Max-O2 Plus Analyzer W/External Sensor
1. Introduction
This manual provides essential instructions for the safe and effective use of the Maxtec Max-O2 Plus Analyzer with External Sensor. Please read this manual thoroughly before operating the device to ensure proper function and to prevent potential hazards. This device is designed for accurate oxygen concentration measurement in various applications.
2. Safety Information
Important Safety Precautions:
- Always follow local and national regulations for the use of oxygen monitoring equipment.
- Do not immerse the device in any liquid.
- Use only Maxtec-approved accessories and replacement parts.
- Keep the device away from strong electromagnetic fields.
- Ensure proper calibration before each use or as recommended by the manufacturer.
- This device is not intended for life-support applications where failure could result in injury or death.
3. Product Overview
The Max-O2 Plus Analyzer is a portable oxygen analyzer designed for quick and accurate oxygen concentration measurements. It features an external sensor for flexible placement and monitoring.
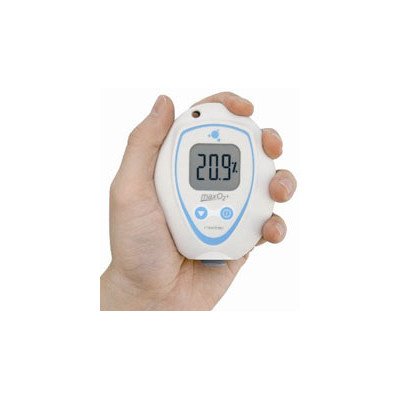
Figure 1: Maxtec Max-O2 Plus Analyzer with External Sensor. This image shows the compact analyzer unit connected to its external oxygen sensor via a cable. The analyzer features a digital display and control buttons.
Key Components:
- Analyzer Unit: Main display and control interface.
- External Oxygen Sensor: Connects to the analyzer for oxygen measurement.
- Tubing/Adapter: For connecting to gas sources (if applicable).
- Battery Compartment: Houses the power source.
4. Setup
Follow these steps for initial setup of your Max-O2 Plus Analyzer:
- Install Batteries: Open the battery compartment on the back of the analyzer and insert two AA batteries, observing correct polarity. Close the compartment securely.
- Connect External Sensor: Carefully plug the external oxygen sensor cable into the designated port on the analyzer unit. Ensure a firm connection.
- Power On: Press the power button to turn on the analyzer. The display should illuminate.
- Initial Calibration: Perform an initial calibration in 21% oxygen (room air) or 100% oxygen as required by your application. Refer to the "Operating" section for detailed calibration instructions.
5. Operating Instructions
5.1 Powering On/Off
- To turn on, press the ON/OFF button.
- To turn off, press and hold the ON/OFF button for 3 seconds.
5.2 Calibration
Regular calibration ensures accurate readings. Calibrate the device daily or before each use.
- Ensure the sensor is exposed to the calibration gas (e.g., room air for 21% O2, or a certified 100% O2 source).
- Wait for the reading to stabilize.
- Press and hold the CAL button until the display shows "CAL".
- Release the button. The analyzer will automatically adjust to the calibration gas concentration.
- Once calibration is complete, the display will return to showing the oxygen percentage.
5.3 Taking Measurements
- Position the external sensor in the environment or gas flow you wish to measure.
- Allow a few seconds for the reading to stabilize on the display.
- Read the oxygen concentration directly from the digital display.
6. Maintenance
Proper maintenance extends the life and accuracy of your analyzer.
6.1 Cleaning
- Wipe the exterior of the analyzer and sensor with a damp cloth and mild detergent.
- Do not use abrasive cleaners or solvents.
- Ensure no liquid enters the sensor or analyzer ports.
6.2 Sensor Replacement
The oxygen sensor has a limited lifespan. Replace the sensor when it no longer calibrates accurately or when the "LOW SENSOR" indicator appears.
- Turn off the analyzer.
- Disconnect the old external sensor from the analyzer.
- Connect the new Maxtec-approved external sensor.
- Turn on the analyzer and perform a full calibration as described in section 5.2.
6.3 Battery Replacement
Replace batteries when the "LOW BATT" indicator appears on the display.
- Turn off the analyzer.
- Open the battery compartment on the back.
- Remove old batteries and insert new AA batteries, ensuring correct polarity.
- Close the compartment securely.
7. Troubleshooting
| Problem | Possible Cause | Solution |
|---|---|---|
| No display when powered on | Dead or incorrectly installed batteries | Replace batteries, check polarity. |
| Inaccurate readings / Calibration failure | Sensor nearing end of life, incorrect calibration gas, sensor not exposed to calibration gas | Replace sensor, ensure correct calibration gas, re-calibrate in stable environment. |
| "LOW BATT" indicator | Low battery power | Replace batteries. |
| "LOW SENSOR" indicator | Oxygen sensor needs replacement | Replace the external oxygen sensor. |
8. Specifications
| Parameter | Value |
|---|---|
| Measurement Range | 0-100% Oxygen |
| Accuracy | ±1% of full scale at constant temperature and pressure |
| Response Time | <15 seconds for 90% response |
| Operating Temperature | 15°C - 40°C (59°F - 104°F) |
| Power Requirements | Two (2) AA Alkaline Batteries |
| Sensor Type | Galvanic Fuel Cell (External) |
| Expected Sensor Life | Approximately 1.5 million O2 percent hours (in normal use) |
9. Warranty Information
Maxtec warrants the Max-O2 Plus Analyzer to be free from defects in materials and workmanship for a period of one (1) year from the date of purchase. The external oxygen sensor is warranted for a period of one (1) year from the date of purchase. This warranty does not cover damage caused by misuse, unauthorized modification, or improper maintenance. For full warranty terms and conditions, please refer to the official Maxtec website or contact customer support.
10. Customer Support
If you have any questions or require assistance with your Max-O2 Plus Analyzer, please contact Maxtec customer support:
- Website: www.maxtec.com
- Email: support@maxtec.com
- Phone: Refer to the Maxtec website for regional contact numbers.
Please have your product model and serial number ready when contacting support.