1. Introduction
Thank you for purchasing the Gemini PS3-USB 3 Channel 10-Inch Mixer. This manual provides essential information for the proper setup, operation, and maintenance of your mixer. Please read this manual thoroughly before use to ensure optimal performance and to prevent damage.
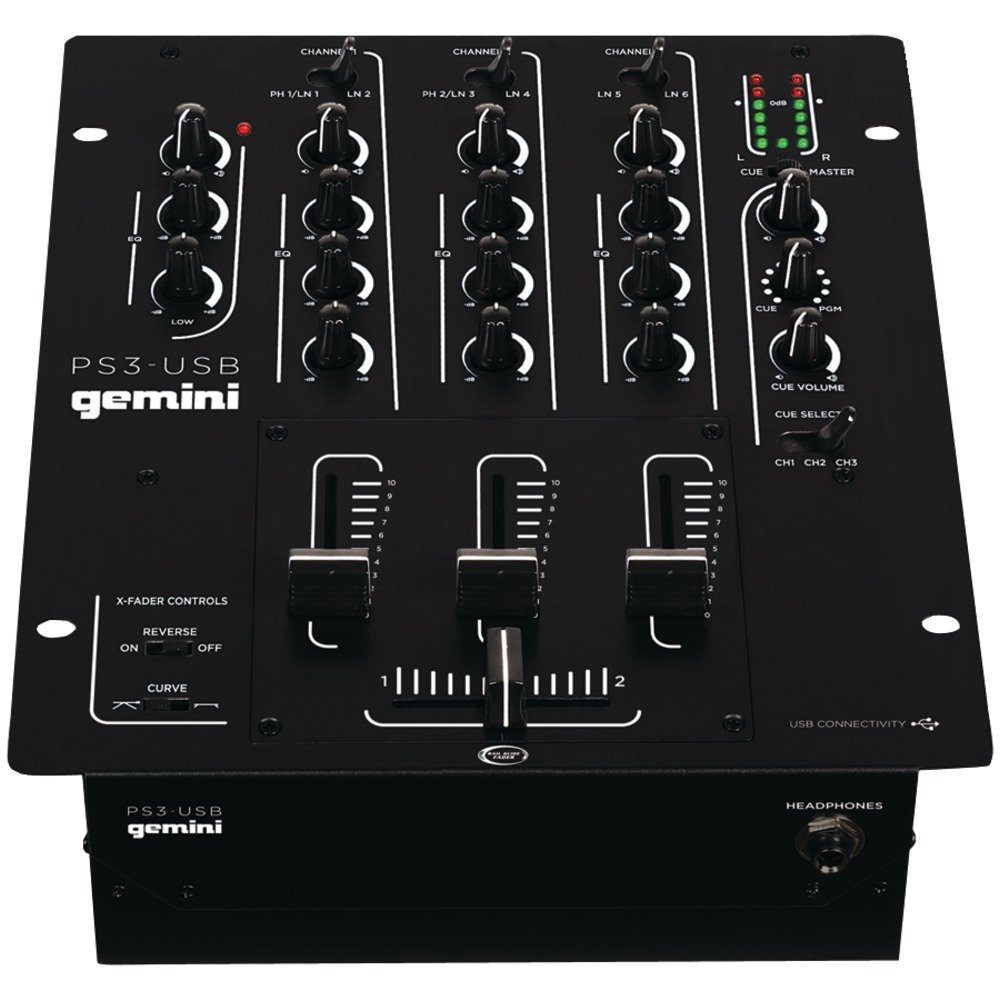
Figure 1: Front view of the Gemini PS3-USB Mixer, showing controls and inputs.
2. Safety Instructions
- Power Source: Connect the unit only to the specified power supply.
- Ventilation: Ensure proper ventilation. Do not block ventilation openings.
- Water and Moisture: Do not expose the unit to rain or moisture. Do not place objects filled with liquids on the unit.
- Heat: Keep the unit away from heat sources such as radiators, heat registers, stoves, or other apparatus (including amplifiers) that produce heat.
- Cleaning: Clean only with a dry cloth.
- Servicing: Refer all servicing to qualified service personnel. Do not attempt to service this product yourself.
3. Setup
3.1 Unpacking
Carefully unpack the mixer and check for any signs of damage. Retain the packaging materials for future transport or storage.
3.2 Connecting Power
Connect the provided power adapter to the mixer's power input and then to a suitable electrical outlet.
3.3 Audio Connections
The PS3-USB features 5-line, 3-channel inputs with 2 convertible Phono/Line RCA inputs.
- Phono/Line Inputs: Connect turntables or line-level devices (CD players, media players) to the RCA inputs. Use the Phono/Line switch to select the appropriate input type for each channel.
- Master Output: Connect the Master RCA outputs to your amplifier or powered speakers.
- Record Output: Connect the Record RCA outputs to a recording device if you wish to record your mix.
- Headphones: Plug your 1/4" (6.3mm) headphones into the front panel headphone connector.
3.4 USB Connection
Connect the mixer to your Mac or PC using a standard USB cable. This allows for simultaneous playback and recording through your computer's media player software.
4. Operating Instructions
4.1 Controls and Functions Overview
Familiarize yourself with the mixer's layout:
- Channel Gain Control: Adjusts the input level for each channel.
- 3-Band Rotary EQ: Provides control over High, Mid, and Low frequencies for each channel.
- Channel Faders: Control the volume of each individual channel.
- Crossfader: A user-replaceable Rail Glide crossfader with curve and reverse controls for blending between channels.
- Master Volume: Controls the overall output level of the mixer.
- VU Meters: Visual indicators for master or cue levels.
- Cue Section: Includes rotary cue volume, CUE/PGM controls, and a split cue switch for headphone monitoring.
- Microphone Section: Features a rotary microphone volume control and a 2-band EQ for microphone input.
4.2 Basic Mixing
- Connect your audio sources to the appropriate Phono/Line inputs.
- Set the Phono/Line switch for each channel to match your source.
- Adjust the Gain control for each active channel to achieve a healthy input level without clipping (distortion).
- Use the channel faders to bring up the volume of your desired audio sources.
- Utilize the 3-band EQ to shape the sound of each channel.
- Use the crossfader to smoothly transition between channels.
- Monitor your mix using headphones via the Cue section and adjust the Master Volume for the main output.
4.3 USB Playback and Recording
Once connected via USB, your computer should recognize the PS3-USB as an audio device.
- Playback: Select the PS3-USB as the output device in your computer's sound settings or media player software to route audio through the mixer.
- Recording: Select the PS3-USB as the input device in your recording software. The mixer's master output will be sent to your computer for recording.
5. Maintenance
- Cleaning: Use a soft, dry cloth to clean the exterior of the mixer. Do not use liquid cleaners or solvents.
- Crossfader Replacement: The Rail Glide crossfader is user-replaceable. Refer to the Gemini website or authorized service centers for replacement parts and instructions if needed.
- Storage: When not in use for extended periods, store the mixer in a cool, dry place, preferably in its original packaging.
6. Troubleshooting
| Problem | Possible Cause | Solution |
|---|---|---|
| No sound output from master. | Master volume too low; incorrect input selection; amplifier/speaker issues. | Increase Master Volume. Check Phono/Line switches. Verify amplifier/speaker connections and power. |
| No sound from a specific channel. | Channel fader down; Gain too low; incorrect Phono/Line selection; source device off/muted. | Raise channel fader. Adjust Gain. Correct Phono/Line switch. Check source device. |
| Distorted audio. | Input Gain too high; Master Volume too high; faulty cable. | Reduce channel Gain. Reduce Master Volume. Replace cables. |
| USB recording/playback not working. | Incorrect USB connection; computer audio settings incorrect; driver issues. | Ensure USB cable is securely connected. Select PS3-USB as audio device in computer settings. Restart computer. |
7. Specifications
- Model: PS3USB
- Channels: 3
- Inputs: 5-Line, 2 Convertible Phono/Line RCA, USB
- Outputs: Master RCA, Record RCA, 1/4" (6.3mm) Headphone
- EQ: 3-Band Rotary EQ per channel, 2-Band EQ for Microphone
- Crossfader: User-replaceable Rail Glide with Curve and Reverse controls
- Connectivity: USB for Mac/PC Playback & Recording
- Dimensions (Approximate Shipping): 12.00in x 10.00in x 3.25in
- Weight (Approximate Shipping): 6.2 lbs (2.8 kg)
- UPC: 747705208149
8. Warranty and Support
This Gemini product is covered by a 90-day warranty from the date of purchase. This warranty covers manufacturing defects and workmanship under normal use. It does not cover damage caused by misuse, accident, modification, or unauthorized repair.
For technical support, service inquiries, or warranty claims, please contact your authorized Gemini dealer or visit the official Gemini website for contact information.
Please retain your proof of purchase for warranty validation.