1. Product Overview
The AcuRite 10-inch LED digital clock is designed for clear time display in various environments such as homes, offices, or classrooms. It features large, easy-to-read numbers and multiple lighting options, including an auto-dim mode for comfortable viewing at night. The clock is powered by an included 9-foot power adapter and offers integrated cord storage for a tidy setup. It can be wall-mounted using built-in keyholes or placed on a tabletop with its fold-out stand.

Figure 1: Front view of the AcuRite 75114M LED Digital Clock.
2. Included Components
- AcuRite 75114M 10-inch LED Digital Clock
- Instruction Manual
- Power Adapter (9-foot cord)
Note: 2 AA batteries are required for battery backup functionality and are not included.
3. Setup
3.1 Powering the Clock
The clock operates using the included 9-foot power adapter. Plug the adapter into a standard electrical outlet. The clock requires continuous power to function. For convenience, the clock features integrated cord storage to manage excess cable.

Figure 2: Integrated cord storage on the back of the clock.
3.2 Battery Backup Installation
For battery backup functionality during power outages, install 2 AA batteries (not included) into the battery compartment located on the back of the clock. The display will not be active during battery backup mode, but the clock will maintain accurate timekeeping.

Figure 3: Back of the clock with battery compartment and controls.
3.3 Placement Options
- Wall Mounting: Use the integrated keyholes on the back of the clock to securely mount it to a wall. Ensure appropriate wall anchors and screws are used for stability.
- Tabletop Use: Utilize the fold-out stand on the back of the clock for stable placement on a desk, shelf, or table.
4. Operating Instructions
4.1 Setting the Time and Date
The clock features control buttons on the back for setting the time and date. Refer to Figure 3 for button locations.
- Press and hold the SET button to enter time setting mode.
- Use the UP and DOWN buttons to adjust the hour, then press SET to confirm and move to minutes.
- Repeat the process for minutes, then for the year, month, and day.
- The clock supports a 12-hour format (AM/PM indicator will be displayed).
4.2 Adjusting Display Brightness
The clock offers six different lighting settings, including an auto-dim mode. Use the dedicated brightness control button (often labeled with a sun icon or similar, refer to Figure 3) to cycle through the available brightness levels. The auto-dim mode automatically adjusts the display brightness based on ambient light conditions.
4.3 Display Information
The clock displays the current time in large digits. Additionally, it shows the temperature, day of the week, and the current date.
5. Maintenance
5.1 Cleaning
To clean the clock, gently wipe the display and casing with a soft, damp cloth. Avoid using abrasive cleaners or solvents, as these may damage the surface.
5.2 Battery Replacement
If the clock experiences frequent power outages and the time is not maintained, the AA backup batteries may need to be replaced. Open the battery compartment on the back of the clock, remove the old batteries, and insert new ones, ensuring correct polarity.
6. Troubleshooting
| Problem | Possible Cause | Solution |
|---|---|---|
| Clock display is blank. | No power from adapter. | Ensure the power adapter is securely plugged into both the clock and a working electrical outlet. |
| Time is incorrect after a power interruption. | Backup batteries are dead or not installed. | Install or replace 2 AA batteries in the battery compartment. Reset the time manually if necessary. |
| Clock loses time or is inaccurate. | Internal clock drift or power fluctuations. | Manually reset the time. If inaccuracy persists, contact AcuRite customer support. |
| Display is too bright or too dim. | Brightness setting needs adjustment. | Use the brightness control button on the back of the clock to cycle through the six lighting settings, including auto-dim mode. |
7. Specifications
| Feature | Detail |
|---|---|
| Brand | AcuRite |
| Model Number | 75114M |
| Color | White |
| Display Type | Digital LED |
| Special Feature | Light Up, Auto-Dimming |
| Product Dimensions | 10"W x 5.5"H |
| Power Source | Corded Electric (9-foot adapter), Battery Powered (backup) |
| Batteries Required | No (for main operation), Yes (2 AA for backup, not included) |
| Mounting Type | Wall Mount, Tabletop |
| Material | Plastic |
| Item Weight | 1.3 pounds |
| Connectivity Technology | Power (AC adapter) |
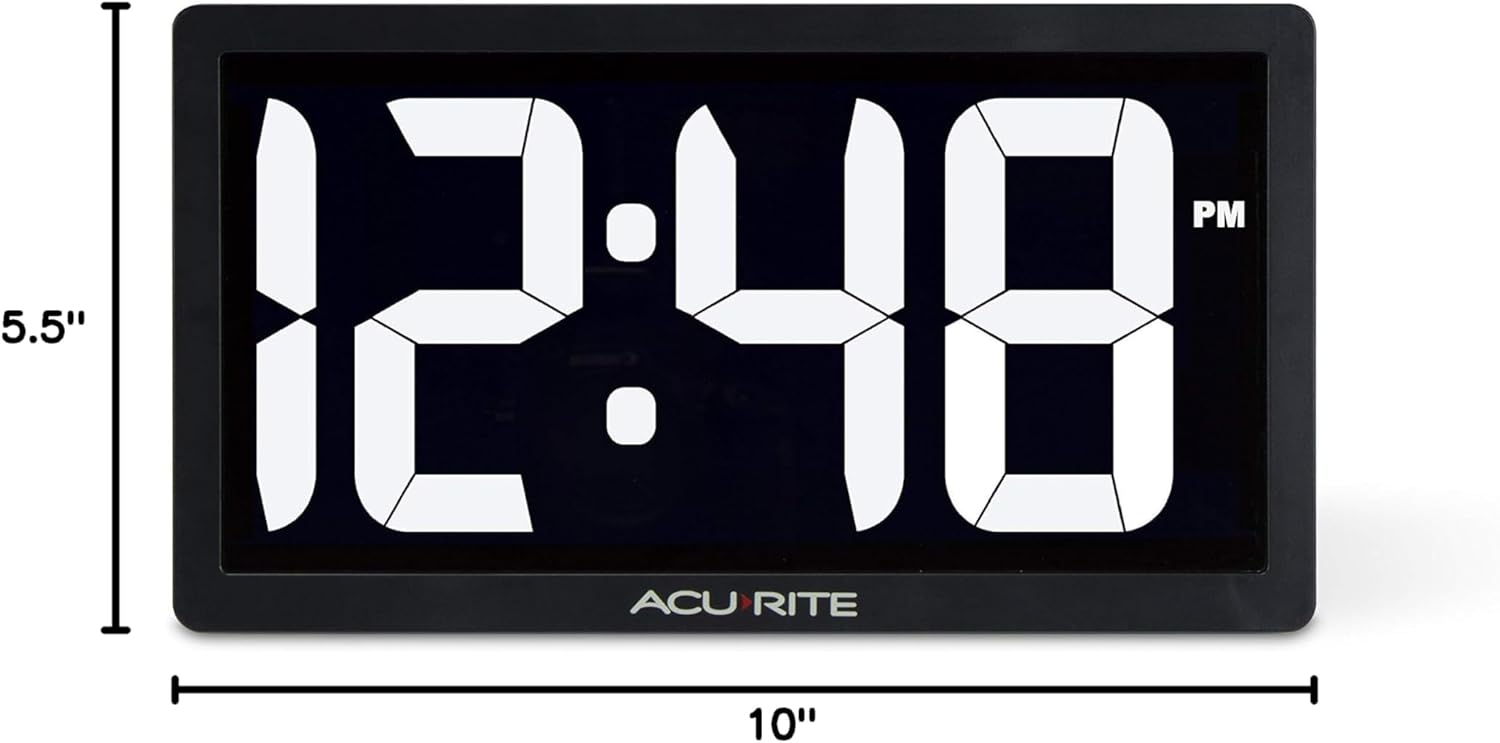
Figure 4: Product dimensions of the AcuRite 75114M clock.
8. Warranty and Support
8.1 Warranty Information
This AcuRite 75114M LED Digital Clock comes with a one-year limited warranty. Please retain your proof of purchase for warranty claims.
8.2 Customer Support
For technical assistance, troubleshooting not covered in this manual, or warranty inquiries, please contact AcuRite customer support. Refer to the official AcuRite website for current contact information.


