1. Introduction
This manual provides essential information for the proper installation, operation, and maintenance of your PIKO G Scale V100/V199 Add-On Rear Light Set (4 LEDs), Model 36016. This set is designed to enhance the realism of your PIKO G Scale V100, BR 199, or BR 218 locomotives by adding functional rear lighting. Please read these instructions carefully before proceeding with installation.
2. Package Contents
Please verify that all components are present and undamaged before beginning installation. If any parts are missing or damaged, contact your retailer or PIKO customer support.
- 1x PIKO G Scale V100/V199 Add-On Rear Light Set (containing 4 LEDs and associated wiring/components)
- 1x Instruction Manual (this document)
3. Safety Instructions
Observe the following safety guidelines to prevent injury or damage to your model train equipment:
- Adult Supervision: This product is recommended for users 15 years and older. Younger users should have adult supervision during installation and operation.
- Power Disconnection: Always disconnect power to your locomotive and track before performing any installation, maintenance, or modification.
- Electrical Components: Handle electrical components with care. Avoid touching exposed wires or circuit boards while power is connected.
- Tools: Use appropriate tools for installation. Sharp tools should be handled with caution.
- Compatibility: Ensure this light set is compatible with your specific PIKO V100, BR 199, or BR 218 locomotive model before installation.
4. Setup and Installation
The following steps outline the general procedure for installing the rear light set. Specific details may vary slightly depending on your locomotive model. Refer to your locomotive's original manual for guidance on accessing its internal components.
- Prepare Locomotive: Ensure your PIKO V100/V199 locomotive is powered off and disconnected from the track. Carefully remove the locomotive's shell or relevant body parts to access the internal wiring and mounting points for the rear lights.
- Identify Mounting Location: Locate the designated area on your locomotive's chassis or body for the rear light installation. This set is designed to fit existing provisions.
- Install LEDs: Carefully insert the 4 LEDs into their respective openings. Ensure they are oriented correctly (e.g., red lights for rear, if applicable, or as per your locomotive's design).
- Connect Wiring: Connect the wiring from the add-on light set to the locomotive's internal power supply. This typically involves connecting to existing light circuits or a dedicated accessory power output. Pay close attention to polarity (positive and negative connections) to avoid damage. Consult your locomotive's wiring diagram if unsure.
- Secure Wiring: Route and secure the wiring to prevent it from interfering with moving parts or being pinched when the shell is reassembled. Use small cable ties or adhesive if necessary.
- Test Functionality: Before fully reassembling the locomotive, temporarily connect it to the track and apply power to test the new rear lights. Verify that all 4 LEDs illuminate correctly.
- Reassemble Locomotive: Once functionality is confirmed, carefully reassemble the locomotive's shell and secure all screws or clips.
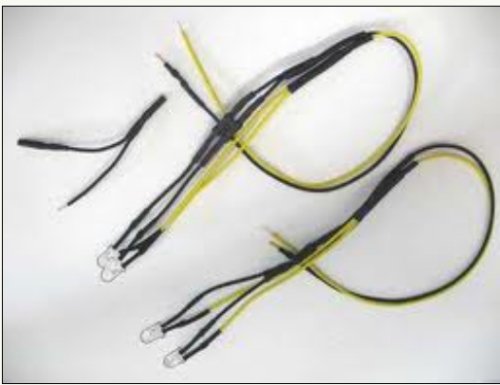
Image: The PIKO G Scale V100/V199 Add-On Rear Light Set (4 LEDs), Model 36016. This image shows the light set components, including the four individual LEDs and their wiring, ready for installation into a compatible PIKO G Scale locomotive.
5. Operating Instructions
Once properly installed, the PIKO G Scale V100/V199 Add-On Rear Light Set operates in conjunction with your locomotive's power system. The lights will illuminate when power is supplied to the locomotive, typically when the train is running on the track or when its lighting functions are activated via a control system.
- Ensure your track power is on.
- If your locomotive has a directional lighting feature, the rear lights should activate when the locomotive is moving in the appropriate direction or when the rear lighting function is selected.
6. Maintenance
The PIKO Add-On Rear Light Set requires minimal maintenance to ensure long-lasting performance.
- Cleaning: Periodically, gently wipe the LED lenses with a soft, dry cloth to remove dust or debris. Avoid using harsh chemicals or abrasive materials.
- Inspection: Occasionally inspect the wiring for any signs of wear, fraying, or loose connections. Address any issues promptly to prevent electrical problems.
- Storage: If the locomotive is to be stored for an extended period, ensure it is kept in a clean, dry environment away from extreme temperatures and direct sunlight.
7. Troubleshooting
If you encounter issues with your rear light set, refer to the following common problems and solutions:
- Lights Not Illuminating:
- Check that the locomotive is receiving power from the track.
- Verify all wiring connections are secure and correctly polarized.
- Ensure the locomotive's internal lighting circuit is functional.
- Inspect LEDs for visible damage.
- Lights Flickering:
- Check for loose wiring connections.
- Ensure track and wheel contacts are clean and providing consistent power.
- Only Some Lights Working:
- Inspect the wiring to the non-functional LEDs for breaks or disconnections.
- Individual LEDs may be faulty and require replacement.
If troubleshooting steps do not resolve the issue, please contact PIKO customer support.
8. Specifications
| Model Number | 36016 |
| Product Type | Add-On Rear Light Set (4 LEDs) |
| Gauge | G Scale |
| Compatibility | PIKO V100, BR 199, BR 218 Locomotives |
| Item Weight | 0.64 ounces |
| Manufacturer Recommended Age | 15 years and up |
| Manufacturer | PIKO |
9. Warranty and Support
PIKO products are manufactured to high-quality standards. This product is covered by the manufacturer's standard warranty against defects in materials and workmanship. Please retain your proof of purchase for warranty claims.
For technical support, warranty inquiries, or replacement parts, please contact your authorized PIKO retailer or visit the official PIKO website for customer service contact information.
Manufacturer: PIKO


