WOODRIVER 9850
WOODRIVER Wheel Marking Gauge Model 9850 Instruction Manual
Precision Marking Tool for Woodworking
1. Product Overview
The WOODRIVER Wheel Marking Gauge Model 9850 is a precision instrument designed for accurately marking lines on wood surfaces. This tool is essential for woodworking tasks requiring precise measurements and clean scoring, such as preparing for cuts, joinery, or inlay work.
Key features include:
- Brass Head: Provides stability and a smooth reference surface against the workpiece edge.
- 8-inch Steel Rod: Features clear measurement markings for setting desired depths.
- Hardened Bevel Edge Marking Wheel: Designed to score clean, visible lines on various wood types.
- Knurled Knob: Allows for simple and firm adjustment and locking of the brass head position.

Figure 1: The WOODRIVER Wheel Marking Gauge Model 9850, showing the brass head, steel rod with measurements, and marking wheel.
2. Setup
Before using your WOODRIVER Wheel Marking Gauge, ensure all components are present and in good condition.
- Unpacking: Carefully remove the marking gauge from its packaging. Verify that the brass head, 8-inch steel rod, and hardened bevel edge marking wheel are included. The marking wheel is pre-installed at one end of the steel rod.
- Familiarization: Identify the knurled knob on the brass head. This knob is used to loosen and tighten the brass head, allowing it to slide along the steel rod for depth adjustment.
- Initial Inspection: Check the marking wheel for sharpness and ensure it rotates freely. Inspect the steel rod for any obstructions that might hinder the smooth movement of the brass head.
3. Operating Instructions
Follow these steps for accurate and consistent marking:
- Adjusting the Marking Depth:
Loosen the knurled knob on the brass head by turning it counter-clockwise. Slide the brass head along the steel rod to the desired measurement. The steel rod features etched markings to assist with approximate settings. For precise settings, it is recommended to use an external ruler or a reference piece of wood.
- Securing the Setting:
Once the brass head is positioned at the correct depth, tighten the knurled knob firmly by turning it clockwise. Ensure the head is securely locked in place to prevent any movement during the marking process. The marking wheel should be perpendicular to the surface you intend to mark.
- Making a Mark:
Hold the brass head firmly against the edge of your workpiece. Apply consistent, gentle pressure to the gauge and slide it along the edge of the wood. The hardened bevel edge marking wheel will score a clean, visible line on the wood surface. This tool is effective for marking both along the grain and across the grain.
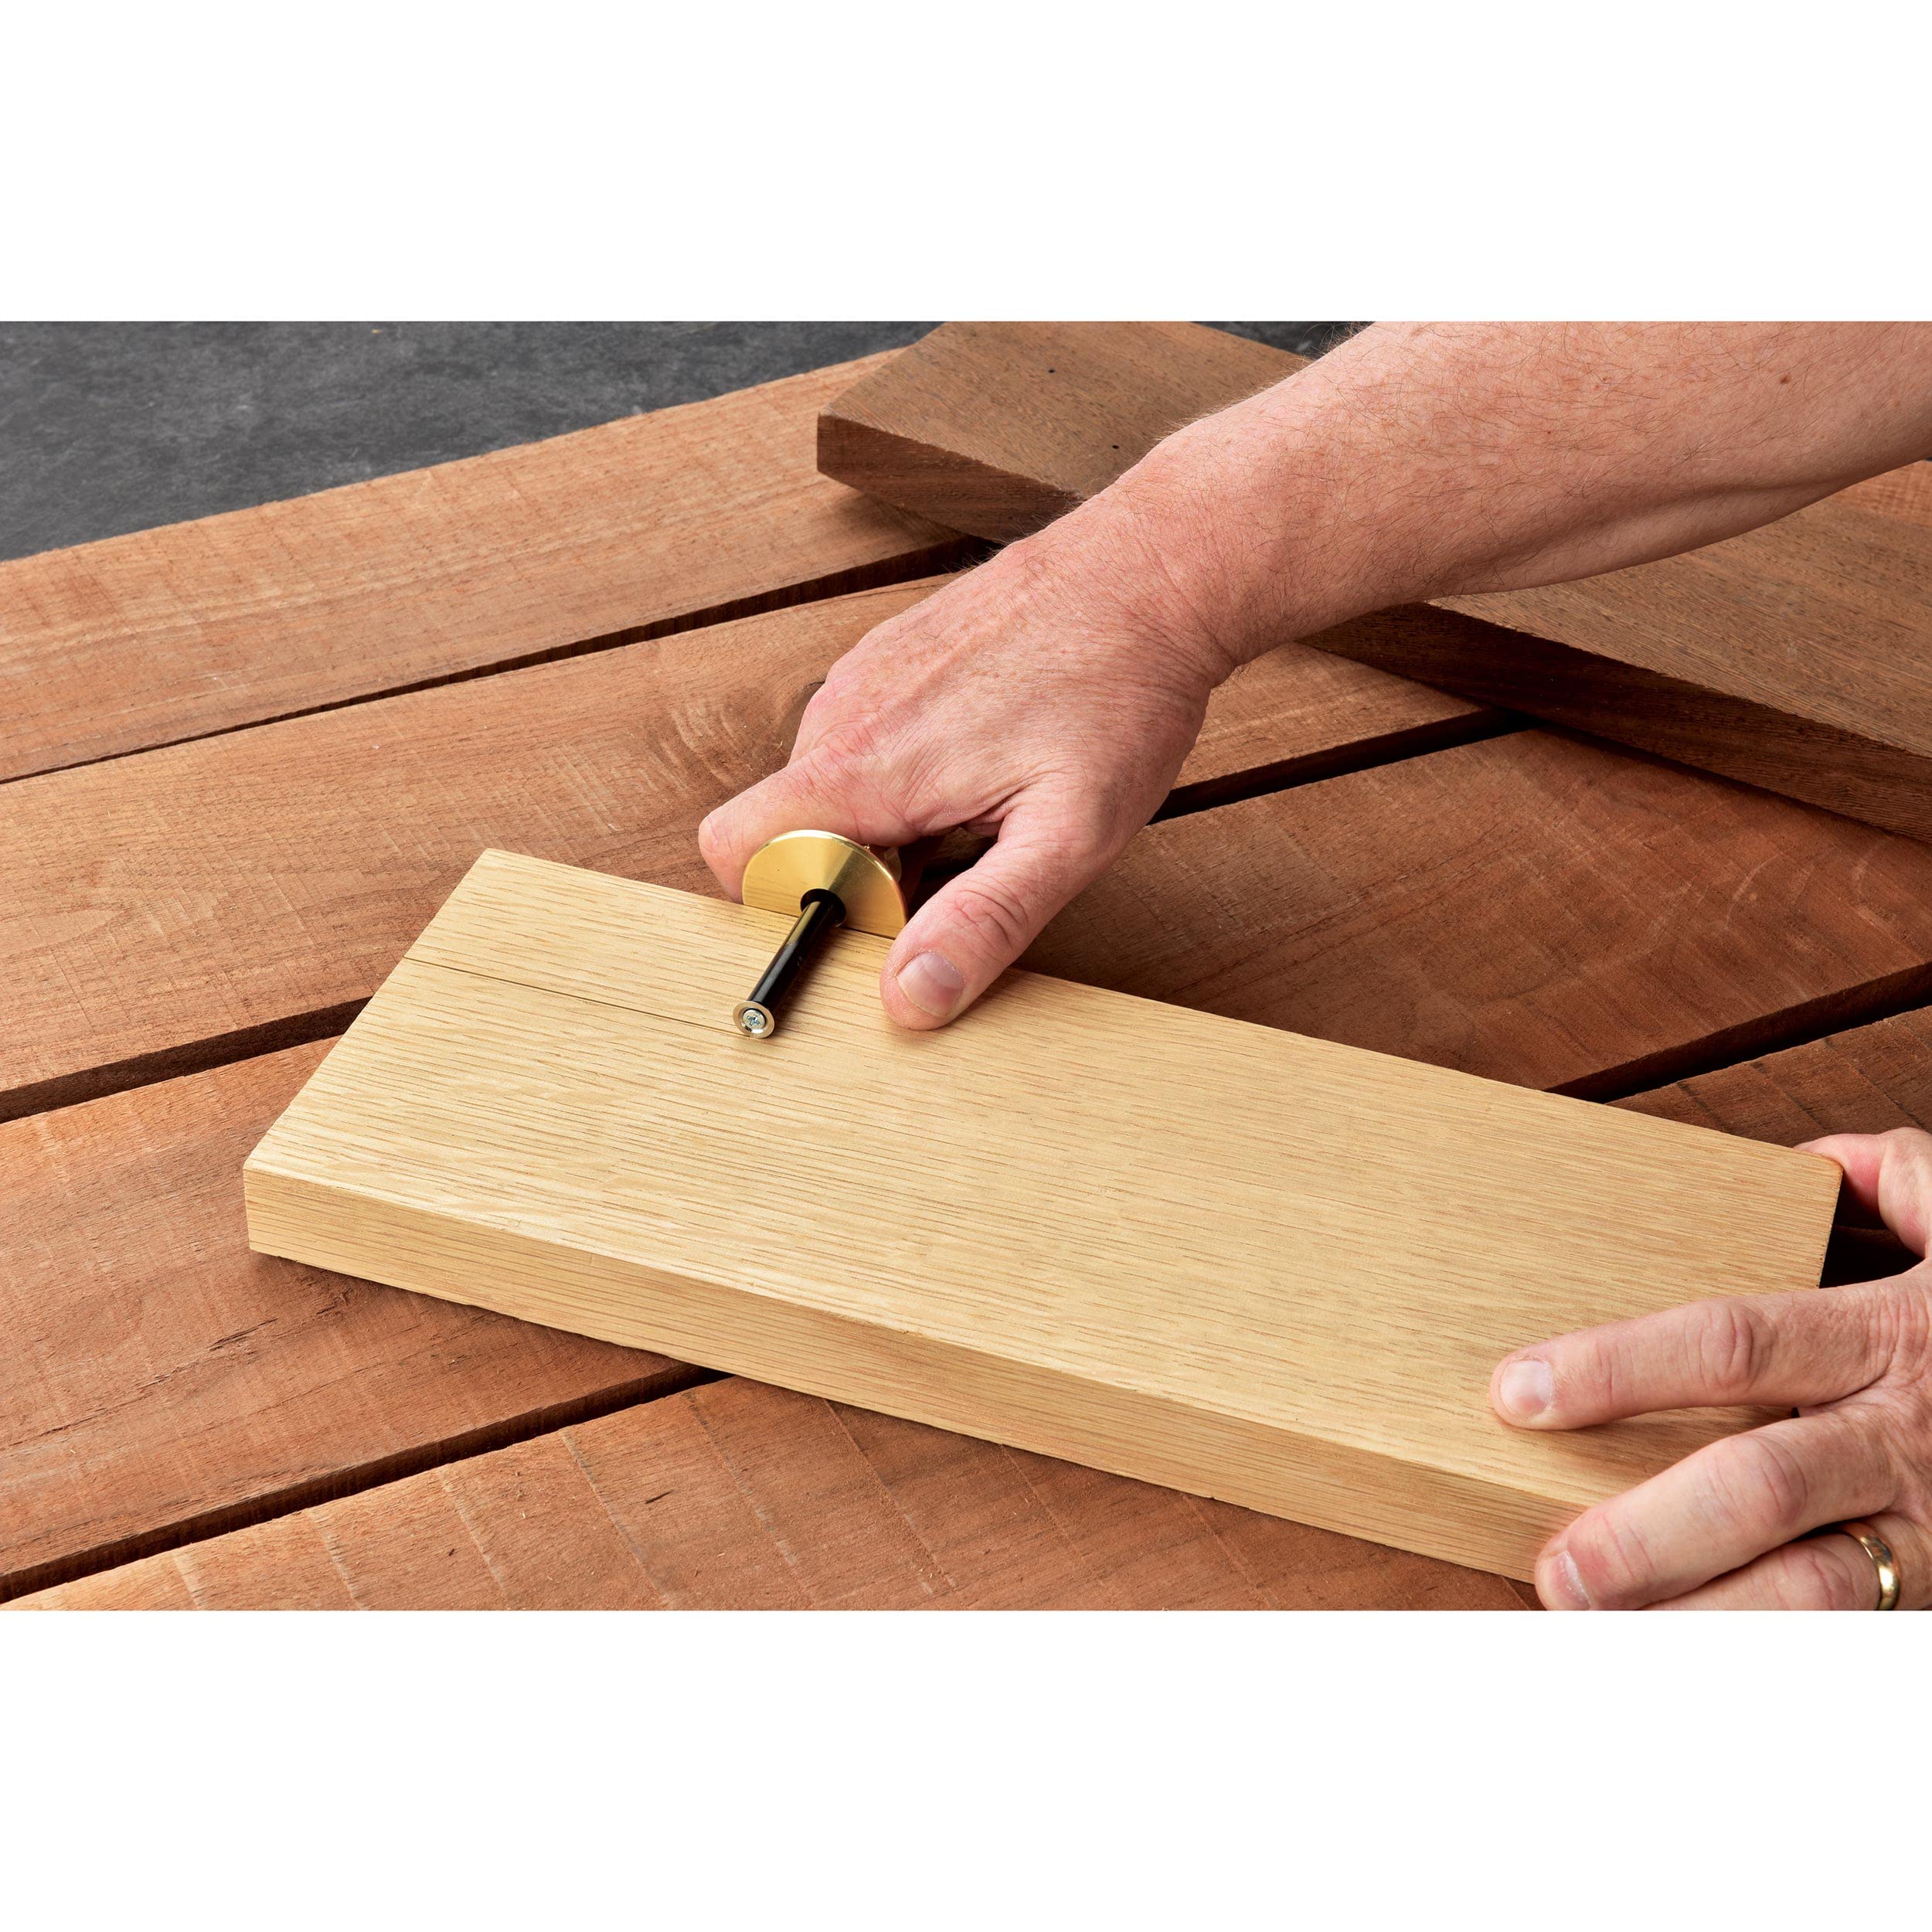
Figure 2: Demonstrating how to hold the marking gauge against the edge of a wooden board.
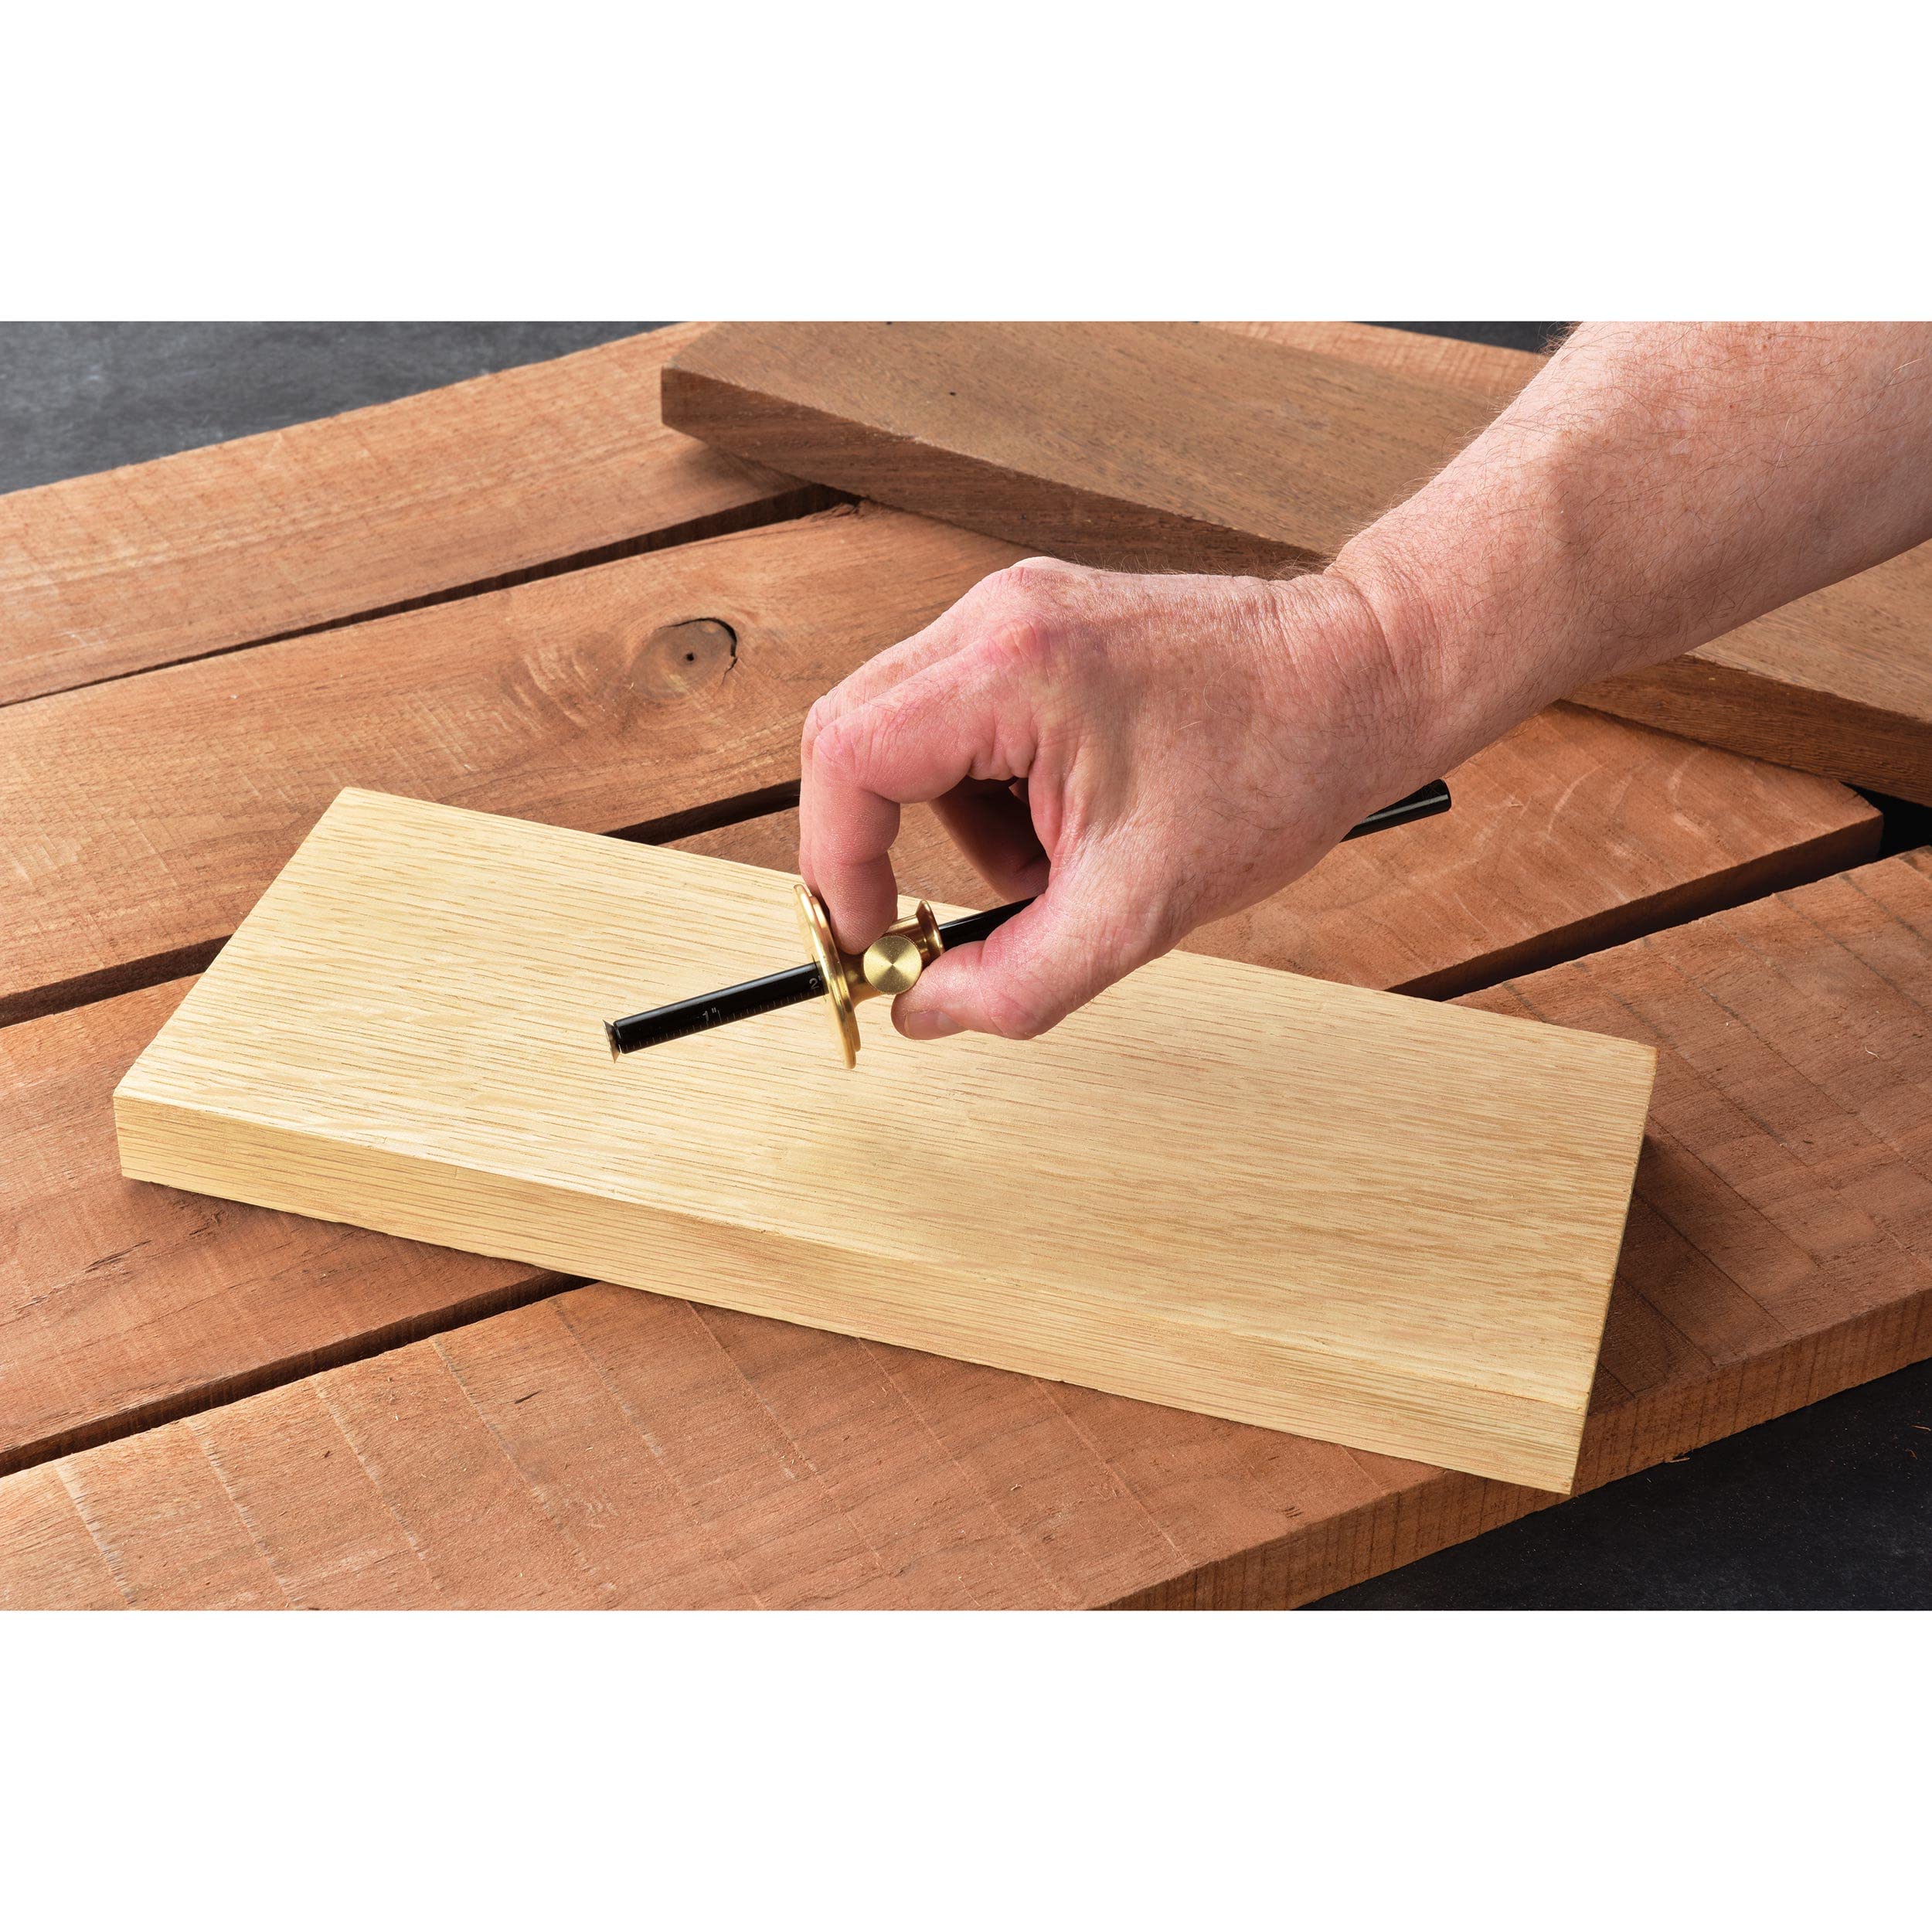
Figure 3: The marking wheel scoring a precise line on a wooden surface.
4. Maintenance
Proper maintenance ensures the longevity and accuracy of your marking gauge.
- Cleaning: After each use, wipe down the steel rod and brass head with a clean, dry cloth to remove any wood dust, resin, or debris. This prevents buildup that could affect accuracy or smooth operation.
- Marking Wheel Sharpness: Periodically inspect the hardened bevel edge marking wheel. If the lines produced become faint or ragged, the wheel may be dull. A dull wheel may require replacement or professional sharpening to restore optimal performance.
- Storage: Store the marking gauge in a dry environment to prevent corrosion of the steel components.
- Knob Tightening: Avoid overtightening the knurled knob excessively, as this could potentially wear down the measurement markings on the steel rod over time. Tighten only enough to secure the brass head firmly.
5. Troubleshooting
Refer to the following common issues and their potential solutions:
| Issue | Possible Cause / Solution |
|---|---|
| Marking line is faint or inconsistent. |
|
| Brass head slides during use. |
|
| Marking wheel detaches or becomes loose. |
|
6. Specifications
- Brand: WOODRIVER
- Model: 9850
- Materials: Alloy Steel, Brass, Wood
- Rod Length: 8 inches
- Item Dimensions: Approximately 10 x 4 x 1.85 inches (L x W x H)
- Item Weight: 0.4 Pounds
- Included Components: Brass Head, Steel Rod, Hardened Bevel Edge Marking Wheel
7. Warranty and Support
For product support, technical assistance, or information regarding warranty terms and conditions, please contact the manufacturer, Woodcraft Supply. It is recommended to refer to your original purchase documentation for specific warranty details applicable to your product.
You can also visit the official WOODRIVER store for more information: WOODRIVER Store
Ask a question about this manual
Ask about setup, troubleshooting, compatibility, parts, safety, or missing instructions. Manuals+ will review the question and use this page’s manual context to help answer it.