1. Product Overview
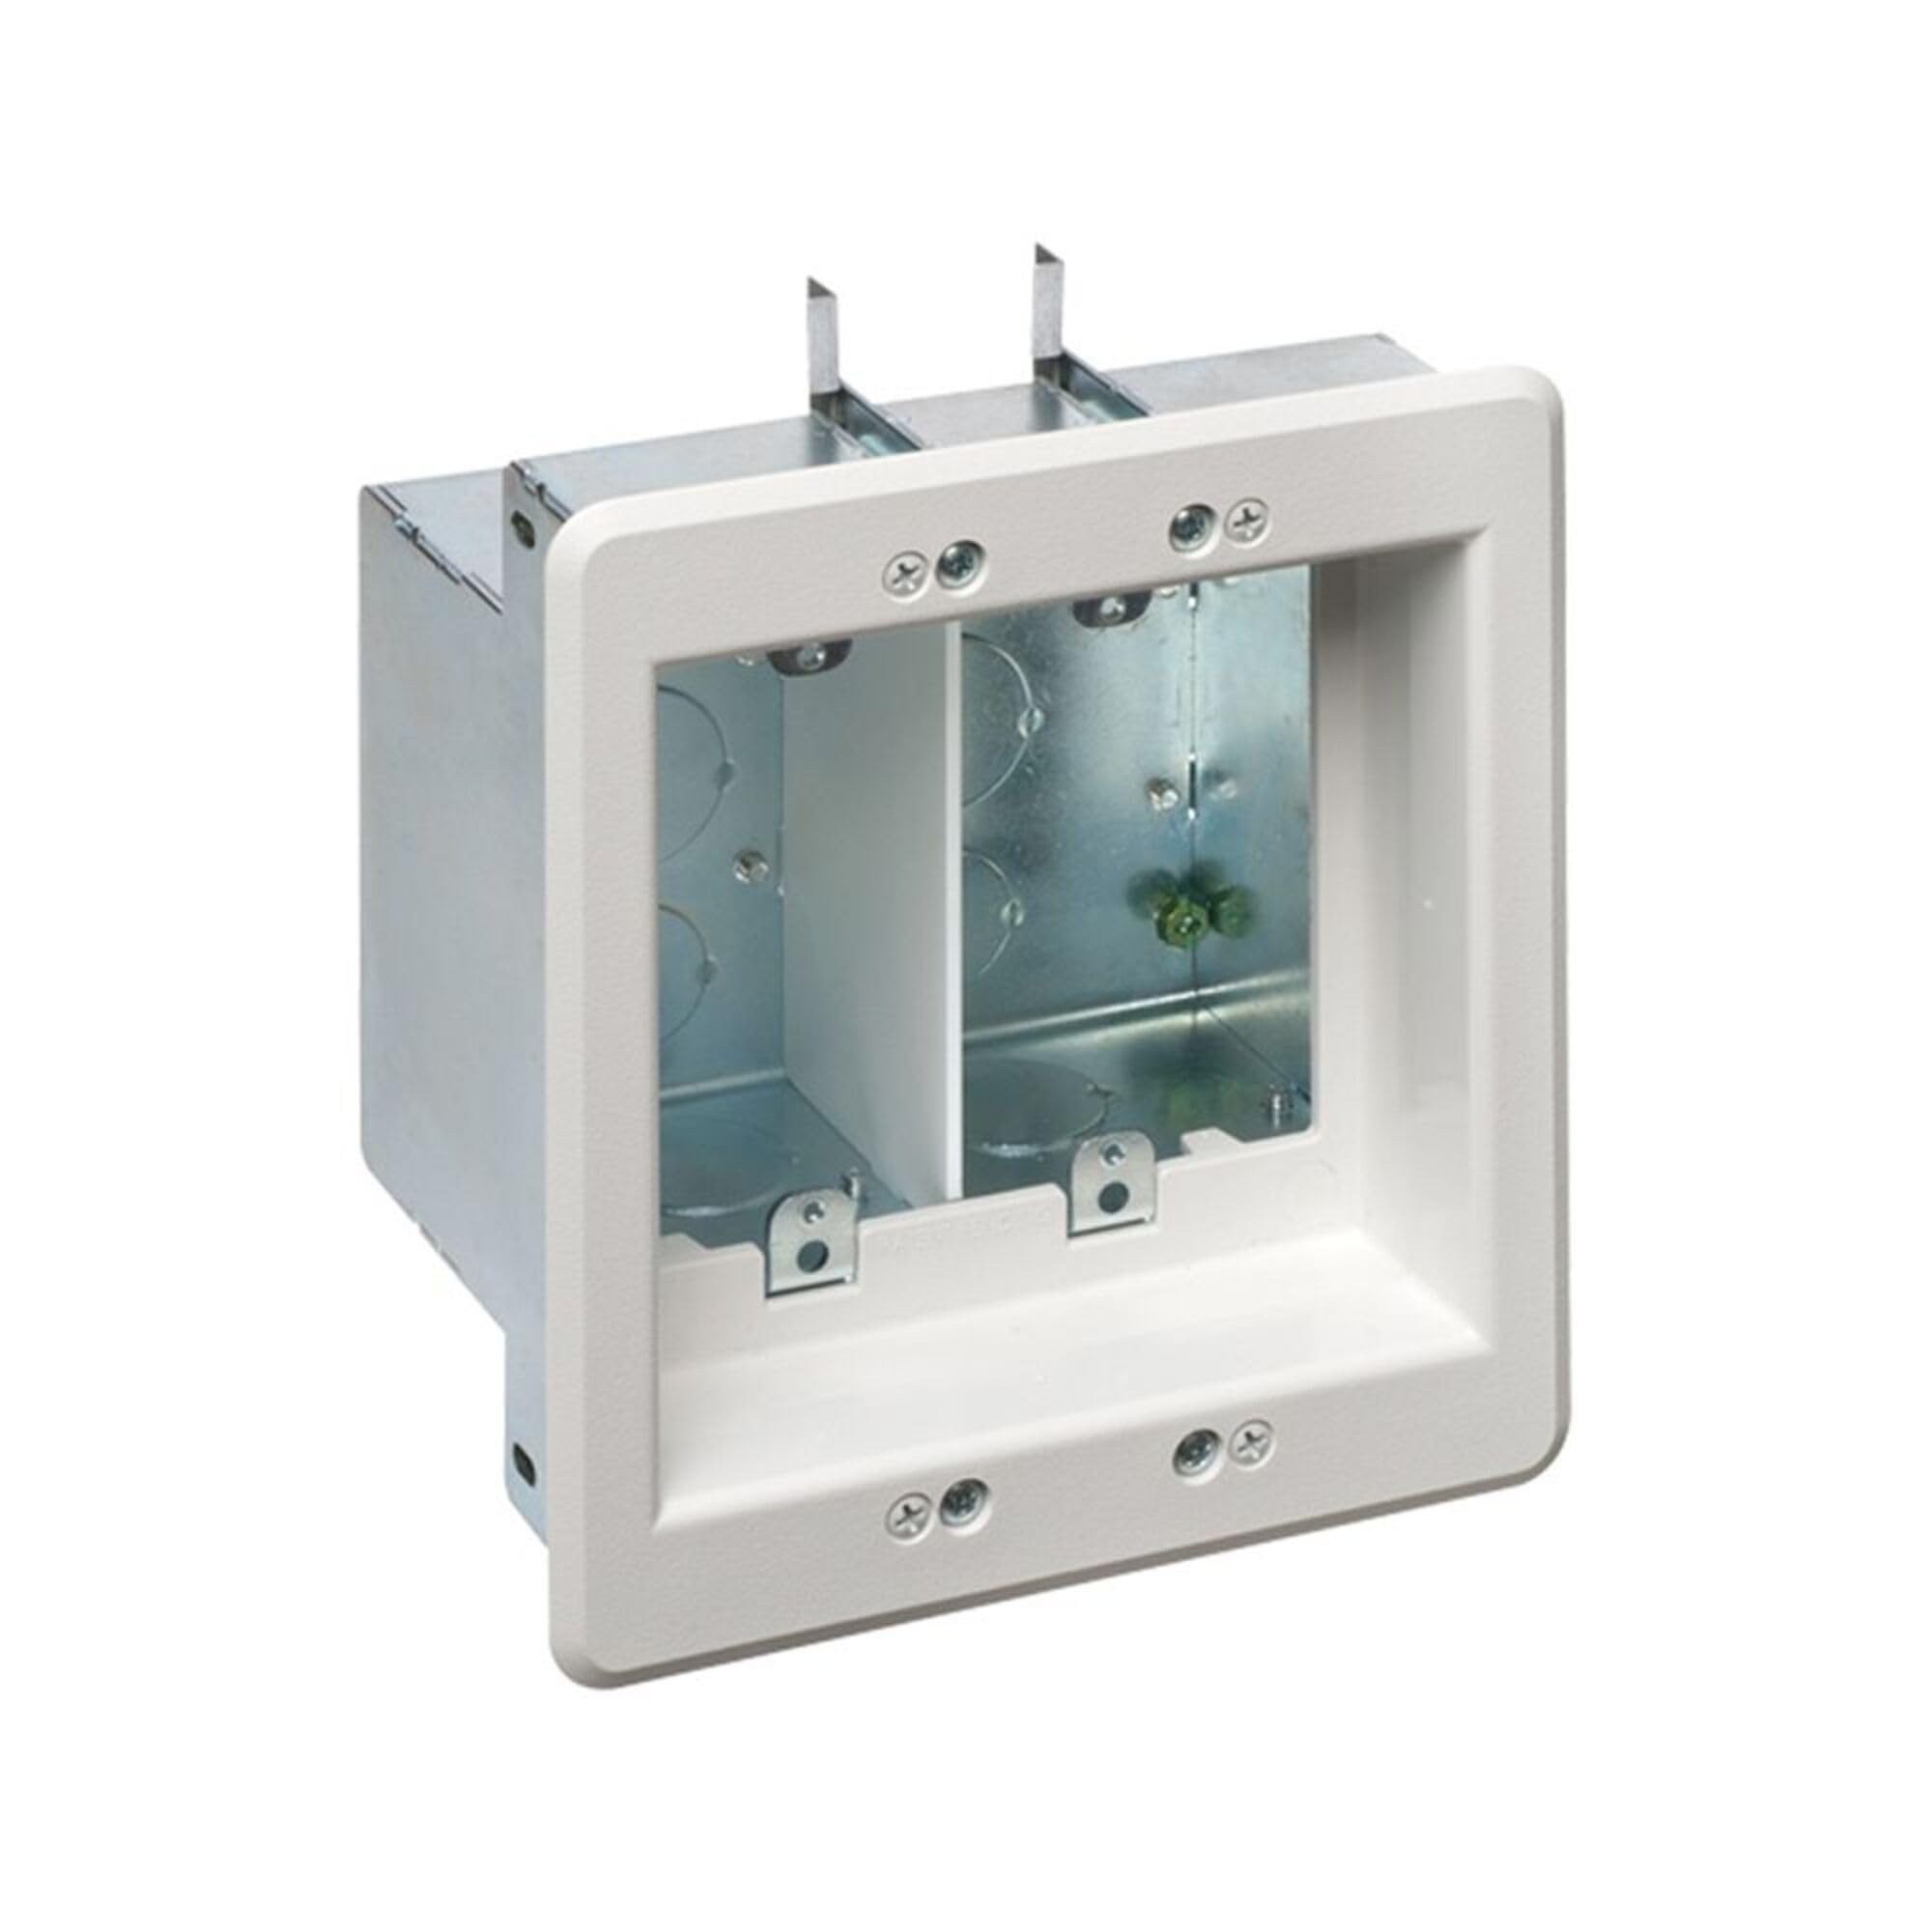
The Arlington TVBS505 is a 2-gang steel recessed electrical box designed to allow flat-screen televisions to mount flush against the wall. This kit includes a steel box with a non-metallic, paintable trim plate. It is engineered for both power and low voltage wiring, making it suitable for various display types such as LCD, LED, and Plasma TVs. The recessed design helps conceal wires within the wall, providing a clean and organized installation.
Key Features:
- Steel Box Construction: Ensures durability and compliance with electrical codes.
- Non-Metallic Paintable Trim Plate: Allows for customization to match wall aesthetics.
- Recessed Design: Enables flush mounting of flat-screen TVs by hiding electrical and low voltage connections behind the wall.
- Adjustable Depth: Accommodates wall board, paneling, or drywall thicknesses from 1/4-inch to 1-1/2-inch.
- Dual Purpose: Designed for both power and low voltage wiring, including a low voltage divider.
2. Safety Information
Always prioritize safety when working with electrical components. Failure to follow these safety guidelines may result in electric shock, fire, or personal injury.
- Disconnect Power: Before beginning any installation or maintenance, ensure that power to the circuit is turned off at the main service panel (breaker box). Verify with a voltage tester.
- Qualified Personnel: If you are unsure about any part of the installation process, consult a qualified electrician.
- Local Codes: All wiring must comply with local and national electrical codes.
- Proper Tools: Use only insulated tools and appropriate personal protective equipment.
- Wire Management: Ensure all wires are properly stripped, connected, and secured within the box to prevent shorts or loose connections.
- Avoid Overloading: Do not exceed the electrical ratings of the installed receptacles or the circuit capacity.
3. Package Contents
Verify that all components are present before beginning installation:
- 1 x Arlington TVBS505 2-Gang Steel Recessed Electrical Box
- 1 x Non-Metallic Paintable Trim Plate (White)
- 1 x Low Voltage Divider
- Mounting Hardware (screws for new and old work applications)
4. Setup and Installation
This section provides general instructions for installing the TVBS505 recessed box. Specific steps may vary based on your wall construction (new vs. old work).
Tools Required:
- Voltage Tester
- Screwdriver (Phillips and/or Flathead)
- Drywall Saw or Utility Knife
- Measuring Tape and Pencil
- Level
- Wire Strippers/Cutters
- Drill (optional, for pilot holes)
Installation Steps:
- Turn Off Power: Locate the circuit breaker controlling the area where you will install the box and turn it off. Use a voltage tester to confirm the power is off at the intended installation location.
- Mark and Cut Opening: Position the box on the wall at the desired height. Use a pencil to trace the outline of the box. For old work installations, carefully cut out the marked section of drywall using a drywall saw. Ensure the opening is precise, as the trim plate provides minimal overlap.
- Prepare Wiring: Run electrical power cables and low voltage cables (e.g., HDMI, coaxial, Ethernet) to the opening. Remove appropriate knockouts on the steel box for cable entry. Install proper cable clamps or connectors for power wiring.
- Install Low Voltage Divider: If separating power and low voltage, insert the provided low voltage divider into the designated slots within the steel box.
- Mount the Box:
- For New Construction (to a stud): Position the box against the stud and secure it using the provided screws through the mounting tabs.
- For Old Work (existing wall): Insert the box into the cut opening. Tighten the screws on the adjustable mounting tabs. These tabs will pivot and secure the box firmly against the inside of the drywall. The box is designed to fit wall thicknesses from 1/4-inch to 1-1/2-inch.
- Wire Devices: Connect your electrical receptacles and low voltage devices (e.g., keystone jacks) according to their respective instructions and local electrical codes. Mount these devices into the steel box.
- Install Trim Plate: Attach the paintable trim plate over the installed devices and secure it to the steel box using the provided screws. Do not overtighten, as the plate is rigid.
- Restore Power: Once all connections are secure and the trim plate is installed, turn the power back on at the main service panel. Test all installed devices for proper functionality.
5. Operation
The Arlington TVBS505 recessed box provides a secure and aesthetically pleasing location for your electrical and low voltage connections. Once installed, simply plug your TV's power cord and any necessary low voltage cables (HDMI, coaxial, etc.) into the devices mounted within the box. The recessed design allows the plugs and cables to sit behind the wall surface, enabling your flat-screen TV to be mounted flush against the wall without interference.
6. Maintenance
The TVBS505 recessed box requires minimal maintenance. Periodically inspect the trim plate for any damage or discoloration. If the trim plate is painted, ensure the paint is not chipping or peeling. For cleaning, wipe the trim plate with a soft, damp cloth. Do not use abrasive cleaners or solvents. If any electrical issues arise, immediately disconnect power and consult a qualified electrician.
7. Troubleshooting
- Problem: Devices (outlets, keystone jacks) do not fit into the box.
Solution: Ensure you are using standard 2-gang devices. Verify that the low voltage divider is correctly positioned or removed if not needed for your specific setup. - Problem: The box feels loose in the wall after installation.
Solution: For old work installations, re-tighten the screws on the adjustable mounting tabs until the box is firmly secured against the drywall. Ensure the wall thickness is within the 1/4-inch to 1-1/2-inch range. - Problem: No power to the installed electrical receptacle.
Solution: Check the circuit breaker at your main service panel. Verify all wire connections within the box are secure and correctly wired. If the issue persists, consult a qualified electrician. - Problem: Trim plate does not sit flush or cracks when tightened.
Solution: Ensure the wall opening is cut precisely and the box is installed flush with the wall surface. The trim plate is rigid; avoid overtightening the screws.
8. Specifications
| Attribute | Value |
|---|---|
| Brand | ARLINGTON |
| Model Number | TVBS505 |
| Material | Steel (Box) |
| Color | White |
| Style | Steel |
| Finish Type | White |
| Installation Type | Screw-In |
| Item Weight | 2.3 Pounds |
| Product Dimensions | 3.93 x 6.01 x 6.69 inches |
| Size | 2 Gang |
| Power Source | Wired Electric |
| Included Components | Recessed Outlet Wall Plate Kit |
9. Warranty and Support
This Arlington product is covered by the manufacturer's standard warranty. For specific warranty details, technical support, or assistance with installation, please contact Arlington Industries directly through their official website or customer service channels. Keep your purchase receipt as proof of purchase for any warranty claims.


