1. Introduction and Overview
This manual provides instructions for the safe and effective use of your Sony Cyber-shot DSC-W610 digital camera. The DSC-W610 is a compact digital camera featuring a 14.1 megapixel sensor, 4x optical zoom, and a 2.7-inch LCD screen, designed for capturing high-quality still images and videos.
Key Features:
- 14.1 Megapixel Super HAD CCD Image Sensor
- 4x Optical Zoom Lens
- 2.7-inch (230K dots) Clear Photo LCD Display
- Sweep Panorama Mode (up to 360°)
- Intelligent Auto (iAuto) Mode
- Face Detection and Smile Shutter Technologies
- Soft Skin Mode
- Intelligent Scene Recognition (iSCN) Mode
- Dynamic Range Optimizer (DRO)
- Self-Portrait Timer
2. Camera Components
Familiarize yourself with the various parts of your camera.

Image 1: Front View. This image displays the front of the Sony Cyber-shot DSC-W610 camera, showing the lens, flash, and "Sony" and "Cyber-shot" branding. The lens barrel is extended, indicating the camera is ready for use.
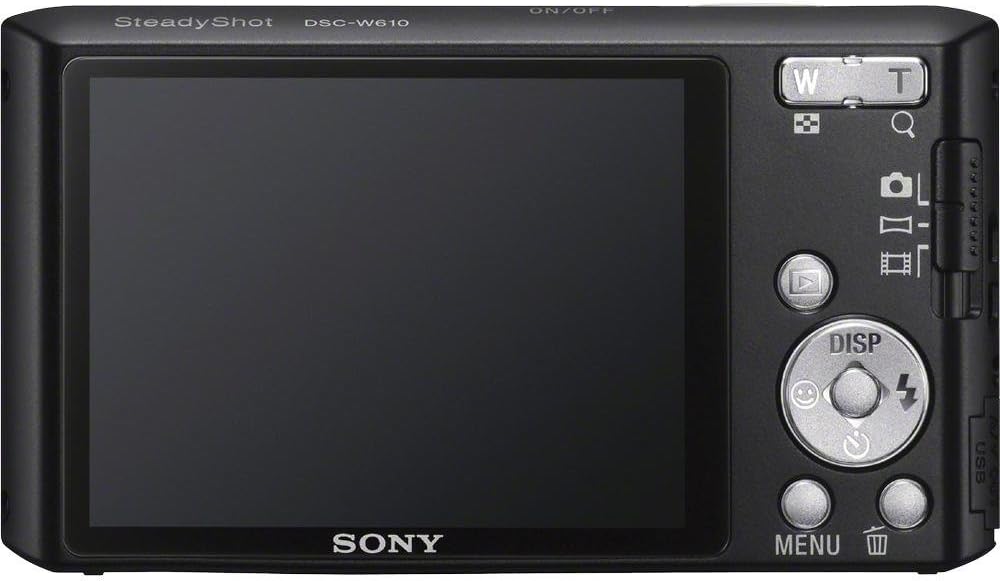
Image 2: Rear View. This image shows the back of the Sony Cyber-shot DSC-W610 camera, highlighting the 2.7-inch LCD screen, control buttons (zoom, playback, menu, delete, directional pad with flash control), and the USB port cover on the side.
3. Setup
3.1. Charging the Battery
- Insert the supplied battery into the battery charger.
- Connect the charger to a power outlet. The charge lamp will illuminate.
- When charging is complete, the charge lamp will turn off. Remove the battery.
Note: Charge the battery fully before first use.
3.2. Inserting the Battery and Memory Card
- Open the battery/memory card cover on the bottom of the camera.
- Insert the charged battery with the correct orientation until it locks into place.
- Insert a compatible memory card (SD/SDHC/SDXC, microSD/micro SDHC, Memory Stick Duo/Pro Duo/Pro-HG Duo) into the memory card slot until it clicks. Ensure the card is facing the correct direction.
- Close the battery/memory card cover securely.
Caution: Do not force the battery or memory card. Incorrect insertion can cause damage.
4. Operating the Camera
4.1. Power On/Off
- To turn on the camera, press the ON/OFF button.
- To turn off the camera, press the ON/OFF button again.
4.2. Basic Photography
- Turn on the camera.
- Frame your shot using the LCD screen.
- Use the zoom lever (W/T) to adjust the optical zoom.
- Press the shutter button halfway down to focus. The focus indicator will light up.
- Press the shutter button fully down to take the picture.
4.3. Shooting Modes and Features
4.3.1. Intelligent Auto (iAuto) Mode
The iAuto mode automatically optimizes camera settings by recognizing scenes, lighting conditions, and faces. This ensures clear images with natural skin tones and reduced blur without manual adjustments.
4.3.2. Sweep Panorama Mode
Capture wide panoramic images by sweeping the camera.
- Select Sweep Panorama mode from the menu.
- Press the shutter button and sweep the camera horizontally or vertically in the desired direction.
- The camera will automatically stitch the images together to create a panoramic photo.
4.3.3. Face Detection Technology
This feature detects up to eight faces in a frame and adjusts focus, exposure, and white balance for optimal portrait results.
4.3.4. Smile Shutter Technology
The camera automatically captures a photo when it detects a smile. Activate this feature and select sensitivity levels for adults or children.
4.3.5. Soft Skin Mode
Reduces the appearance of blemishes and wrinkles on skin tones without affecting other parts of the image.
4.3.6. Intelligent Scene Recognition (iSCN) Mode
Automatically detects up to seven different scene types (e.g., Backlight, Portrait, Landscape) and applies optimal camera settings. In Advanced Mode, it can take a second photo with optimized settings for challenging lighting.
4.3.7. Dynamic Range Optimizer (DRO)
Recovers shadow and highlight details in high-contrast scenes, producing more natural-looking images. DRO Plus offers enhanced optimization by analyzing specific regions of an image.
4.3.8. Self-Portrait Timer
Utilizes Face Detection to initiate a 2-second timer and take a picture once a face is detected in the frame, simplifying self-portraits.
4.4. Video Recording
- To start recording, press the Movie button.
- To stop recording, press the Movie button again.
4.5. Playback
- Press the Playback button to view captured images and videos.
- Use the directional buttons to navigate through your media.
- Press the Playback button again to return to shooting mode.
5. Maintenance
5.1. Cleaning the Camera
- Use a soft, dry cloth to clean the camera body.
- For the lens and LCD screen, use a lens cleaning cloth specifically designed for optical surfaces. Avoid harsh chemicals.
- Remove dust from the lens with a blower brush.
5.2. Battery Care
- Store batteries in a cool, dry place when not in use.
- Avoid exposing batteries to extreme temperatures.
- If the camera will not be used for an extended period, remove the battery.
5.3. Storage
Store the camera in a dry, well-ventilated area, away from direct sunlight and dust. Use a camera case for protection during transport.
6. Troubleshooting
If you encounter issues with your camera, refer to the following common solutions:
- Camera does not turn on: Ensure the battery is fully charged and correctly inserted.
- Cannot take pictures: Check if the memory card has sufficient free space or if it is locked. Ensure the lens cap is removed.
- Images are blurry: Verify that the camera is in focus. Clean the lens if it is dirty. Ensure sufficient lighting.
- Flash does not fire: Check flash settings to ensure it is not set to "Off" or "Red-eye Reduction" in bright conditions.
- Battery drains quickly: Reduce LCD brightness, limit video recording, and turn off the camera when not in use.
For more detailed troubleshooting, please consult the Sony support website.
7. Specifications
| Feature | Specification |
|---|---|
| Model Name | Cyber-shot DSC-W610 |
| Effective Still Resolution | 14.1 MP |
| Photo Sensor Type | CCD (1/2.3-inch) |
| Optical Zoom | 4x |
| Digital Zoom | 4x |
| Screen Size | 2.7 Inches (LCD) |
| Maximum Aperture | 3.5 Millimeters |
| Minimum Focal Length | 26 Millimeters |
| Maximum Focal Length | 105 Millimeters |
| Image Stabilization | No |
| Supported File Format | JPEG 2.3 |
| Video Resolution | 640 x 480 (30 fps), 320 x 240 (30 fps) |
| Flash Memory Type | SD/SDHC/SDXC, microSD/micro SDHC, Memory Stick Duo/Memory Stick Pro Duo, Memory Stick Pro-HG Duo |
| Connectivity Technology | USB |
| Battery Type | Lithium Ion |
| Battery Average Life | 250 Photos |
| Item Weight | 0.25 Pounds |
8. Warranty and Support
8.1. Warranty Information
The Sony Cyber-shot DSC-W610 camera typically comes with a 90-day Limited Hardware Warranty. For full details and terms, please refer to the official warranty document provided with your product or visit the Sony support website.
View Sony Warranty Document (PDF)
8.2. Customer Support
For further assistance, technical support, or service inquiries, please contact Sony customer support or visit the official Sony support website.


