1. Product Overview
The Jammin Pro StudioPack 202 is a comprehensive studio recording kit designed for high-quality professional and home recordings. This bundle includes essential components for music production, featuring a studio-grade USB audio interface, a large-diaphragm condenser microphone, high-performance studio headphones, and professional music production software.
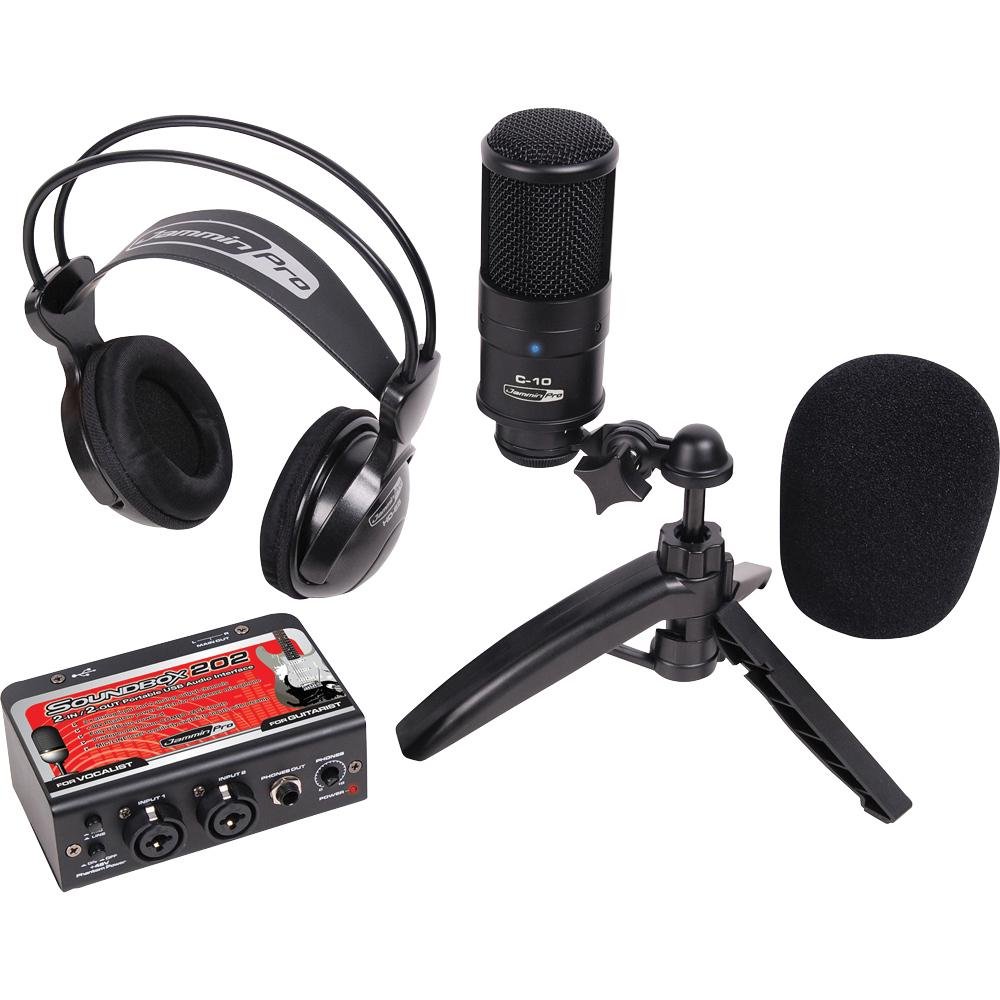
Image: The Jammin Pro StudioPack 202 kit, showcasing the USB audio interface, condenser microphone with stand, and studio headphones.
2. What's in the Box
Verify that all the following items are included in your StudioPack 202:
- 1 x 2-Input/2-Output USB Audio Interface
- 1 x Large-Diaphragm Condenser Microphone
- 1 x Microphone Table Stand
- 1 x High-Performance Studio Headphones
- 1 x XLR to XLR Cable
- 1 x Microphone Windscreen
- Professional Music Production Software (Magix Music Maker SE, Audacity)
3. Setup Guide
Follow these steps to set up your Jammin Pro StudioPack 202:
- Software Installation: Before connecting any hardware, install the included music production software (Magix Music Maker SE for PC, or Audacity for general use). Ensure your operating system (Windows XP or Mac OS X) is compatible. Follow the on-screen instructions during installation.
- Connect USB Audio Interface: Connect the USB audio interface to an available USB port on your computer using a standard USB cable (not explicitly listed as included, assume standard USB-A to USB-B or similar). The computer should automatically detect the device.
- Connect Microphone: Attach the condenser microphone to the microphone table stand. Connect the XLR to XLR cable from the microphone to the XLR input on the USB audio interface. Ensure the connection is secure.
- Connect Headphones: Plug the studio headphones into the headphone output jack on the USB audio interface.
- Configure Audio Settings: Open your installed music production software or your computer's sound settings. Select the Jammin Pro USB Audio Interface as your primary input and output device. Adjust input gain levels on the interface as needed for your microphone.
- Microphone Windscreen: Place the microphone windscreen over the condenser microphone to reduce plosive sounds and protect the microphone capsule.
4. Operating Instructions
Once your StudioPack 202 is set up, you can begin recording and monitoring:
- Recording: In your chosen music software, create a new audio track. Select the appropriate input channel for your microphone (typically Input 1 or 2 on the interface). Arm the track for recording and press the record button to start.
- Monitoring: Use the headphones connected to the audio interface to monitor your input and playback. Adjust the headphone volume knob on the interface to a comfortable listening level. The 2-input/2-output interface allows for simultaneous recording and monitoring.
- Input Gain: Use the gain knob on the audio interface for the microphone input to set an appropriate recording level. Aim for a strong signal without clipping (distortion). Most software will have a visual meter to help you achieve this.
- Playback: After recording, you can play back your audio through the headphones or connected speakers. Ensure the audio interface is selected as the output device in your software.
5. Maintenance and Care
Proper care will extend the life of your StudioPack 202 components:
- Cleaning: Use a soft, dry cloth to clean the surfaces of the audio interface, microphone, and headphones. Avoid using liquid cleaners or abrasive materials.
- Storage: When not in use, store the components in a clean, dry environment, away from direct sunlight, extreme temperatures, and excessive dust.
- Handling: Handle the microphone and audio interface with care. Avoid dropping or subjecting them to strong impacts. Do not pull cables forcefully.
- Microphone Windscreen: Periodically clean or replace the microphone windscreen to maintain hygiene and acoustic performance.
6. Troubleshooting
If you encounter issues, try the following solutions:
- No Sound from Headphones:
- Ensure headphones are fully plugged into the interface.
- Check the headphone volume knob on the interface.
- Verify the audio interface is selected as the output device in your computer's sound settings and music software.
- Microphone Not Detected/No Input Signal:
- Ensure the XLR cable is securely connected to both the microphone and the interface.
- Check the input gain knob on the interface for the microphone channel.
- Confirm the audio interface is selected as the input device in your computer's sound settings and music software.
- Try a different USB port on your computer.
- Software Issues:
- Ensure your music software is up to date.
- Consult the software's specific user manual or online support for troubleshooting.
- Distorted Audio:
- Reduce the input gain on the audio interface to prevent clipping.
- Check for loose cable connections.
7. Technical Specifications
| Brand | Jammin Pro |
| Model Number | STUDIOPACK202 |
| Connectivity Technology | USB |
| Number of Channels | 2 (2 In / 2 Out) |
| Audio Input | USB |
| Resolution | 16-bit/48 kHz |
| Compatible Devices | Personal Computer |
| Operating System | Windows XP, Mac OS X |
| Microphone Type | Back Electret Condenser (Large-Diaphragm) |
| UPC | 846903004659 |
| ASIN | B0060QVSA4 |
8. Warranty Information
Specific warranty details for the Jammin Pro StudioPack 202 are not provided in this manual. Please refer to the documentation included with your purchase or contact your retailer for information regarding warranty coverage and terms.
9. Customer Support
For further assistance or technical support, please consider the following options:
- Manufacturer Website: Visit the official Jammin Pro website for product updates, FAQs, and support resources.
- Retailer Support: Contact the retailer from whom you purchased the StudioPack 202 for product-specific inquiries or return policies.
- Software Support: For issues related to Magix Music Maker SE or Audacity, refer to the respective software's support channels.