Introduction
This manual provides essential information for the assembly, operation, and maintenance of your Metropolitan Display Heavy-Duty Commercial Grade Double-Bar Rolling Z Rack Garment Rack. Designed for heavy, rugged use, this rack features a gloss black base with chrome uprights and hangrail, offering a 400-pound capacity. It rolls smoothly on rubber wheels equipped with brakes and bumpers. Please read these instructions carefully before assembly and use to ensure proper function and longevity of your product.
Key Features
- Heavy-Duty Double-Bar Rolling Garment Rack: Provides extensive hanging space for various garments.
- Commercial Grade Construction: Built to withstand heavy use, supporting up to 400 lbs.
- Smooth Mobility: Equipped with 4-inch casters that include brakes for secure positioning and smooth movement.
- Nesting Black Base: Features a new black nesting Z-base design for enhanced stability and space-saving storage when not in use.
- Adjustable Height: Overall height is adjustable from 70.5 inches to 90.5 inches, accommodating different garment lengths.
- Compact Storage: Designed to ship flat-packed and allows for easy disassembly for compact storage.
Specifications
| Attribute | Detail |
|---|---|
| Brand | Metropolitan Display |
| Model Number | 01-236BL-2 |
| Color | Black (Base), Chrome (Uprights/Hangrail) |
| Material | Metal |
| Recommended Use | Garment Storage |
| Product Dimensions (D x W x H) | 24" x 63" x 70.5" - 90.5" |
| Installation Type | Free Standing |
| Load Capacity | 400 Pounds |
| Number of Shelves | 1 (Bottom wire shelf) |
| Assembly Required | Yes (Tools and hardware included) |
Setup and Assembly
The Z Rack is designed for quick and easy assembly. All necessary tools and hardware are included. Follow these steps for proper setup:
- Unpack Components: Carefully remove all parts from the packaging. Verify that all components are present according to the included parts list.
- Assemble the Z-Base: Connect the two main base pieces to form the Z-shape. Secure them using the provided bolts and the included wrench. Ensure all connections are tight for stability.
- Attach Uprights: Insert the vertical upright poles into the designated slots on the Z-base. These poles typically snap into place or are secured with bolts.
- Install Casters: Screw the four 4-inch rubber casters into the bottom of the Z-base. Two of these casters include locking mechanisms.
- Connect Top Hangrail: Place the chrome hangrail onto the top of the upright poles. Ensure it clicks securely into place.
- Adjust Height: The upright poles feature spring buttons allowing for easy height adjustment. Press the buttons and slide the upper section of the poles to your desired height (70.5", 80.5", or 90.5"). Ensure the buttons fully engage in the holes for secure locking.
- Optional Bottom Shelf: If your model includes a bottom wire shelf, place it onto the lower support bars of the Z-base.

Figure 1: Z Rack with key dimensions. Overall height is adjustable from 70.5 to 90.5 inches, width is 63 inches, and depth is 24 inches.
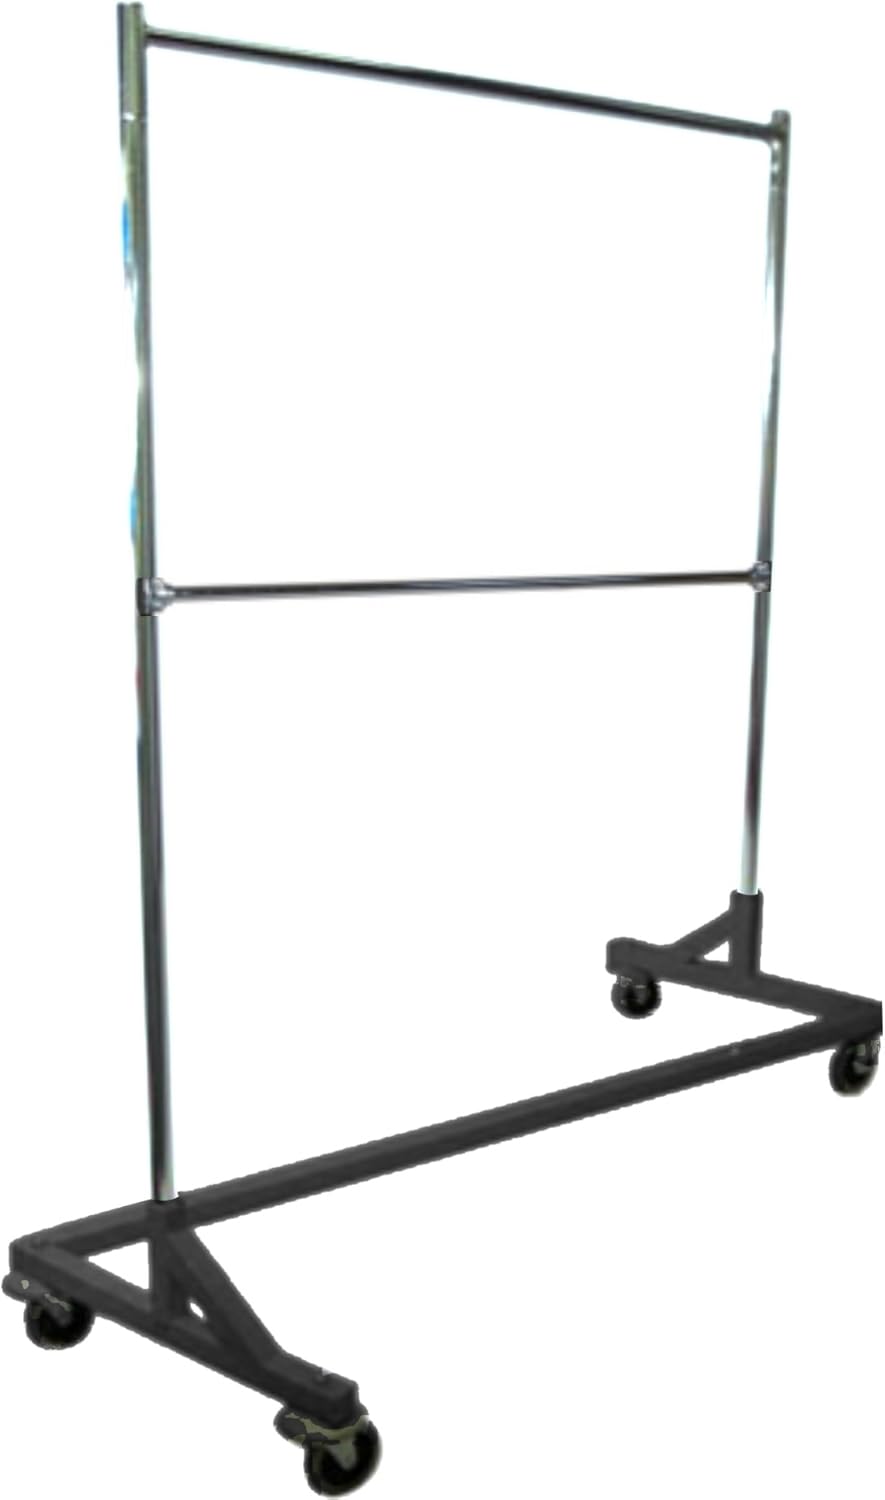
Figure 2: Fully assembled Heavy-Duty Commercial Grade Double-Bar Rolling Z Rack Garment Rack.
Assembly Video Guides
HOKEEPER Heavy Duty Z Rack Garment Rack Assembly
Video 1: This video demonstrates the assembly process for a heavy-duty Z-rack, including connecting base components, attaching uprights, and installing casters. It highlights the stability of the Z-base design.
Tajsoon Z Base Clothes Rack Assembly
Video 2: A quick guide to assembling the Tajsoon Z Base Clothes Rack, showcasing the ease of connecting the frame and adding the wheels. It also demonstrates the adjustable height feature.
Operating Instructions
- Loading Garments: Hang clothes evenly across the chrome hangrail to distribute weight and maintain stability. The rack can support up to 400 pounds.
- Adjusting Height: To adjust the height, locate the spring buttons on the upright poles. Press the buttons and slide the upper section of the poles to the desired height. Ensure the buttons fully engage in the adjustment holes before loading garments.
- Moving the Rack: To move the rack, release the brakes on the casters by flipping the lever. Push or pull the rack smoothly to its new location.
- Securing the Rack: Once the rack is in its desired position, engage the brakes on at least two of the casters to prevent unintended movement.
- Using Bottom Storage: The Z-base design allows for nesting multiple racks together for compact storage. The bottom area can also be used for shoes or storage boxes.
Maintenance
- Regular Cleaning: Wipe down the metal surfaces with a soft, damp cloth to remove dust and dirt. Avoid abrasive cleaners that may damage the finish.
- Check Connections: Periodically inspect all bolts and connections to ensure they remain tight. Tighten any loose fasteners as needed.
- Caster Care: Keep the casters free of debris (lint, hair, etc.) to ensure smooth rolling. Lubricate the caster axles if they become stiff.
- Weight Distribution: Always distribute weight evenly on the hangrail to prevent stress on any single point of the rack.
Troubleshooting
- Rack Wobbles: Ensure all assembly bolts are securely tightened. Verify that the upright poles are fully engaged in their height adjustment holes. Check that the casters are properly installed and tightened.
- Difficulty Rolling: Check casters for trapped debris (hair, lint, etc.) and remove if present. Ensure caster brakes are fully disengaged. Lubricate caster axles if necessary.
- Height Adjustment Issues: Ensure the spring buttons are fully depressed when attempting to adjust height. Check for any obstructions within the poles.
- Rack Tipping: This rack features a stable Z-base design. Ensure weight is distributed evenly and the maximum load capacity of 400 lbs is not exceeded. Avoid hanging excessively heavy items on one side.
Warranty and Support
For warranty information, product support, or to inquire about replacement parts, please refer to the documentation included with your purchase or contact Metropolitan Display customer service directly. Keep your purchase receipt for warranty claims.


