Introduction
This manual provides essential instructions for the setup, operation, maintenance, and troubleshooting of your ORION VR5006 4 Head Hi-Fi Stereo VHS VCR Recorder Player. Please read this manual thoroughly before using the unit to ensure proper function and longevity.
Safety Information
- Electrical Safety: To prevent electric shock, do not open the unit. Refer all servicing to qualified personnel.
- Ventilation: Ensure adequate ventilation around the unit. Do not block ventilation openings.
- Moisture: Do not expose the unit to rain or moisture.
- Power Cord: Handle the power cord carefully. Do not place heavy objects on it or expose it to heat.
Setup
Connecting to a Television
To connect the VCR to your television, use standard RCA audio/video cables. Connect the yellow "VIDEO OUT" jack on the VCR to the "VIDEO IN" jack on your TV. Connect the white "AUDIO OUT (L)" and red "AUDIO OUT (R)" jacks on the VCR to the corresponding "AUDIO IN (L)" and "AUDIO IN (R)" jacks on your TV.

Image: Rear panel of the ORION VR5006 VCR, displaying the RCA video and audio output jacks, as well as the antenna input.
For antenna or cable TV connection, connect the incoming antenna/cable line to the "ANTENNA IN" jack on the VCR. Then, connect the "RF OUT" jack on the VCR to the "ANTENNA IN" jack on your television.
Connecting External Devices (e.g., Camcorder)
To record from an external device, connect its video and audio outputs to the "VIDEO IN" (yellow), "L-AUDIO IN" (white), and "R-AUDIO IN" (red) jacks located on the front of the VCR.

Image: Front left section of the ORION VR5006 VCR, highlighting the front panel input jacks for Video In, L-Audio In (Mono), and R-Audio In.
Power Connection
Plug the VCR's power cord into a standard AC 120V 60Hz wall outlet.
Operating Instructions
Basic Playback
- Insert a VHS tape into the tape slot. The VCR will automatically load the tape.
- Press the PLAY button (►) to begin playback.
- To stop playback, press the STOP/EJECT button (■/▲).
- To eject the tape, press the STOP/EJECT button again when the tape is stopped.
Fast Forward and Rewind
- Press the F.FWD button (►►) to fast forward the tape.
- Press the REW button (◄◄) to rewind the tape.
- Press PLAY or STOP to exit fast forward or rewind mode.
Recording
- Insert a recordable VHS tape.
- Select the desired input source (e.g., TV channel, external input).
- Press the REC/OTR button (●) to begin recording. The VCR will automatically record for a preset duration (One Touch Recording).
- To stop recording, press the STOP/EJECT button.
Channel Selection
Use the CHANNEL ▼ and CHANNEL ▲ buttons to change TV channels when the VCR is in TV mode.
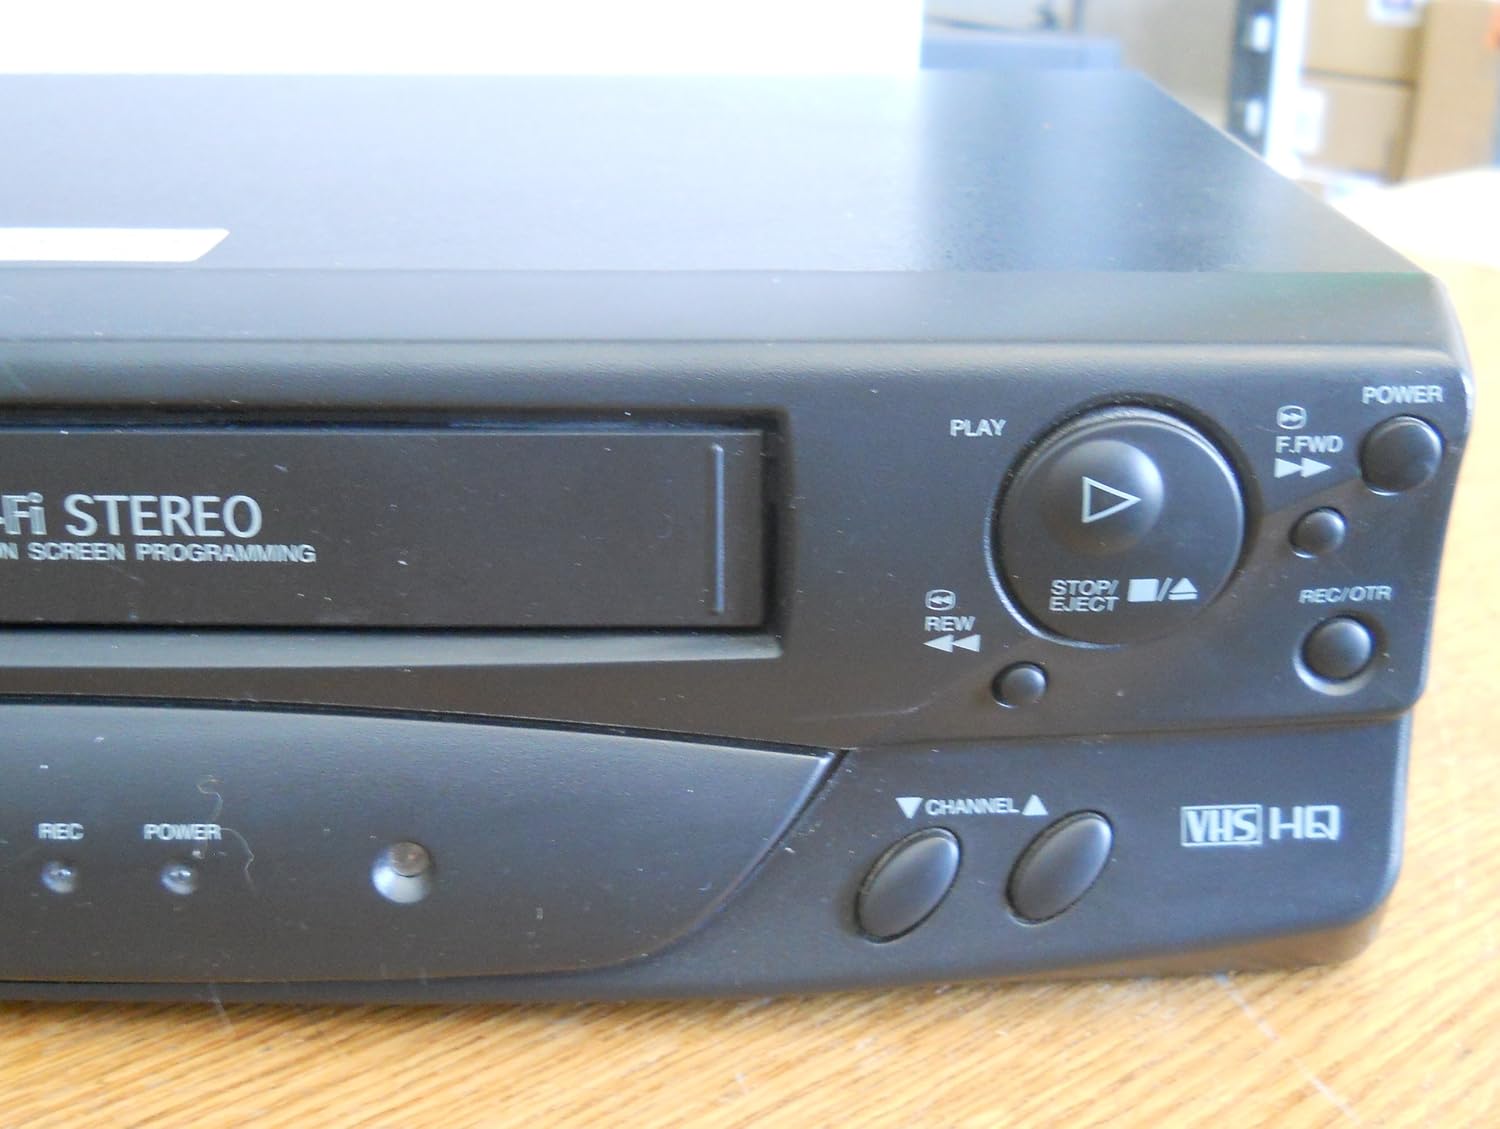
Image: Front right section of the ORION VR5006 VCR, displaying the main control buttons including Play, Stop/Eject, Fast Forward, Rewind, Record/OTR, and Channel Up/Down.
On Screen Programming and Digital Auto Tracking
The ORION VR5006 features On Screen Programming for easy setup and timer recording. Refer to the on-screen menus for detailed instructions. Digital Auto Tracking automatically adjusts the video heads for optimal picture quality during playback.
Maintenance
Cleaning the Exterior
Wipe the exterior of the VCR with a soft, dry cloth. Do not use liquid cleaners or abrasive materials, as they may damage the finish.
Tape Head Cleaning
Over time, dust and tape residue can accumulate on the video heads, leading to poor picture quality. Use a commercially available VHS head cleaning cassette periodically to maintain optimal performance. Follow the instructions provided with the cleaning cassette.
Tape Care
- Store VHS tapes in their cases, away from direct sunlight, heat, and magnetic fields.
- Avoid exposing tapes to extreme temperatures or humidity.
- Rewind tapes fully before storing them.
Troubleshooting
| Problem | Possible Cause | Solution |
|---|---|---|
| No picture on TV | Incorrect TV input selected; loose video cable; VCR not powered on. | Select the correct AV input on your TV. Check video cable connections. Ensure VCR is plugged in and powered on. |
| No sound | Loose audio cables; TV volume too low; incorrect audio input selected. | Check audio cable connections. Increase TV volume. Select correct audio input on TV. |
| Tape will not eject | Power interruption; tape jammed. | Ensure VCR is powered on. If power was interrupted, try again. Do not force the tape. If jammed, seek professional service. |
| Poor picture quality (snowy, distorted) | Dirty video heads; poor tape condition; tracking issues. | Use a head cleaning cassette. Try a different tape. The VCR features Digital Auto Tracking, but severe issues may require service. |
| VCR does not respond to controls | Unit frozen; power issue. | Unplug the VCR from the power outlet for a few minutes, then plug it back in and try again. |
Specifications
| Model Number | VR5006 |
| Power Supply | AC 120V, 60Hz, 9W |
| Video System | VHS HQ |
| Audio System | Hi-Fi Stereo |
| Dimensions (Approx.) | 14.09 x 10 x 4.02 inches |
| Weight (Approx.) | 6.04 pounds |
| Serial Number | 054201259372 (Note: This is a placeholder link.) |

Image: Close-up view of the ORION VR5006 VCR's rear label, showing the model number, power specifications, and serial number.
Warranty Information
This product is covered by a limited warranty. Please refer to the original purchase documentation or contact your retailer for specific warranty terms and conditions. Keep your proof of purchase for warranty claims.
Customer Support
For technical assistance or service inquiries, please contact the retailer where you purchased this product. Have your model number (VR5006) and serial number (054201259372) ready when contacting support.


